Staubbach Falls is one of Lauterbrunnen’s defining sights and an unusually rewarding subject for photographers because its 297-meter drop can be photographed from close range, from the village, or from farther across the valley. Good results depend less on expensive gear than on choosing the right viewpoint, light, shutter speed, and weather conditions.
Quick Answer
For strong Staubbach Falls photos, shoot from Lauterbrunnen or a wider valley viewpoint in morning or evening light, use a tripod for slow shutter speeds, and carry an ND filter when daylight is too bright. Start around ISO 100, f/8 to f/11, then adjust shutter speed for the amount of water motion you want.
Key Takeaways
- Staubbach Falls drops 297 meters and can be photographed from several perspectives around Lauterbrunnen.
- Morning and evening usually provide calmer conditions and more attractive photographic light than harsh midday sun.
- Use a tripod and experiment with shutter speed instead of assuming every waterfall photo needs extremely long exposure.
- An ND filter helps you use slower shutter speeds in bright conditions, while a circular polarizer can reduce reflections on wet surfaces and foliage.
- The closer rock-gallery route is seasonal and involves stairs, spray, and wet surfaces, so keep your equipment protected and stay on the secured route.
At a Glance
| Time Required | About 30–60 minutes for a basic visit; allow 1–2 hours if you want to test several viewpoints and wait for changing light. |
| Difficulty | Easy from village and base viewpoints; more demanding on the seasonal rock-gallery route because of stairs, wet surfaces, and spray. |
| Tools Needed | Camera or phone, tripod for slow exposures, optional ND filter, optional circular polarizer, lens cloth, and rain protection. |
| Cost | Entry to Staubbach Falls is free; transportation and photography equipment are separate. |
Plan Your Staubbach Falls Photography Visit
Staubbach Falls is the landmark of Lauterbrunnen. According to Lauterbrunnen Tourism, the waterfall drops 297 meters and admission is free. The local tourism organization describes it as Switzerland’s highest free-falling waterfall.
For photographers, water volume matters almost as much as light. Switzerland Tourism reports that Staubbach carries the most water in early summer. At lower flow, wind can break the narrow fall into drifting spray, creating a very different photograph from a powerful high-flow cascade.
The standard village and base viewpoints are straightforward to reach on foot. A closer route climbs into the rock face through a tunnel and secured path. Switzerland Tourism lists this gallery as walkable from May to October, so do not assume it will be accessible during winter or early spring.
Warning: Spray can make the gallery, steps, and nearby surfaces wet. Stay on designated paths, respect closures and barriers, keep tripod legs out of walking routes, and do not climb onto wet rocks for a better angle.
Choose the Right Camera Equipment
A DSLR or mirrorless camera gives you convenient manual exposure control and interchangeable lenses, but you do not need a professional camera simply to photograph Staubbach Falls. A capable phone or compact camera can work well for wide scenic compositions, especially when light is good.
A wide-angle lens is useful when you want the waterfall, cliffs, village, and surrounding landscape in the same frame. A 16–35 mm full-frame-equivalent range is a practical example, but it is not mandatory. A normal or short telephoto focal length can be better when you want the waterfall to occupy more of the frame or when photographing it from farther across the valley.
A sturdy tripod becomes important when your shutter speed is too slow to hand-hold reliably. It lets you keep the rocks, buildings, and landscape sharp while intentionally blurring moving water. A remote shutter release is convenient, but a two-second camera timer can perform the same basic job of reducing movement caused by pressing the shutter button.
Neutral-density filters reduce the amount of light entering the camera, allowing you to choose a slower shutter speed without immediately overexposing a daytime image. This technique is recommended in waterfall and long-exposure guidance from Canon, Nikon, and Adobe.
A circular polarizing filter serves a different purpose. It can reduce glare and reflections from wet rocks, leaves, and water. Because polarization depends on your angle to the light, rotate the filter while looking through the viewfinder or screen and stop when the result looks natural.
Pro Tip: Carry a clean microfiber cloth. Fine spray can quickly collect on the front element or filter and create soft spots that are difficult to notice on a small camera screen.
Understanding the Lighting Conditions
Lighting changes rapidly in the Lauterbrunnen Valley because high cliffs can place parts of the scene in shade even when the sky above is bright. Morning and evening are useful starting points because the light is generally softer and the area may be calmer. Switzerland Tourism also recommends morning or evening for photography at Staubbach Falls.
Do not depend on a textbook golden-hour effect. Mountains and cliffs can block direct sunlight before the normal sunset time or delay when it reaches parts of the valley in the morning. Cloud cover can also be an advantage. Overcast conditions reduce harsh contrast and can make it easier to retain detail in both bright water and darker rock.
Midday sun can produce stronger contrast and bright highlights on wet surfaces. If you must shoot at that time, watch the histogram or highlight warning on your camera and reduce exposure when necessary to avoid losing detail in the brightest parts of the waterfall.
Finding the Best Vantage Points
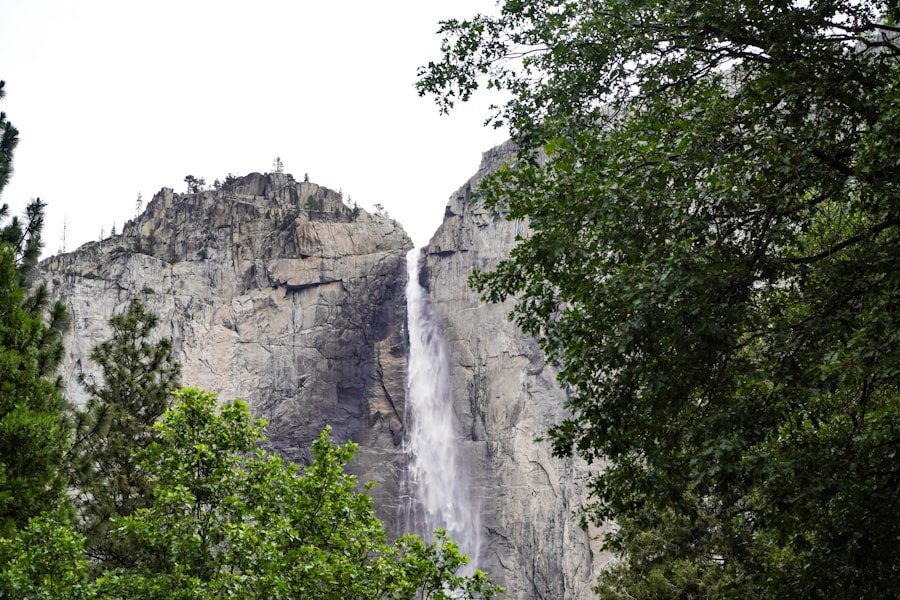
The point from which you photograph Staubbach Falls dramatically changes the picture. Switzerland Tourism specifically identifies Lauterbrunnen and Wengen, on the opposite side of the valley, as good areas for photographing the falls.
Village Viewpoints
From Lauterbrunnen village, you can combine Staubbach Falls with traditional buildings, meadows, roads, or the valley walls. These environmental elements help communicate the waterfall’s extraordinary scale. Move rather than relying only on zoom so that foreground objects do not overlap awkwardly with the falling water.
Foot of the Falls
Closer to the base, the waterfall feels much larger and more dramatic. This position is useful for upward-looking compositions and details of spray. The main challenge is keeping water droplets off the lens and controlling the extreme difference between bright sky and darker rock.
Seasonal Rock Gallery
The gallery route brings you very close to the waterfall through a tunnel, stairs, and a secured path. It is less suitable for setting up a large tripod where space is restricted, but it can produce unusual views of the valley and the waterfall’s spray. Check current access before relying on this location because the route is seasonal.
Across the Valley
A more distant position gives you space to show the waterfall in relation to the entire Lauterbrunnen landscape. From higher or opposite-side viewpoints, including areas around Wengen, the waterfall becomes part of a broader valley composition instead of filling the frame.
Foreground elements can improve depth. Fences, paths, rocks, trees, flowers, and buildings may act as visual guides toward the waterfall, but keep the composition simple enough that the narrow white fall remains easy to identify.
Using Long Exposure Techniques
| Shutter-Speed Approach | Visual Effect | Best Use |
| Fast exposure, such as roughly 1/500 sec or faster | Freezes more individual droplets and spray. | Showing the power, texture, or wind-blown spray of the falls. |
| Moderately slow exposure, around 1/15 to 1/4 sec | Adds visible motion while retaining some texture in the water. | A natural-looking compromise between frozen water and extreme smoothing. |
| Long exposure, about 1 second or longer | Blends moving water and spray into smoother streaks. | Creating a softer, more abstract waterfall effect when the scene and light allow it. |
Long exposure is one of the best-known waterfall techniques, but there is no single correct shutter speed. The appearance of Staubbach Falls changes with its water volume, wind, distance from the camera, focal length, and the speed you select.
A tripod keeps stationary parts of the frame sharp while the water moves during the exposure. In bright daylight, an ND filter may be necessary to reach a slow enough shutter speed without overexposing the frame. Start with a moderate exposure, review the water texture, and then lengthen or shorten the shutter speed deliberately.
Nikon’s moving-water examples demonstrate that even an exposure around 1/4 second can create noticeable water movement, while exposures lasting several seconds or longer can produce much smoother results. Treat those numbers as creative reference points rather than fixed recipes.
Capturing the Movement of the Water
Staubbach Falls does not always behave like a heavy, compact waterfall. Its long free fall allows wind to push the falling water sideways and turn part of it into mist. That means a very slow shutter speed can sometimes make the waterfall look too faint.
For a stronger sense of power, try a faster shutter speed and examine whether individual streams and droplets become more visible. For a softer result, reduce the shutter speed gradually until the water reaches the amount of blur you prefer.
Take several exposures rather than committing to one setting. A sequence at different shutter speeds gives you more creative choice later and helps when wind changes the waterfall’s shape from moment to moment.
Note: If the waterfall nearly disappears in a long exposure, the problem may not be focus. Wind-blown spray can become extremely faint when blurred for too long. Shorten the exposure and compare the result.
Incorporating the Surrounding Landscape
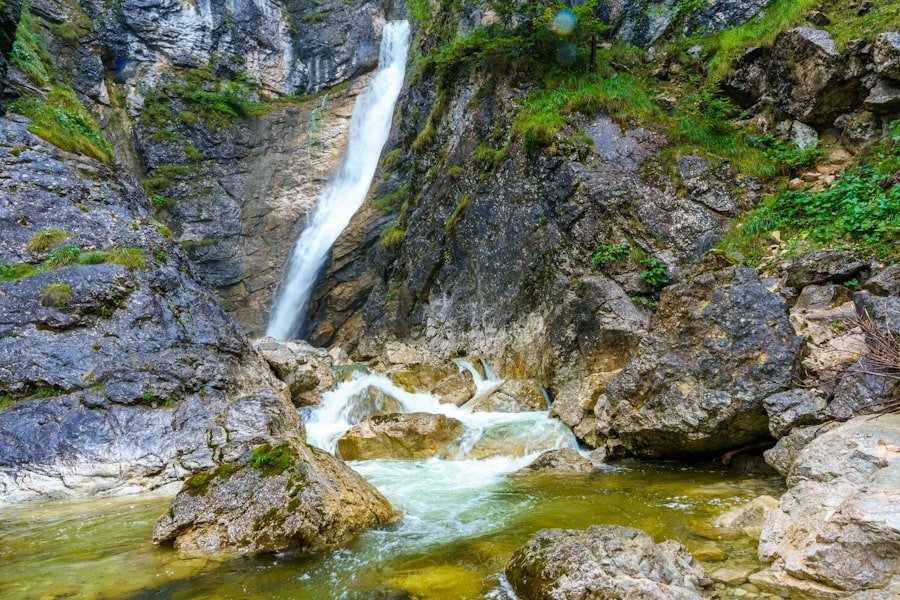
Staubbach Falls is impressive by itself, but the surrounding valley explains its scale. Trees, meadows, cliffs, village buildings, paths, and mountains can turn a simple waterfall photograph into a stronger sense-of-place image.
Look for foreground objects that lead toward the fall instead of competing with it. A path can create a leading line, while a small building or person can provide scale. If you include foliage close to the camera, check the edges of the frame so cut-off branches do not become distractions.
Vertical orientation often suits Staubbach Falls because of its height, while a horizontal frame works better when you want to emphasize the width and depth of the Lauterbrunnen Valley. Capture both while you are on location.
Reflections and wet surfaces may also add depth, especially after rain. A circular polarizer lets you control some reflected glare, but do not automatically remove every reflection because highlights can help communicate moisture and atmosphere.
Adjusting Camera Settings for Staubbach Falls Photography
The exposure triangle consists of aperture, shutter speed, and ISO. Instead of treating any setting as mandatory, begin with sensible values and adjust them for the scene.
Aperture
For a landscape composition where both foreground and distant scenery matter, f/8 to f/11 is a useful starting range on many cameras. Check the image at high magnification and adjust when you need more or less depth of field.
ISO
When the camera is secure on a tripod and there is no need for a fast exposure, begin near your camera’s low native ISO, often around ISO 100. Increase ISO when you need a faster shutter speed or when changing conditions make a low ISO impractical.
Shutter Speed
Choose shutter speed according to how you want the water to look. Faster values preserve droplets and texture. Slower values blur movement. If you cannot obtain the slow speed you want without overexposure, add an ND filter instead of simply closing the aperture as far as it will go.
Focus
For a broad landscape, focus on an important area with enough depth of field to keep the scene acceptably sharp. When photographing close details, place focus precisely on the rock, vegetation, or water feature that should carry the viewer’s attention.
RAW and Exposure Checks
If your camera supports RAW capture, it gives you more flexibility when recovering highlights and shadows during editing. Regardless of file format, check your histogram and highlight warnings because bright white water can lose detail before the rest of the scene appears overexposed.
The most useful waterfall setting is not a particular shutter speed. It is the shutter speed that gives the water the texture you want while keeping the rest of your composition technically sound.
A Simple Staubbach Falls Shooting Workflow
- Choose the viewpoint first. Decide whether you want a close waterfall image, a village composition, or a wide valley view.
- Build the composition. Check foreground objects, frame edges, horizon or building alignment, and the waterfall’s position.
- Set a low ISO when practical. Start near ISO 100 when using a tripod and increase it only when necessary.
- Choose an aperture. Try f/8 to f/11 for a broad landscape, then adjust according to depth-of-field needs.
- Select your water effect. Start with a moderate shutter speed and review the amount of movement.
- Add an ND filter if needed. Use one when daylight prevents the slower exposure you want.
- Check the lens for spray. Clean droplets before important exposures.
- Bracket the creative settings. Capture several shutter speeds so you can compare water texture later.
Post-Processing Tips for Staubbach Falls Photography
Post-processing can improve a Staubbach Falls photograph, especially when the bright waterfall and darker cliffs exceed what looks balanced straight from the camera. Adobe Lightroom, Camera Raw, Photoshop, and similar editors provide tools for exposure, highlights, shadows, color, sharpening, lens correction, and cropping.
Begin by checking the waterfall itself. Reduce highlights if necessary to recover visible texture in bright water, but avoid turning naturally white spray gray. Lift shadows carefully if the cliff face is too dark, and watch for noise or flat-looking contrast.
Next, correct the overall white balance and color. Greens can become unnaturally saturated very quickly, particularly in wet vegetation, so use saturation and vibrance conservatively. If mist has lowered contrast, a small amount of dehaze or clarity may help, but aggressive settings can create halos around the waterfall and cliff edges.
Lens-profile corrections can address common distortion and vignetting for supported lenses. Straighten buildings or other obvious references when necessary, then crop only when doing so improves the relationship between the waterfall and its surroundings.
For current visitor information rather than unrelated photography claims, consult the official Switzerland Tourism Staubbach Falls guide.
Frequently Asked Questions
What is the Staubbach Falls viewpoint?
Staubbach Falls can be viewed from several places around Lauterbrunnen rather than from one single viewing platform. The 297-meter waterfall is visible from the village and valley, while a seasonal secured path and gallery provide a much closer perspective.
What are good camera settings for Staubbach Falls?
For a tripod-based landscape, a practical starting point is ISO 100, roughly f/8 to f/11, and a shutter speed chosen for the desired water effect. Try faster exposures for visible droplets and progressively slower exposures for more blur. Adjust all settings for the actual light and your camera.
Is the Staubbach Falls viewpoint easily accessible?
The village and base views are straightforward to reach on foot. The closer gallery is different: it involves a tunnel, stairs, a secured path, spray, and wet surfaces. Switzerland Tourism lists the gallery as walkable from May to October, so check current access before visiting.
What is the best time of day to photograph Staubbach Falls?
Morning and evening are good starting points because conditions can be calmer and the light softer. However, the valley’s steep cliffs affect when direct sunlight reaches each area, so cloud cover, season, and your chosen viewpoint also matter.
Are there safety precautions near Staubbach Falls?
Yes. Water spray can make paths, stairs, and nearby surfaces slippery. Stay on designated and secured routes, obey closures and signs, avoid climbing onto wet rocks, and position tripods where they will not obstruct other visitors.
Do you need an ND filter to photograph Staubbach Falls?
No. An ND filter is useful when you want a slow shutter speed but the available light is too bright. In dim, overcast, morning, or evening conditions, you may already be able to obtain a sufficiently slow exposure without one.
When does Staubbach Falls have the most water?
Switzerland Tourism states that the waterfall carries the most water in early summer. Flow still varies with snowmelt, rainfall, and other natural conditions, so its appearance can differ substantially between visits.
Is Staubbach Falls free to visit?
Yes. Lauterbrunnen Tourism currently lists entry to Staubbach Falls as free. Transportation, parking, accommodation, and photography equipment are separate expenses.
Sources
- Lauterbrunnen Tourism: Staubbachfall Waterfall — backs the 297 m height, free admission, local landmark status, and seasonal behind-the-falls experience.
- Switzerland Tourism: Staubbach Falls — backs water-flow seasonality, photo-location guidance, gallery information, and morning/evening photography advice.
- Nikon: Long Exposures of Moving Water — supports tripod, shutter-speed experimentation, and ND-filter techniques.
- Canon: How to Photograph Water — supports ND-filter and shutter-speed techniques for waterfalls.
- Adobe: ND Filter Photography — explains how ND filters enable slower shutter speeds in brighter conditions.