Alaska winter clothing needs to do three jobs: keep moisture away from your skin, hold warm air around your body, and block wind, snow, and wet weather. The exact layers you need will depend on your destination, the forecast, your activity level, and how long you expect to remain outside.
Quick Answer
For most Alaska winter trips, wear a wool or synthetic base layer, an insulating fleece or puffy layer, and a windproof outer shell. Add waterproof protection when snow, slush, or wet weather is likely. Finish with insulated boots, wool socks, a hat, mittens, face coverage, and UV-protective eyewear.
Key Takeaways
- Choose a wool or synthetic base layer that moves sweat away from your skin. Avoid cotton next to your skin during long or active outings.
- Use fleece, wool, down, or synthetic insulation as your middle layer, then adjust its thickness to your activity level.
- Wear a wind-blocking outer layer. Choose waterproof outerwear when wet snow, rain, or slush is expected.
- Protect your feet, hands, ears, face, and eyes with insulated boots, wool or synthetic socks, mittens, a warm hat, face coverage, and UV-protective glasses.
- Carry spare dry clothing and move into shelter if you develop constant shivering, confusion, poor coordination, numbness, or pale and waxy skin.
At a Glance
| Planning Time | About 10–20 minutes after you know your destination, forecast, and planned activities |
| Difficulty | Easy, but conditions may require frequent layer changes |
| Tools Needed | Local weather forecast, wind-chill check, activity plan, and packing checklist |
| Cost | Varies according to the clothing you already own and whether you need insulated boots or technical outerwear |
Check the Forecast Before You Dress
There is no single Alaska winter outfit that works for every destination and activity. Check the hourly forecast for your exact location, including the air temperature, wind, precipitation, and expected changes during your outing. The National Weather Service wind-chill guidance can help you understand how quickly exposed skin may lose heat in windy weather.
Also consider what you will be doing. Hiking, skiing, or snowshoeing produces body heat and sweat. Standing outside to watch the northern lights produces much less heat, so you may need a thicker insulating layer, warmer boots, and more protection around your face and hands.
Note: Clothing temperature ratings are only a starting point. Wind, moisture, fit, activity, circulation, age, health, and personal cold tolerance can all change how warm an item feels.
The best Alaska winter outfit is not always the thickest one. It is the one that keeps you dry, blocks the wind, and can be adjusted before sweat makes you cold.
Essential Base Layers for Winter Activities
Your base layer is the foundation of an effective Alaska winter clothing system. Choose merino wool, polypropylene, polyester, or another synthetic fabric that moves moisture away from your skin. The CDC Yellow Book recommends wool or synthetic base layers as part of a cold-climate layering system.
Your base-layer top and leggings should fit close to your body without restricting movement. A close fit helps the fabric collect moisture, but the layer should not feel tight around your waist, knees, shoulders, or wrists.
Avoid cotton base layers when you may sweat or remain outside for a long time. Cotton holds moisture and dries slowly, which may leave you feeling colder when your activity level drops.
Products Worth Considering

MIDWEIGHT: Mens Merino Base Layer Available in: Lightweight = 165 g/m², Midweight = 250 g/m², Heavyweight = 320 g/m². Free Merino Wool Hiking Socks ($21 Value) – Package includes Midweight Merino wool base layer mens top and wool men long johns 250 g/m² + Merino Wool Hiking Socks. Cool Packaging. Makes A Great Gift.

Midweight: Womens Merino Base Layer Set Available in: Lightweight = 165 g/m², Midweight = 250 g/m², Heavyweight = 320 g/m². Merino Wool Hiking Socks ($21 Value): Package includes Midweight Merino wool base layer top, Merino Leggings 250 g/m² + Merino Wool Hiking Socks. Cool Packaging. Makes A Great Gift!
Choose the Right Base-Layer Weight
- Lightweight: Useful for active skiing, winter hiking, or indoor-to-outdoor travel.
- Midweight: A flexible choice for sightseeing, moderate activity, and changing conditions.
- Heavyweight: Better for low-activity outings, prolonged outdoor stops, or very cold forecasts.
Pack a spare base-layer top or undershirt if you expect heavy activity. Changing out of a damp layer can make a major difference when you stop moving.
Insulating Mid Layers to Keep You Warm
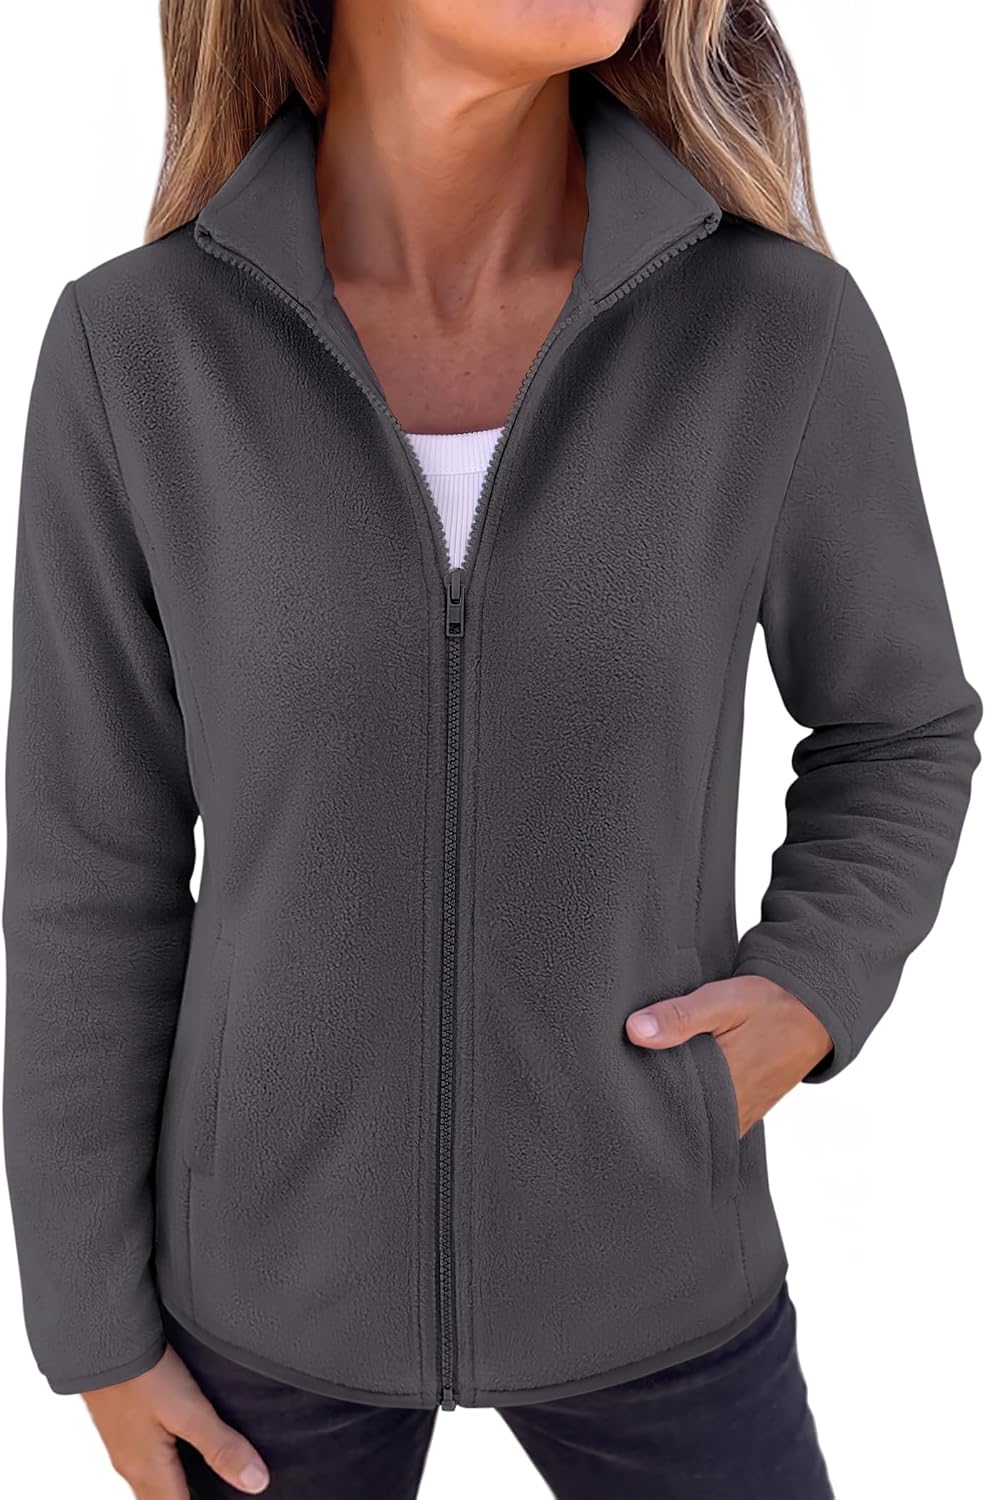
Mid layers trap warm air around your body. Fleece is breathable and works well during activity. Wool also insulates well and manages moisture. Down offers strong warmth for its weight, while synthetic insulation is often easier to manage in damp weather.
Products Worth Considering

【WATERPROOF & BREATHABLE】33,000ft men's softshell jacket with hood features 3-layered material with outer soft shell, TPU membrane mid-layer and inner fleece lining to provide strong protection against the elements. Outer shell with DWR finish resists water, dirt and oil to keep you dry and clean. (8000MM fabric waterproofness rating, 1000G/M2/24hr fabric breathability rating)

【Water-resistant & Breathable】Men's softshell jacket fabric is treated to repel water while maintain breathability, effectively prevents rainwater into the garment and keep you dry and comfortable. Repels light rain, moisture and snowflake.(Water may leak through the stitching parts of the jacket while wearing in the heavy rain.)

【WATERPROOF & BREATHABLE】33,000ft men's softshell jacket with hood features 3-layered material with outer soft shell, TPU membrane mid-layer and inner fleece lining to provide strong protection against the elements. Outer shell with DWR finish resists water, dirt and oil to keep you dry and clean. (8000MM fabric waterproofness rating, 1000G/M2/24hr fabric breathability rating)
Types of Mid Layers
Common choices include a fleece jacket, wool sweater, insulated vest, light puffy jacket, or heavier insulated jacket. Pick thicker insulation for low-activity time, such as aurora viewing, and lighter insulation for hiking, skiing, or snowshoeing.
How Much Insulation Do You Need?
- Active outings: Start with a breathable fleece or light synthetic jacket. Carry a warmer layer for breaks.
- Casual sightseeing: A fleece or sweater under an insulated jacket is usually easier to adjust than one extremely bulky garment.
- Stationary activities: Use a thicker puffy jacket or parka, insulated pants, warm boots, and extra hand protection.
A vest can add core warmth without restricting your arms, but it does not replace a full jacket when your arms need protection.
Choosing the Right Outer Layer for Protection
Your outer layer should block wind and keep snow or moisture away from your insulation. Look for a wind-resistant or windproof jacket with an adjustable hood, cuffs, and hem. Choose a waterproof or waterproof-breathable shell when wet snow, rain, or slush is likely.
Breathable fabric and ventilation zippers can help moisture vapor escape. Shell pants are useful for snowshoeing, skiing, snowmobiling, sledding, or any activity where snow may collect on your legs.
| Layer Type | Best Features | Recommended Construction |
|---|---|---|
| Shell Jacket | Blocks wind and wet weather without fixed insulation | Nylon or polyester face fabric with a waterproof-breathable membrane or coating |
| Insulated Jacket | Combines outer protection and warmth | Down or synthetic insulation with a weather-resistant outer fabric |
| Parka | Longer coverage for low-activity or prolonged exposure | Substantial insulation, wind-resistant fabric, hood, and longer hem |
| Layering System | Most adaptable option for changing weather and activity | Separate base, insulating, and outer layers |
Do Not Forget Your Lower-Body Layers
Your legs need the same moisture, insulation, and weather protection as your upper body. Start with wool or synthetic leggings. Add fleece-lined pants, insulated pants, or a light insulating layer when the forecast or activity requires more warmth.
Wear waterproof or water-resistant shell pants when you may sit, kneel, fall, or walk through snow. Ordinary jeans can become cold and uncomfortable when wet, so they are best limited to short urban outings with reliable shelter and dry conditions.
Alaska Winter Outfit Examples by Activity
City Sightseeing and Short Walks
- Wool or synthetic long-sleeve base layer
- Fleece, sweater, or light puffy jacket
- Insulated coat or windproof shell
- Warm pants with base-layer leggings when needed
- Insulated waterproof boots and wool socks
- Hat, gloves or mittens, and a neck gaiter
Winter Hiking and Snowshoeing
- Lightweight or midweight base layer
- Breathable fleece or light synthetic insulation
- Windproof shell carried or worn as conditions require
- Base-layer leggings with flexible hiking pants or shell pants
- Waterproof boots, gaiters, and suitable traction
- Warmer puffy layer packed for breaks or emergencies
Aurora Viewing and Other Stationary Activities
- Midweight or heavyweight base layers
- Fleece or wool middle layer
- Thick insulated jacket or parka
- Insulated pants or base leggings under warm outer pants
- Warm insulated boots with space around your toes
- Liner gloves under insulated mittens
- Warm hat, balaclava, and neck gaiter
Skiing, Snowboarding, and Snowmobiling
Use activity-specific outerwear, including waterproof shell pants or insulated bibs, suitable gloves, a helmet where required, and goggles. Follow the outfitter’s packing instructions because guided operators may provide specialized suits, boots, or helmets.
Footwear: Boots That Can Handle the Cold
Choose boots that keep your feet warm and dry while providing traction on snow and ice. Look for insulated, waterproof boots with a grippy outsole. The boots should hold your heel securely while leaving enough room to move your toes.
Do not size boots so tightly that thick socks become compressed. Compressed socks lose some of the air space that provides insulation, and tight footwear may feel uncomfortable during long outings.
Products Worth Considering
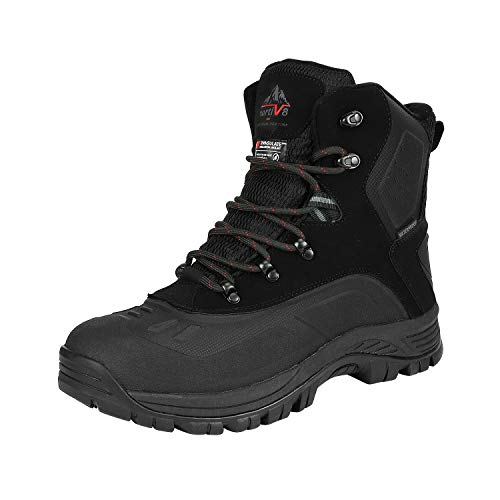
Waterproof material: Men's snow boots feature waterproof construction and windproof synthetic toe caps for anti-collision.

Warm Waterproof Material & Winter Protection: Designed with water resistant upper and cozy faux fur lining, casual snow boots for women 2026 keep feet warm, dry and comfortable in cold weather. Non slip womens snow boots feature soft insulation and cushioned memory foam insole to reduce walking fatigue, making them ideal for snowy days, freezing temperatures and everyday outdoor wear.

COMFORTABLE CUSHIONING FOR ALL-DAY WEAR: Women's snow boots are designed with a plush fur lined interior that wraps your feet in softness from the moment you slip them on. The cushioned footbed provides gentle support with every step, helping to reduce fatigue whether you're walking through the airport, running errands around town, or enjoying a casual day out. Lightweight construction ensures these booties won't weigh you down, while the cozy lining keeps your feet feeling comfortable.
Insulation and Warmth
Choose warmer boots if you expect to stand still for long periods. If you will move continuously, lighter insulation may be enough as long as your feet remain dry and you have a plan for breaks.
Removable liners can be useful because you can take them out and dry them overnight. Gaiters can also keep loose snow from entering around the tops of your boots.
Waterproofing and Winter Traction
Waterproof rubber lower sections or waterproof membranes help protect your feet from slush and wet snow. Check the soles for deep lugs that can grip packed surfaces.
For icy sidewalks or hard-packed trails, use traction aids such as ice cleats or microspikes that match the surface and activity. Deeper, softer snow may require snowshoes instead. Test any traction device before a long outing and remove it when it becomes unsafe on smooth indoor floors.
Thermal Socks: The Unsung Heroes of Warmth
Wear wool or synthetic socks that move moisture away from your skin. Avoid cotton socks because they can retain moisture and chill your feet.
One properly fitted pair of warm socks is often better than two thick pairs that make your boots tight. Carry a dry spare pair in a sealed bag, especially during long tours or activities where snow may enter your boots.
Accessories: Hats, Gloves, and Face Coverage
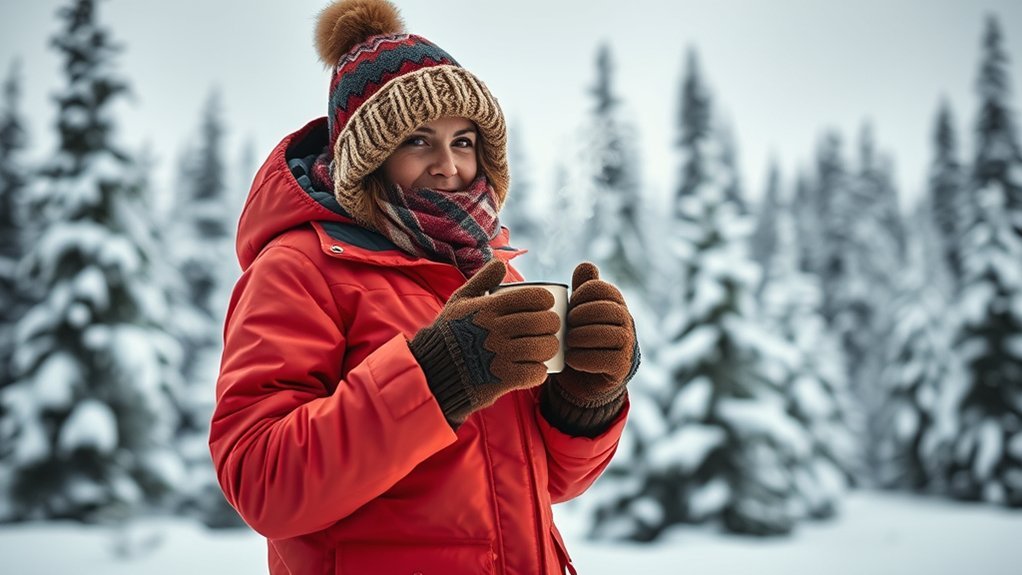
Hats, gloves or mittens, and face coverings protect areas that can cool quickly in wind and low temperatures.
- Hat: Choose a warm beanie, trapper-style hat, or another design that fully covers your ears. Your outer hood should fit over it without blocking your vision.
- Hands: Choose insulated, water-resistant gloves or mittens. Mittens are usually warmer because your fingers share heat, while gloves provide more dexterity.
- Liner gloves: Thin liner gloves let you use a camera, phone, zipper, or buckle without exposing bare skin for long.
- Neck and face: Use a neck gaiter, scarf, face mask, or balaclava to block wind around your cheeks, chin, and neck.
Pro Tip: Keep your spare gloves, socks, and insulating layer inside a dry bag or sealed packing bag. Backup clothing will not help if it becomes wet in your day pack.
Goggles and Sunglasses for Glare Protection
Bright snow can increase glare and reflected UV exposure. The U.S. Food and Drug Administration recommends sunglasses marked UV400 or “100% UV protection,” which block more than 99% of UVA and UVB radiation.
Look for:
- UV protection: Choose UV400 or 100% UV protection rather than judging protection by lens darkness.
- Polarized lenses: Polarization can reduce reflected glare, but you should still confirm that the lenses provide full UV protection.
- Wraparound coverage: Larger frames help limit light entering from the sides.
- Anti-fog treatment or ventilation: This is useful for skiing, snowboarding, and snowmobiling.
Apply broad-spectrum sunscreen to exposed skin and protect your lips with a suitable lip balm. Winter clouds and cold air do not remove UV exposure.
Layering Strategies for Optimal Comfort
Use the base, middle, and outer system, then adjust it as your activity changes. Open ventilation zippers, loosen your collar, or remove a middle layer before you begin sweating heavily. Add the layer again when you stop for a break.
- Start slightly cool during active outings: You will warm up as you move.
- Insulate before stopping: Put on your warmer jacket before your body begins to cool.
- Keep wet items separate: Do not place damp gloves or socks against dry clothing.
- Use warm breaks: Move indoors or into a heated vehicle when conditions or exposure times become unsafe.
The CDC advises travelers to stay dry because sweat and wet clothing can increase heat loss. Its cold-weather travel guidance also recommends removing extra layers when you become too warm.
Packing Tips for Your Alaskan Winter Adventure
- Outerwear: Pack a wind-blocking jacket and waterproof protection when snow, rain, or slush is possible. Add shell pants for snow activities.
- Base layers: Bring moisture-wicking tops and leggings, plus enough clean or dry sets for your trip.
- Insulation: Pack a breathable middle layer and a warmer puffy jacket or parka for low-activity periods.
- Boots: Choose insulated waterproof boots with suitable traction.
- Socks: Bring wool or synthetic socks and at least one dry spare pair for long outings.
- Accessories: Pack a hat, liner gloves, insulated gloves or mittens, and a scarf, gaiter, or balaclava.
- Eye and skin protection: Bring UV-protective sunglasses or goggles, sunscreen, and lip protection.
What to Carry in Your Day Pack
- Spare dry socks and gloves
- Extra insulating jacket
- Warm hat or face covering
- Water and easy-to-eat snacks
- Phone and portable battery stored close to your body when practical
- Flashlight or headlamp
- Any activity-specific emergency equipment recommended by your guide or park
Know the Warning Signs of Cold Injury
Warning: Constant shivering, exhaustion, confusion, fumbling hands, slurred speech, poor coordination, or unusual drowsiness may signal hypothermia. Numbness or pale, grayish, firm, or waxy skin may signal frostbite. Move into shelter and seek medical help rather than trying to continue the activity.
Possible Hypothermia
CDC hypothermia guidance lists shivering, exhaustion, confusion, fumbling hands, memory loss, slurred speech, and drowsiness among the warning signs. Hypothermia is a medical emergency.
Move the person into a warm room or shelter, remove wet clothing, protect the person with dry layers, and get medical assistance. Do not give a drink to an unconscious person.
Possible Frostbite
CDC frostbite guidance lists numbness and pale, grayish-yellow, firm, or waxy skin as warning signs. Get into shelter and seek medical care.
Do not rub or massage a frostbitten area. Do not place it against a stove, heating pad, radiator, or other intense heat source because numb skin can burn easily.
Care for Winter Clothing and Maintain Insulation
Follow the care label on every garment because wool, down, synthetic insulation, and waterproof shells may need different washing and drying methods.
- Base layers: Wash often enough to remove sweat and oils, then dry them fully before packing.
- Down insulation: Prevent clumping by following the manufacturer’s drying instructions and making sure the item is completely dry before storage.
- Synthetic insulation: Use the garment label’s recommended detergent, temperature, and drying method.
- Waterproof shells: Avoid fabric softener, bleach, or harsh additives when the manufacturer warns against them. Clean shells can breathe and shed water more effectively.
- Boots: Remove liners and insoles when possible, then allow all parts to dry away from damaging direct heat.
Store insulated clothing clean, dry, and uncompressed when space allows. Long-term compression can reduce the loft that traps warm air.
Frequently Asked Questions
How do I choose the right size for winter clothing?
Base layers should fit close to your skin without restricting movement. Middle and outer layers should leave enough room for the layers below, free arm movement, and normal circulation. Check the complete outfit together before your trip instead of sizing each item separately.
Are there specific colors that retain or repel heat?
Color should not be your main warmth decision. Prioritize insulation, wind protection, moisture control, and proper fit. Bright colors or reflective details may improve visibility in snow, low light, or roadside conditions.
Can I wear regular clothing under winter layers?
You can use suitable clothing you already own, but avoid cotton next to your skin when you may sweat or remain outside for hours. Wool and synthetic fabrics handle moisture better. Jeans are best kept to short, dry outings because wet denim dries slowly.
What materials should I avoid for winter wear?
Avoid cotton base layers and cotton socks during prolonged cold exposure. Also avoid outerwear that blocks movement, boots that compress your socks, and damaged waterproof clothing that allows snow or slush to reach your insulation.
How do I care for winter clothing to maintain insulation?
Follow each care label. Wash away sweat and dirt, rinse detergent thoroughly, and dry insulation completely. Do not use fabric softener or bleach on waterproof shells when the manufacturer advises against it. Store insulated garments dry and loosely rather than tightly compressed.
What should I wear for northern lights viewing?
Aurora viewing often involves standing still at night, so use warmer clothing than you would for an active daytime walk. Wear substantial base layers, fleece or wool insulation, a heavy puffy jacket or parka, insulated pants, warm boots, mittens, a hat, and face coverage.
Do I always need a heavy parka in Alaska during winter?
Not always. A flexible base, fleece, puffy, and shell system may work better during active outings or milder coastal conditions. A heavy parka becomes more useful during very cold forecasts, strong wind, long outdoor waits, or activities with little movement.
Should I wear two pairs of socks?
Only when your boots have enough room. Two pairs that make the boots tight can compress insulation and reduce comfort. A thin moisture-managing liner under one warm sock may work, but one well-fitted wool or synthetic sock is often the better choice.
How should children dress for an Alaska winter?
Use the same base, insulating, and weather-protection system, but check children often because they may not recognize or explain early cold symptoms. Keep spare dry mittens and socks available, cover exposed skin, schedule warm breaks, and follow local weather or activity guidance.
Sources
- CDC Yellow Book: Heat and Cold Illness in Travelers — cold-climate layering, moisture management, insulation, and outer-shell guidance
- CDC Travelers’ Health: Cold Weather and Travel — staying dry, adjusting layers, footwear, and cold-weather travel precautions
- CDC: Preventing Hypothermia — warning signs and emergency response
- CDC: Preventing Frostbite — symptoms, prevention, and safe first actions
- National Weather Service: Understanding Wind Chill — wind-chill interpretation and exposed-skin risk
- U.S. Food and Drug Administration: Sun and Sunglasses Safety — reflected UV, UV400 lenses, wraparound eyewear, and winter sun protection