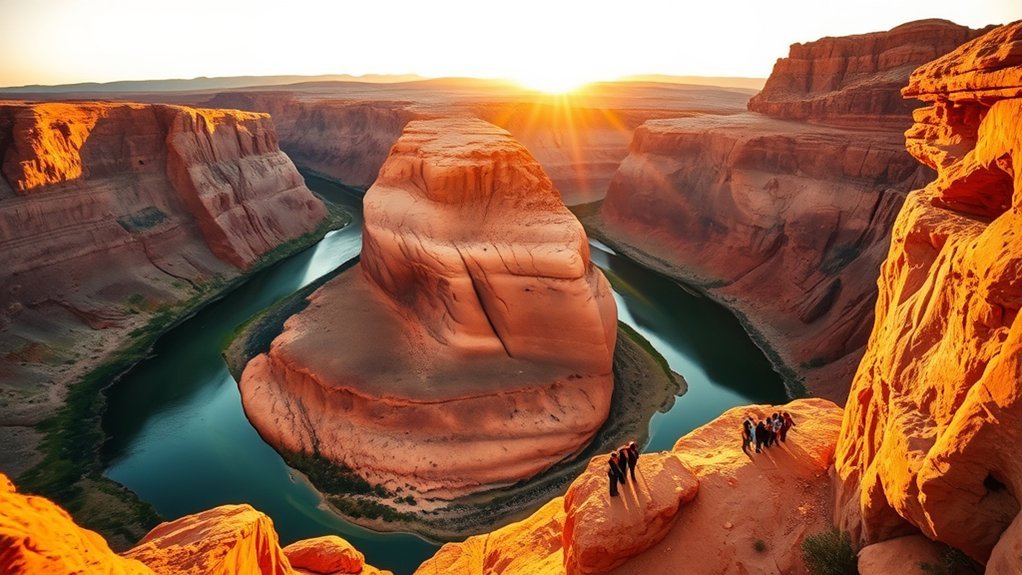
You’ll find Horseshoe Bend a dramatic, unforgettable rim-top view of the Colorado River that’s easy to reach but still feels wild. In about 1.5 miles round trip you’ll walk to a 1,000-foot overlook where layered sandstone and turquoise water meet in a perfect horseshoe. Practical tips on timing, safety, and photo spots will help you make the most of it—keep going to plan the trip right.
Overview and Key Facts
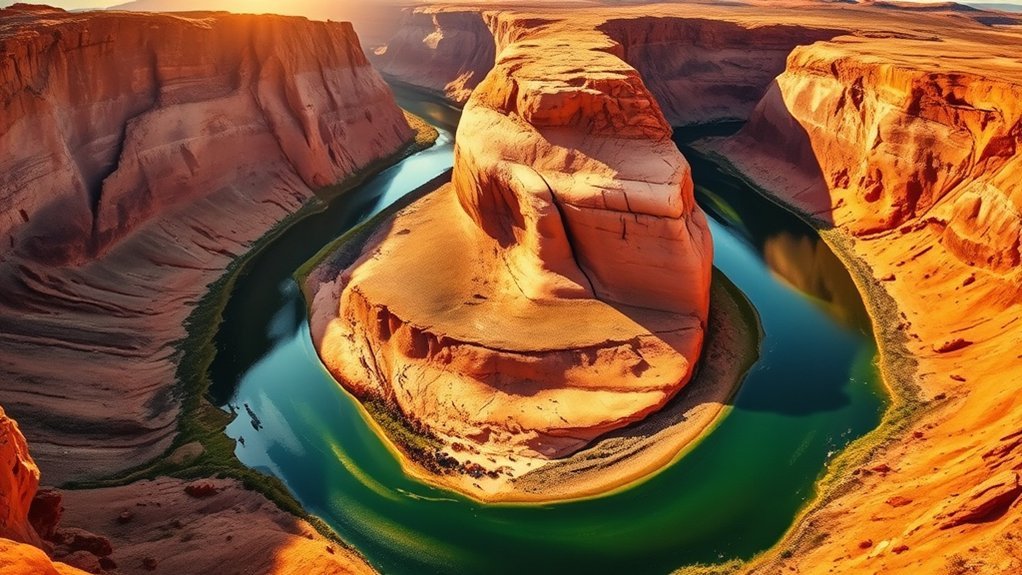
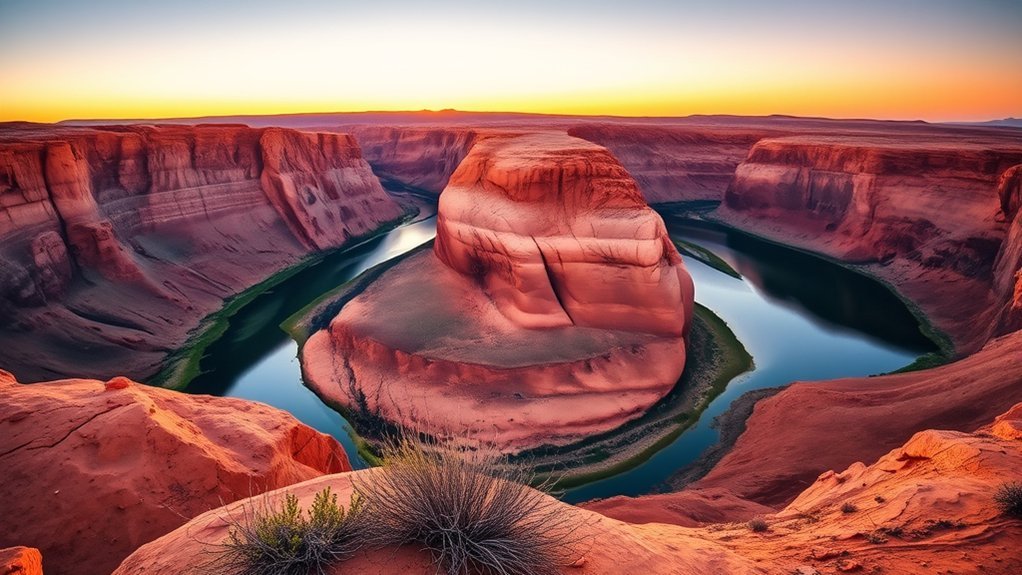
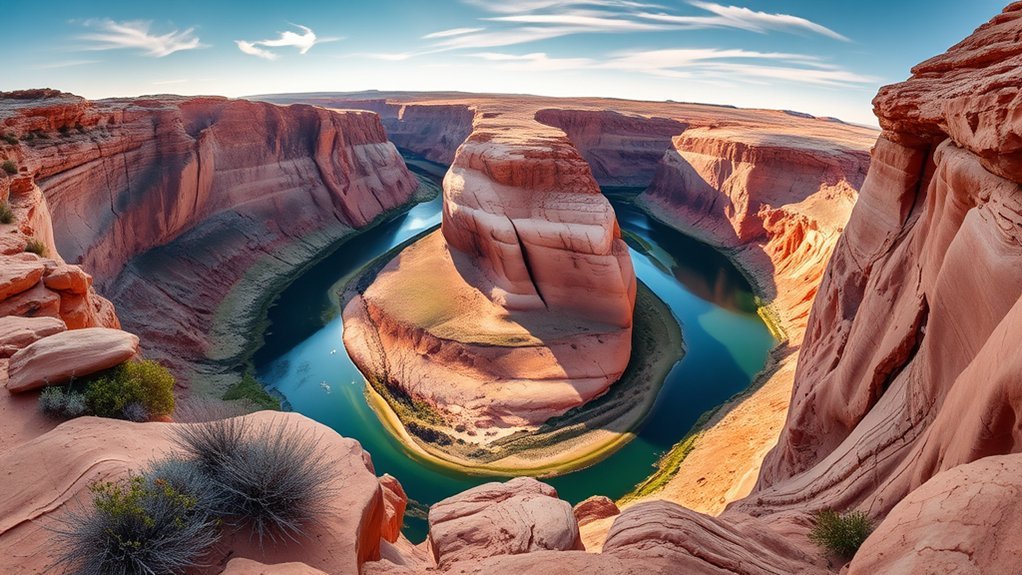
Horseshoe Bend is a breathtaking Colorado River meander near Page, Arizona, carved over millions of years into a dramatic horseshoe-shaped canyon you can view from a 1,000-foot overlook. When you visit Horseshoe Bend, you’ll stand on sandstone cliffs that drop to the river and take in sweeping panoramic views that photographers prize at sunrise and sunset. The site’s in Glen Canyon National Recreation Area and now has a fenced overlook for safer viewing. From the parking area a short walk — about a 1.5-mile round trip hike — brings you to the rim; there’s a $10 parking fee per vehicle. For cooler temperatures and fewer people, the best time to visit is early morning or late afternoon.
History and Geology
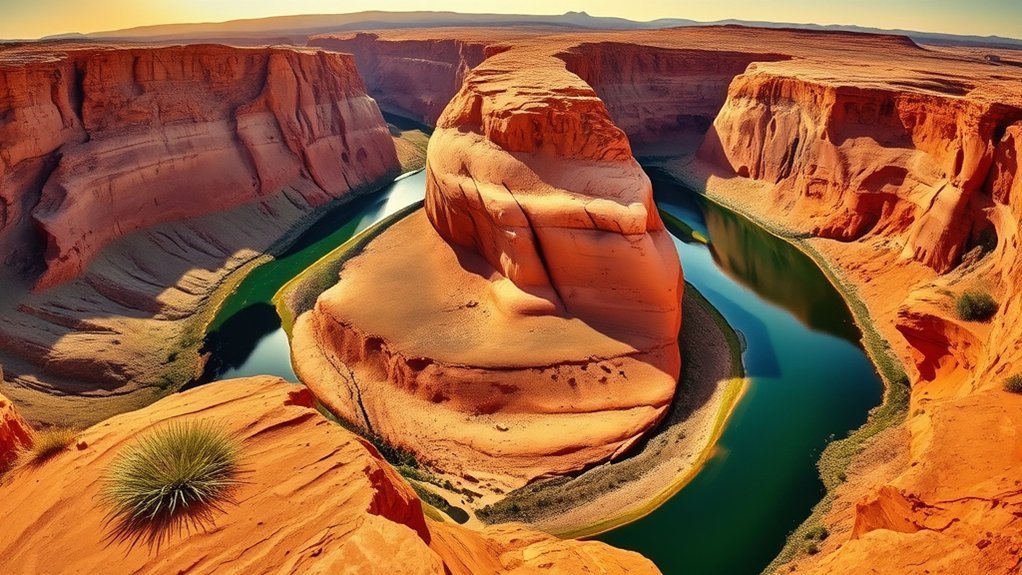
Standing on the rim, you can almost read the story written in the layers of rock — a saga that began about 200 million years ago when vast dunes of sand hardened into Navajo Sandstone, then continued as the Colorado River carved the canyon over the last six million years. You’ll see Horseshoe Bend’s dramatic meander, a geological formation shaped as the river followed paths of least resistance. Erosion sculpted steep cliffs, exposing banded sandstone that records shifting climates and seas. As part of Glen Canyon, this site links natural beauty with deep history: wind, water and time worked together to pry and polish rock into the iconic curve you admire today, a clear lesson in slow, relentless geological change.
Getting There and Directions

Set your GPS for Page, Arizona, then follow Highway 89 north from Flagstaff for about two hours until you reach the large parking area at mile marker 544 — note there’s a $10 per-vehicle fee and no roadside parking. From the lot you’ll walk a short, maintained 0.6-mile round-trip dirt trail to the overlook, so wear sturdy shoes and bring water. Follow posted signs and parking rules — drop-offs at the entrance are prohibited and violations can lead to tickets or towing.
Driving From Flagstaff
Drive north on Highway 89 from Flagstaff for about 125 miles — roughly a two-hour trip — and keep an eye out for the well-marked west-side parking lot at mile marker 544 just before Page; roadside parking isn’t allowed. You’ll follow open desert and red-rock scenery as the road narrows into Glen Canyon country. Pull into the parking lot, lock up, and note the visitor fee posted at the entrance — rules are enforced, so don’t risk a ticket or tow. From there, the 0.6-mile hiking trail leads you across sandy, sun-warmed terrain to the rim. When you arrive, the Colorado River will unfurl below, curving through the canyon into the iconic horseshoe, offering truly stunning views worth the drive.
Parking and Fees
A large, well-marked lot just off Highway 89 about 5 miles from Page handles most visitors to Horseshoe Bend, but you’ll want to plan ahead: pay a $10 vehicle fee (or $5 for motorcycles) in cash, arrive early on busy weekends and holidays when the lot fills quickly, and never park or get dropped off on the highway — illegally parked cars can be ticketed and towed. The Horseshoe Bend entrance area manages high visitor use, so follow parking regulations and secure a secured spot promptly. National Park passes aren’t accepted for the entry fee; bring cash payment. Respect rules to protect others and the fragile landscape.
- Arrive before peak visitation times to find parking
- Have exact cash for entry fee
- Do not attempt roadside or illegal parking
- Follow all posted parking regulations
Trailhead and Walk
After you’ve parked and paid the fee, head west from the lot onto the packed dirt trail that leads to the fenced overlook — it’s a roughly 0.6-mile, 20-minute walk each way. You’ll follow the Horseshoe Bend Trail from the parking lot at mile marker 544 on Highway 89, about 5 miles south of Page. The packed dirt path is flat and family-friendly, designed under the Architectural Barriers Act to accommodate wheelchairs and strollers so everyone can hike to the viewpoint safely. No roadside parking or drop-offs are allowed, so plan to walk. As you approach the fenced overlook, the Canyon opens beneath you; pause, breathe, and savor your visit to one of the Southwest’s most dramatic river bends.
Parking, Fees, and Regulations
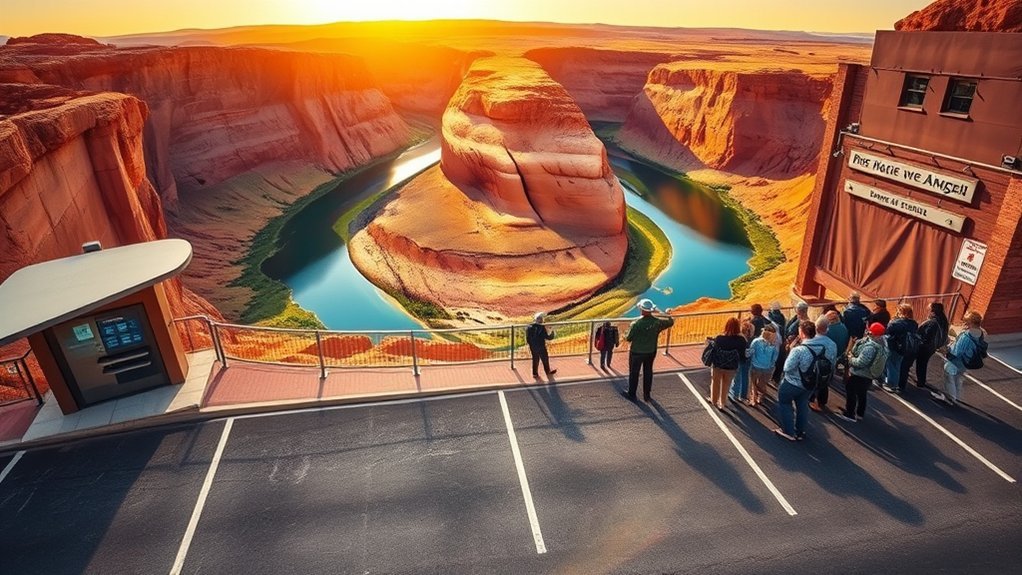
Although it’s just off Highway 89 at mile marker 544—about 5 miles from Page—you’ll notice the clearly marked parking lot for Horseshoe Bend and the $10 per-vehicle (or $5 for motorcycles) fee posted at the entrance; national park passes aren’t accepted. You’ll pay cash only on busy weekends and holidays, so bring small bills. The lot has RV and accessible spots, but no roadside parking or drop-offs are allowed — vehicles left along Highway 89 will be ticketed and towed. Follow posted regulations to keep the vista safe and open for everyone.
Parking at Horseshoe Bend (Mile 544): $10 per vehicle ($5 motorcycle). Cash on busy days; no roadside parking.
- Plan for cash-only payment during peak times.
- Use designated accessible spots if eligible.
- Don’t stop on Highway 89; it’s enforced.
- Expect clear signage about parking, fees, and towing.
The Trail and Accessibility
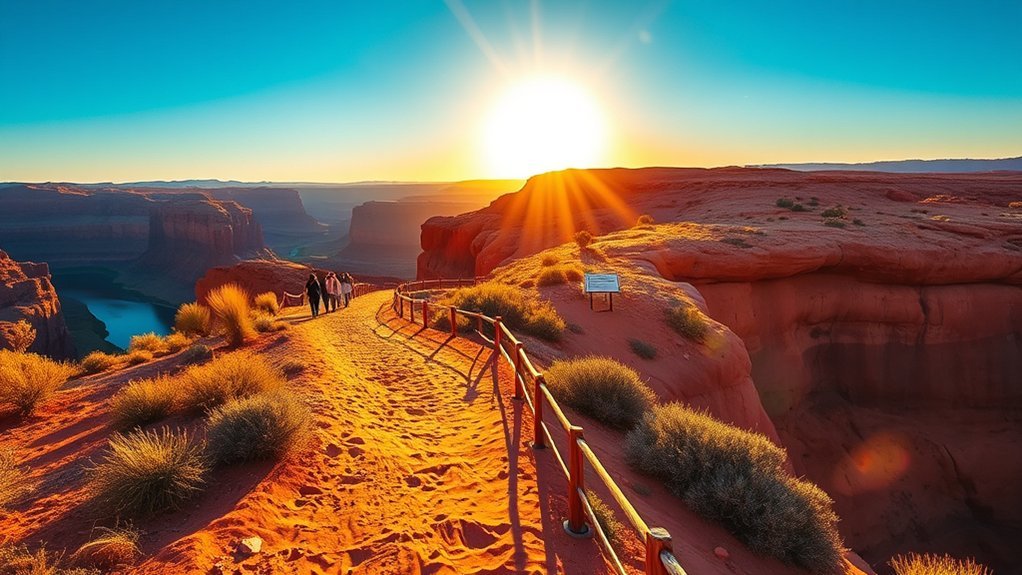
Because the path is a short, flat 1.5-mile round trip with packed dirt underfoot, you can comfortably make the hike in about 20 minutes each way while enjoying open desert views and two shaded rest structures along the route. The trail’s packed dirt surface is well-marked and family-friendly, letting parents push strollers or guide children toward the dramatic viewpoint. Accessibility is a priority: the route complies with the Architectural Barriers Act, offering barrier-free access for most visitors and wheelchairs. You’ll find no shade at the overlook itself, so use the shade structures en route. Leashed dogs are welcome, so you can bring pets safely. Move at your own pace, take in the scenic views, and respect the route’s design for all users.
Best Times to Visit and Crowd Tips
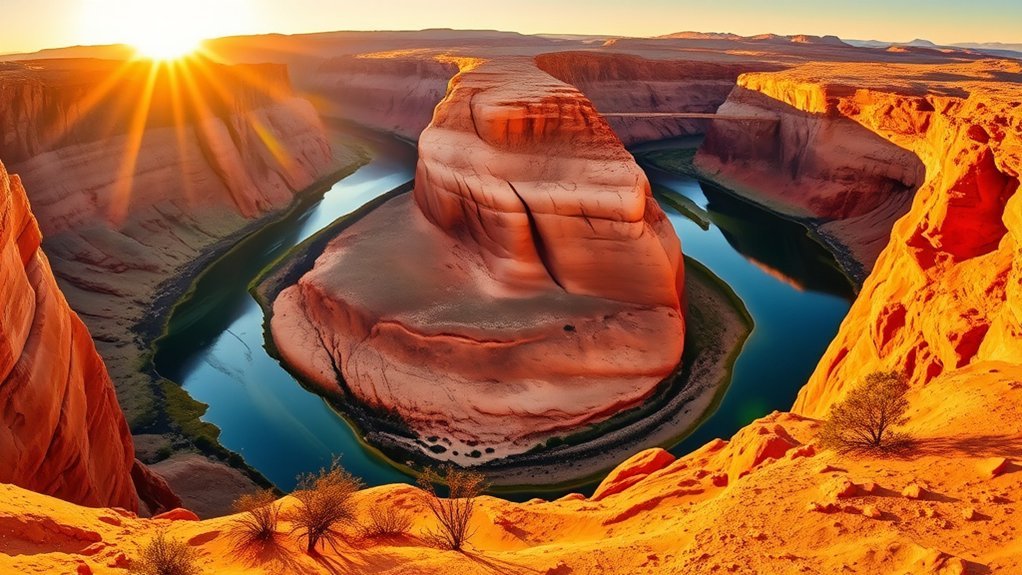
Now that you’ve got the trail and accessibility details down, plan your timing to make the most of the overlook. The best times to visit are early morning or late afternoon to dodge peak crowds and catch vibrant colors that make for stunning views and ideal photography. Visitor numbers spike between 9–11 a.m. and 4:30–6:30 p.m., so aim for sunrise or sunset for quieter moments and dramatic light. Weekdays generally mean fewer people than weekends. Early afternoons see fewer visitors but hotter temps and muted canyon tones; in winter, cooler temperatures call for layers so you stay comfortable while you take it in.
- Arrive at sunrise for soft light and minimal crowds
- Use late afternoon for golden hues and quieter overlooks
- Choose weekdays to reduce visitor numbers
- Avoid 9–11 a.m. and 4:30–6:30 p.m. peak crowds
What to Bring and Safety Advice
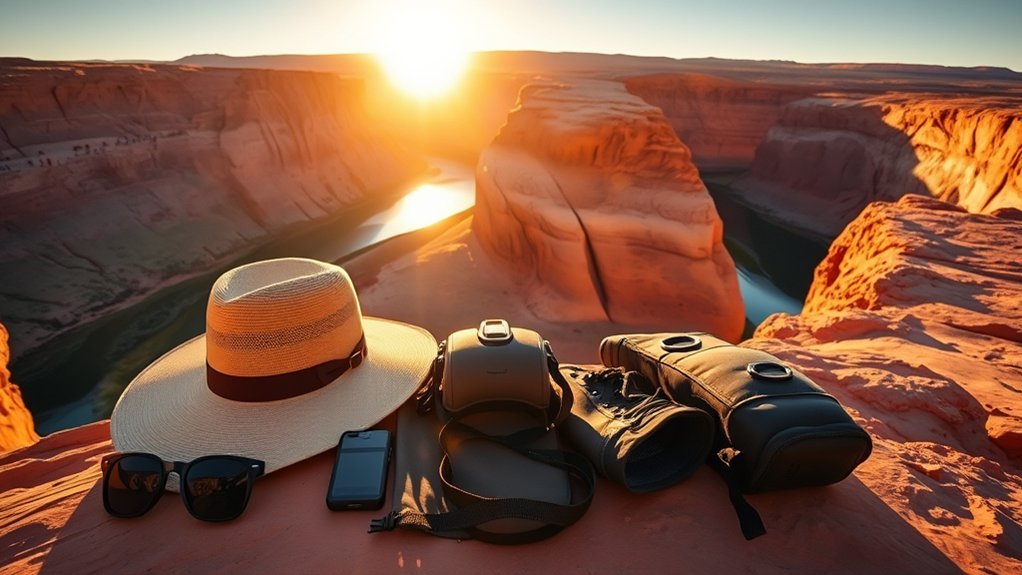
Bring plenty of water—plan on at least a liter per person for every two hours you’re out—and pack light snacks to keep your energy steady in the dry heat. Wear closed-toe shoes, sun protection, and stay well back from the slick sandstone edges, since the drops are steep and not fully fenced. Keep dogs leashed and monitor footing on the trail so you can enjoy the view safely.
Water and Hydration
If the sun’s high and the air feels like an oven, you should plan on at least 1 liter of water per person for every two hours on the trail — and carry extra in summer when temperatures can top 100°F (37°C). You’ll feel the dry heat steal energy fast, so prioritize hydration, sip often, and avoid waiting until you’re thirsty. Apply sunscreen, wear a hat and sunglasses, and seek whatever shade you can find during breaks. Closed-toe shoes protect your feet from hot ground and rough terrain. Never leave pets in vehicles; bring water and check them frequently.
- Pack at least 1 liter per person per two hours plus extra for pets
- Use a wide-brim hat, sunscreen, and cooling cloths
- Monitor for heat symptoms; rest in shade
- Wear closed-toe shoes for footing and heat protection
Edge and Trail Safety
While the 0.6-mile trail to the Horseshoe Bend overlook looks easy, you should gear up and stay alert: wear closed-toe shoes, carry at least 1 liter of water per person for every two hours (more in summer), and don a wide-brimmed hat, sunglasses, and sunscreen to protect against intense desert sun. Stick to the path while hiking; bikes, drones, skateboards, and motorized vehicles are prohibited. Sandstone near the edge becomes slick, so keep a safe distance from steep drop-offs and avoid risky photo poses. Plan visits for cooler morning or late-afternoon hours to reduce heat stress when temperatures soar above 100°F. Prioritize hydration, sun protection, proper footwear, and constant awareness for safe, memorable views.
Nearby Attractions and Day-Trip Ideas
Because Horseshoe Bend sits so close to a string of dramatic landscapes, you can easily turn your visit into a full day (or more) of exploration: Explore nearby attractions around Page that mix river vistas, slot canyons and desert hikes. Antelope Canyon is just 15 minutes away and requires guided tours — its sculpted light-filled slots are unforgettable. Lake Powell offers kayaking, paddleboarding and swimming for a cooling afternoon. Glen Canyon Dam sits 10 minutes away with scenic overlooks of the Colorado River and the dam. For longer adventures, Rainbow Bridge National Monument is reachable by boat or a strenuous 14+ mile hike. If you want something shorter, try the Toadstools Trail, a 1.5-mile easy scenic trail with mushroom-like rocks.
Horseshoe Bend is a gateway to Page’s dramatic landscapes — from Antelope Canyon tours to Lake Powell water fun.
- Antelope Canyon guided tours
- Lake Powell water activities
- Glen Canyon Dam overlooks
- Rainbow Bridge or Toadstools hike
Photography Tips and Recommended Viewpoints
Want to capture Horseshoe Bend the way you remember it? Use these photography tips to craft stunning photos at sunrise and sunset when soft light sharpens colors and contrast. Bring a wide-angle lens to embrace the breathtaking panoramic curve; include foreground elements like rocks or scrub to add depth and scale. For ideal photographic conditions, arrive early to secure a prime viewpoint—overlook crowds peak mid-morning and late afternoon. Be cautious near the edge while composing; sandstone can be slick, so set up a sturdy tripod for sharp exposures. Explore several vantage points along the rim to vary perspectives and return at golden hour for the most evocative results.
| Time | Gear | Tip |
|---|---|---|
| Sunrise | Wide-angle lens | Arrive early |
| Sunset | Tripod | Use foreground |
| Midday | Polarizer | Avoid crowds |
| Golden hour | Remote shutter | Breathtaking shots |
Frequently Asked Questions
Do I Need a Guide to Visit Horseshoe Bend?
No, you don’t need a guide; self‑guided visiting tips include photography advice, safety precautions, accessibility options, parking information, weather considerations, local attractions, best viewpoints and time management to guarantee a smooth, evocative, informative visit.
How Much Time Do I Need at Horseshoe Bend?
Like a postcard unfolding, you’ll need about 1.5 hours; use Horseshoe Bend tips, photography techniques, hiking trails, sunset views, parking options, accessibility features, visitor center, local wildlife, safety precautions, nearby attractions to plan efficiently.
Is It Better to See a Horseshoe Bend in the Morning or Afternoon?
You’ll prefer morning light: cooler weather conditions, lower crowd levels, better photography tips for golden hues. Afternoon shadows suit sunset views but bring heat; plan hiking trails, scenic viewpoints, seasonal changes and travel itineraries accordingly.
What Is the Best Month to Visit Horseshoe Bend?
October’s ideal weather makes it the best month to visit; you’ll avoid peak season crowds, enjoy sunset views and photography tips-friendly light, manageable hiking trails, safety precautions, visitor amenities, travel restrictions, and nearby attractions.
Conclusion
You’ll stand at the rim, thirsty for a photo that makes the 1,000-foot drop feel like background scenery — and you’ll get it, if you remember water, shade, and common sense. Ironically, the view that humbles you fits so neatly in a frame you’ll post before you’ve really looked. Take your time: breathe the heat, notice the rock’s slow work, and leave only footprints — and maybe one small, grateful silence.