Devil’s Bridge Trail is one of Sedona’s most popular red-rock hikes, but your total distance depends on where you start and whether the access area is open. The official trail is short, while routes from passenger-car trailheads add several miles. Always check current Forest Service alerts before driving because fires, storms, road conditions, and emergency closures can change access without notice.
Quick Answer
When open, Devil’s Bridge Trail is a moderate Sedona hike measuring 1.6 miles round trip from the high-clearance trailhead. Most visitors use a passenger-car route instead: about 4.0 miles from Mescal Trailhead or 5.8 miles from Dry Creek Vista via Chuckwagon Trail.
Current closure warning, July 23, 2026: Devil’s Bridge, Mescal, Long Canyon, and several nearby trails remain closed under the Pocket Fire closure order. Sedona Shuttle Route 11 to Dry Creek Vista and Mescal is also not operating. Do not enter a closed trail or road. Check the Coconino National Forest Pocket Fire closure page and the Sedona Shuttle service alert before traveling.
Last updated: July 23, 2026.
Key Takeaways
- Check access first: Emergency closures, fire restrictions, road conditions, and shuttle operations can change quickly.
- Best passenger-car route: When open, Mescal Trailhead offers a signed route of about 4.0 miles round trip.
- Shortest route: The official Devil’s Bridge Trailhead reduces the hike to 1.6 miles round trip, but FR 152 requires high clearance and should not be driven when wet.
- Parking pass: Follow current signs at Dry Creek and Mescal. A Red Rock Pass or accepted federal recreation pass is required at signed fee sites.
- Main challenge: The final approach has steep natural steps, uneven sandstone, crowding, and exposed edges.
- Heat plan: Start early, carry water based on the route and temperature, and turn around before heat symptoms become severe.
At a Glance
| Time Required | About 2 hours from the official trailhead; allow roughly 2.5–4 hours from passenger-car trailheads, plus any wait for photos. |
| Difficulty | Moderate, with steep sandstone steps and exposed edges near the arch. |
| Tools Needed | Grippy hiking shoes, water, salty snacks, sun protection, offline map, charged phone, first-aid kit, and headlamp. |
| Cost | The hike itself is free. Parking at a signed fee site may require a Red Rock Pass or accepted federal pass. Trailhead shuttle rides are normally free when operating. |
Check Current Closures Before You Go
Do not assume that a trail is open because a map, hiking app, or older article displays a route. Wildfires, flooding, road damage, search-and-rescue activity, and resource-protection orders can close the trail or the roads leading to it.
Before leaving Sedona, complete these checks:
- Open the Coconino National Forest alerts page.
- Review the official Devil’s Bridge Trail No. 120 page.
- Check the Sedona Trailhead Shuttle status and schedule.
- Review the hourly weather forecast, including heat, lightning, wind, and smoke.
- Follow closure signs, gates, ranger instructions, and emergency orders at the trailhead.
Note: A closure applies even when the trail appears quiet or physically passable. Entering a closed area can interfere with firefighting or rescue operations and may lead to penalties.
Which Devil’s Bridge Route Should You Take?
When the area is open, your best route depends on your vehicle, parking availability, hiking time, and comfort around shared trails. The official Devil’s Bridge foot trail is short, but reaching it from a passenger-car trailhead adds distance.
| Starting point | Best for | Approx. round trip | What to know |
|---|---|---|---|
| Official Devil’s Bridge Trailhead | High-clearance vehicles | 1.6 miles | Shortest hike. The 1.3-mile unpaved FR 152 approach is rough, requires high clearance, and is not recommended when wet. |
| Mescal Trailhead | Most passenger cars | About 4.0 miles | Follow the signed Mescal-to-Chuckwagon connection. It offers a good balance of scenery and distance. |
| Dry Creek Vista via Chuckwagon Trail | Shuttle users and a longer scenic approach | About 5.8 miles | Use Chuckwagon instead of walking the dusty jeep road. Expect shared sections with mountain bikes. |
Official High-Clearance Route
- From west Sedona, take Dry Creek Road toward FR 152.
- At the end of the paved section, continue onto the rough unpaved road only when it is open and your vehicle has suitable clearance.
- Travel approximately 1.3 miles on FR 152 to the signed Devil’s Bridge Trailhead turn.
- Park only in a legal designated space.
- Follow Devil’s Bridge Trail No. 120 toward the natural rock staircase and arch.
The Forest Service lists this route as a 1.6-mile round trip with 371 feet of elevation gain and an estimated two-hour hiking time. High clearance does not guarantee that the road is safe after rain, snow, erosion, or storm damage.
Mescal Trailhead Route
- Park at Mescal Trailhead on Long Canyon Road when the trailhead is open and legal parking is available.
- Follow signs for Mescal Trail.
- Continue to the signed Chuckwagon connection.
- Follow Chuckwagon toward the official Devil’s Bridge Trailhead.
- Cross the jeep-road junction carefully and continue onto Devil’s Bridge Trail No. 120.
- Return by the same signed route.
Pro Tip: Do not expect every sign near Mescal Trailhead to say “Devil’s Bridge.” First follow the signed Mescal and Chuckwagon connections. The Devil’s Bridge signs become clearer as you approach the official trailhead.
Dry Creek Vista via Chuckwagon Trail
- Begin at Dry Creek Vista Trailhead when access is open.
- Follow the signed Chuckwagon Trail rather than walking FR 152.
- Stay alert for mountain bikes on shared-use sections.
- Continue for approximately 2.1 miles one way to the official Devil’s Bridge Trailhead connection.
- Complete the final Devil’s Bridge foot trail to the arch.
- Return on Chuckwagon to Dry Creek Vista.
The unpaved portion of FR 152 carries jeeps and other vehicles. The Forest Service does not recommend it as a pedestrian route because of traffic and dust.
Best Times to Hike Devil’s Bridge
Under normal open conditions, the most comfortable time to hike Devil’s Bridge is early morning from fall through spring. Early starts usually offer cooler air, softer light, and a better chance of finding legal parking. They can also reduce the wait for photos, although no arrival time guarantees an empty arch.
Summer demands a more conservative plan. Sedona temperatures can exceed 100°F, exposed trail sections have limited shade, and afternoon monsoon storms may produce lightning, sudden wind, heavy rain, or flash flooding.
Peak Season Timing
Parking and trail traffic are heaviest during spring, fall, weekends, school breaks, and holidays. When the shuttle operates, using the park-and-ride system can reduce parking stress. Some trailhead parking may be restricted while shuttle service is active, so follow posted signs instead of relying on an older parking map.
Sunrise can provide softer light and shorter lines. Late-afternoon light may also be attractive, but you must leave enough time to return before dark. Carry a headlamp even when you expect to finish during daylight.
Seasonal Trail Conditions
- Spring: Mild weather and desert blooms are possible, but crowds can be heavy.
- Summer: Extreme heat, strong sun, wildfire restrictions, smoke, lightning, and monsoon storms are the main hazards.
- Fall: Cooler conditions are often comfortable, though popular weekends remain busy.
- Winter: Cold mornings, snow, and ice can make the natural sandstone staircase slippery.
After rain or snow, avoid FR 152 and use extra caution on slick sandstone. Turn around when traction is poor, thunder is approaching, smoke affects breathing, or a closure prevents safe access.
Trail Difficulty, Distance, and Elevation
The Forest Service rates Devil’s Bridge Trail No. 120 as moderate. From the official trailhead, it begins near 4,605 feet, gains approximately 371 feet, and measures 1.6 miles round trip. Routes from Mescal or Dry Creek Vista are longer because they use connector trails before reaching the official foot trail.
The mileage is not the only challenge. Most of the climbing, uneven steps, crowding, and edge exposure occur near the end of the hike.
Difficulty and Terrain
The lower route includes packed dirt, sand, open red-rock terrain, and rocky trail. The final approach becomes steeper, with natural stone steps and uneven footing. Some hikers may use their hands briefly for balance.
Wear trail shoes or hiking shoes with dependable traction. Casual shoes with smooth soles can slip on dust, loose gravel, or wet sandstone.
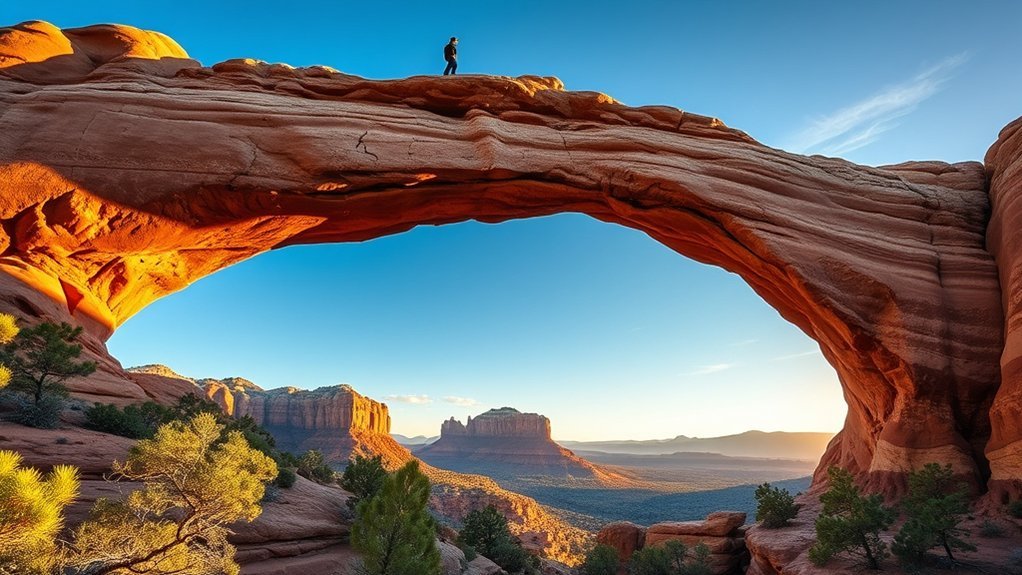
The top of the arch is wider than some photographs suggest, but the drop remains serious. Walk only where you feel stable, keep children close, give other hikers room, and never step backward while posing near an edge.
Distance by Starting Point
- Official Devil’s Bridge Trailhead: About 1.6 miles round trip.
- Mescal Trailhead: About 4.0 miles round trip.
- Dry Creek Vista via Chuckwagon: About 5.8 miles round trip.
Allow extra time for navigation, breaks, heat, children, dogs, shared-trail traffic, and the photo line. Save energy and water for the return hike instead of treating the arch as the end of the trip.
How to Get There and Parking Details
From Sedona, travel toward Dry Creek Road on the west side of town. The paved road reaches the Dry Creek Vista area. Beyond the pavement, FR 152 becomes rough. The Forest Service states that this section requires a high-clearance vehicle and is not recommended during wet weather.
Drivers in passenger cars should normally choose Mescal Trailhead or Dry Creek Vista rather than attempting the unpaved road. Park only in marked or legally permitted spaces. Do not block traffic, private property, bike lanes, gates, emergency access, shuttle stops, or road shoulders where parking is prohibited.
Red Rock Pass Requirements
Dry Creek and Mescal are among the locations where a Red Rock Pass or accepted federal recreation pass may be required when you park at a signed fee site. Follow the current signs at the exact parking location. A pass does not override closures, parking restrictions, or full-lot rules.
Sedona Shuttle
Under normal operations, the free Sedona Trailhead Shuttle serves Dry Creek Vista and Mescal from a park-and-ride lot. No reservation is normally required for fixed-route trailhead service. Service days, hours, emergency suspensions, and parking restrictions can change, so check the current Route 11 page before relying on it.
Note: Do not leave for the trailhead based only on a saved screenshot. Check the live shuttle and Forest Service pages on the day of your hike.
What to Pack for Devil’s Bridge
Pack for exposed sun, rough sandstone, changing weather, and a hike that may take longer than the mileage suggests. There is no dependable drinking water on the trail, and you should not rely on open restrooms or other facilities.
- Grippy footwear: Wear trail or hiking shoes suitable for sandstone steps and loose dirt.
- Water: Carry enough for the full route, return hike, and delays. On hot, dry days, Arizona hiking guidance recommends planning for roughly one quart or liter per hiking hour, adjusted for your body, route, and conditions.
- Food and electrolytes: Bring salty snacks and balanced electrolyte replacement when sweating for an extended period.
- Sun protection: Use sunscreen, sunglasses, a brimmed hat, and lightweight protective clothing.
- Navigation: Download an offline map and carry a charged phone. Do not rely on cellular reception.
- Emergency items: Carry a small first-aid kit, whistle, headlamp, and weather-appropriate extra layer.
- Pet supplies: Bring a leash, dog water, waste bags, and paw protection when surfaces may be hot.
Warning: Stop hiking and move to a cooler place if someone becomes faint, confused, unusually weak, nauseated, unsteady, or unable to continue. Confusion, collapse, seizures, or loss of consciousness can signal a life-threatening emergency. Call 911 and begin cooling the person while help is requested.
Heat, Monsoon, and Emergency Safety
Manage Heat Before It Becomes an Emergency
Begin drinking before you feel thirsty and take regular breaks in shade when any is available. Eat enough to replace energy and salt. Turn around while you still have sufficient water for the return trip. Do not continue simply because the arch appears close on a map.
People with medical conditions, young children, older adults, visitors who are not acclimated to desert heat, and dogs may need a shorter route or cooler day.
Watch for Monsoon Weather
Arizona’s summer monsoon can produce lightning, hard rain, flash flooding, hail, and strong outflow winds. Check the hourly forecast before starting. If thunder develops, leave exposed rock and high points. Do not shelter beneath an isolated tree or enter a wash carrying fast-moving water.
Leave an Emergency Plan
Tell a responsible person which trailhead and route you will use, who is in your group, your vehicle details, and when you expect to return. Stay on the planned route unless an emergency or official closure requires a change.
If you call for help, provide your route, nearest signed junction, visible landmarks, group condition, and phone battery level. Keep the phone available for rescuers instead of using the remaining battery for photographs or social media.
Safety Tips and Trail Etiquette
Devil’s Bridge is narrow in places and exposed near the arch. A safe visit depends on patience, communication, and respect for closures and other trail users.
Stay on Marked Paths
Use signed trails and durable rock surfaces. Cutting switchbacks or following unofficial social paths damages fragile desert soil and makes navigation harder for future visitors.
- Read the trailhead map and posted alerts before starting.
- Use official connector trails instead of creating shortcuts.
- Do not carve rock, build cairns, move natural objects, or damage plants.
- Turn around at any closure sign or barricade.
Yield and Share the Trail
Slow down where the trail narrows and communicate before passing. Uphill hikers commonly receive the right of way, but the safest person to step aside should use stable ground without crushing vegetation.
Mescal and Chuckwagon include shared-use sections. Listen and look for mountain bikes, avoid blocking blind corners, and keep children and dogs close when riders approach.
Photo-Line Etiquette
At the arch, prepare your camera before your turn. Take a small number of photos, move back to a safe waiting area, and allow the next group to proceed. Avoid long staged shoots, outfit changes, loud music, or equipment that blocks the trail.
Do not jump, run, perform balancing poses, or step backward near the edge. Recreational drone flights must follow FAA rules, Forest Service restrictions, emergency closures, and temporary flight restrictions. Never fly near wildfire or aircraft operations.
Photography Locations and Poses on the Arch
The classic photograph is taken from the main viewing area facing the arch, with one person standing or walking on the span. For a wider composition, step back on the established viewing area and include the surrounding red-rock walls.
Sunrise often provides softer light. Midday creates stronger contrast, so expose carefully to retain detail in the sky and sandstone. Keep poses controlled and predictable:
- Stand facing the camera.
- Walk slowly across the span.
- Face the landscape while remaining well away from the edge.
- Sit only where you can approach and rise safely without moving backward.
If the arch feels crowded, windy, icy, or unsafe, photograph it from the viewing area without stepping onto the span.
Nearby Trails and Places to Combine With Your Hike
Nearby west Sedona trails can extend the outing after Devil’s Bridge reopens, but only combine hikes when every route is open and your group has enough water, daylight, and energy.
- Chuckwagon Trail: A scenic connector with rolling terrain and shared mountain-bike use.
- Mescal Trail: A passenger-car access route with open red-rock views.
- Fay Canyon: A gentler nearby option, subject to current closure status and parking conditions.
- Boynton Canyon area: A popular trail network where parking and emergency closures can also affect access.
During a regional wildfire or emergency closure, do not assume a nearby alternative is open. Check each destination separately.
Accessibility and Family-Friendly Options
The route to the arch is not wheelchair-accessible or stroller-friendly because it includes dirt trail, uneven sandstone, and steep natural steps. Families may still enjoy lower sections or earlier viewpoints when the area is open, but no one should feel pressured to complete the final exposed climb.
Use a properly fitted child carrier for toddlers rather than a stroller. Before reaching the final steps, set clear rules for older children: no running, no pushing ahead, no horseplay, and no approaching an edge without an adult.
Dogs are welcome in many areas of Coconino National Forest but must remain leashed and controlled. Bring water, protect paws from hot rock, remove waste, and reconsider the final arch approach when crowds, steps, or temperatures make control difficult.
Mountain Bikes and E-Bikes
Mountain bikes are permitted on some nearby shared-use connector trails, including Mescal and Chuckwagon, subject to signs and closures. Riders should not continue onto the final Devil’s Bridge foot-trail and arch approach when it is signed or managed for hiking.
The Forest Service treats e-bikes as motor vehicles. An e-bike is allowed only on roads or trails designated for the applicable motorized use. Ordinary bicycle permission on a nonmotorized trail does not automatically authorize an e-bike. Check signs and the current Motor Vehicle Use Map information before riding.
Leave No Trace Practices and Conservation Notes
Devil’s Bridge sits in a fragile desert landscape where heavy visitation can damage soil, plants, rock surfaces, and the visitor experience.
- Plan ahead: Verify closures, weather, route, parking, and water needs.
- Travel on durable surfaces: Stay on signed trail, established paths, and durable sandstone.
- Pack out waste: Remove all trash, food scraps, tissues, and pet waste.
- Leave what you find: Do not carve rock, collect natural objects, or build decorative cairns.
- Respect wildlife: Observe from a distance and do not feed animals.
- Be considerate: Keep noise low, manage pets, and avoid blocking the trail.
Review the Coconino National Forest safety and outdoor ethics guidance before your hike.
Frequently Asked Questions
Is Devil’s Bridge Trail open today?
As of July 23, 2026, Devil’s Bridge remains closed under the Pocket Fire closure order. Check the current Coconino National Forest alerts and Sedona Shuttle pages before traveling because the closure status can change.
How long is Devil’s Bridge Trail?
The official Devil’s Bridge Trail No. 120 is 1.6 miles round trip from the high-clearance trailhead. From Mescal Trailhead, the round trip is about 4.0 miles. From Dry Creek Vista via Chuckwagon Trail, it is about 5.8 miles.
How much time should I allow?
Allow about two hours from the official trailhead. From Mescal or Dry Creek Vista, plan roughly 2.5–4 hours depending on pace, temperature, breaks, navigation, and the photo line.
Is Devil’s Bridge Trail hard?
The Forest Service rates it moderate. The lower trail is manageable for many hikers, but the final approach has steep sandstone steps, uneven footing, crowding, and exposed edges.
Where should passenger cars park?
When the area is open, passenger-car drivers should normally use Mescal Trailhead or Dry Creek Vista. Do not drive the unpaved FR 152 section in a low-clearance vehicle.
Do I need four-wheel drive?
The Forest Service specifically requires high clearance for the unpaved FR 152 approach. Four-wheel drive may help in difficult conditions, but it does not make a wet, closed, damaged, or unsafe road legal or suitable to drive.
Do I need a permit or parking pass?
A normal day hike does not require a hiking permit. Parking at signed fee sites such as Dry Creek or Mescal may require a Red Rock Pass or accepted federal recreation pass. Special events, commercial activities, and some filming or drone operations may have separate requirements.
Are dogs allowed on Devil’s Bridge Trail?
Dogs are allowed in many Coconino National Forest areas but must remain leashed and controlled. Carry dog water, protect paws from hot rock, remove waste, and follow any temporary closure or pet restriction.
Are restrooms and drinking water available?
Do not depend on trailhead restrooms or potable water. Facilities vary by access point and may be unavailable or closed. Use a restroom before arriving and carry all the water needed for the full hike.
Can I mountain bike or use an e-bike?
Mountain bikes are allowed on some nearby shared-use connectors, including Mescal and Chuckwagon, subject to signs and closures. E-bikes are treated as motor vehicles by the Forest Service and are allowed only on routes designated for motorized use.
Is there cell phone reception?
Reception may be unreliable. Download an offline map, keep your phone charged, and leave your route and return time with a responsible person. Do not depend on cellular service for navigation.
Sources
- Coconino National Forest: Devil’s Bridge Trail No. 120 — official distance, elevation, difficulty, route connections, and FR 152 access requirements.
- Coconino National Forest Alerts — current trail, road, fire, and emergency closure information.
- Coconino National Forest Safety and Outdoor Ethics — footwear, navigation, heat, pet, drone, and Leave No Trace guidance.
- Sedona Shuttle Trailhead Routes — current trailhead service, operating days, suspensions, and park-and-ride information.
- Visit Sedona Red Rock Pass Q&A — current fee-site and pass information.
- National Park Service: Plan Ahead in Arizona — desert heat, water, monsoon, and navigation guidance.
Conclusion
Devil’s Bridge is a memorable Sedona hike, but a safe trip begins with current access information rather than mileage alone. As of July 23, 2026, the trail remains closed under the Pocket Fire order, so postpone the hike until officials reopen the area.
When normal access returns, most passenger-car visitors will find Mescal Trailhead the most practical route, while high-clearance drivers can shorten the hike from the official trailhead when FR 152 is open and dry. Verify alerts, carry enough water, respect the arch line, stay away from exposed edges, and leave the desert exactly as you found it.