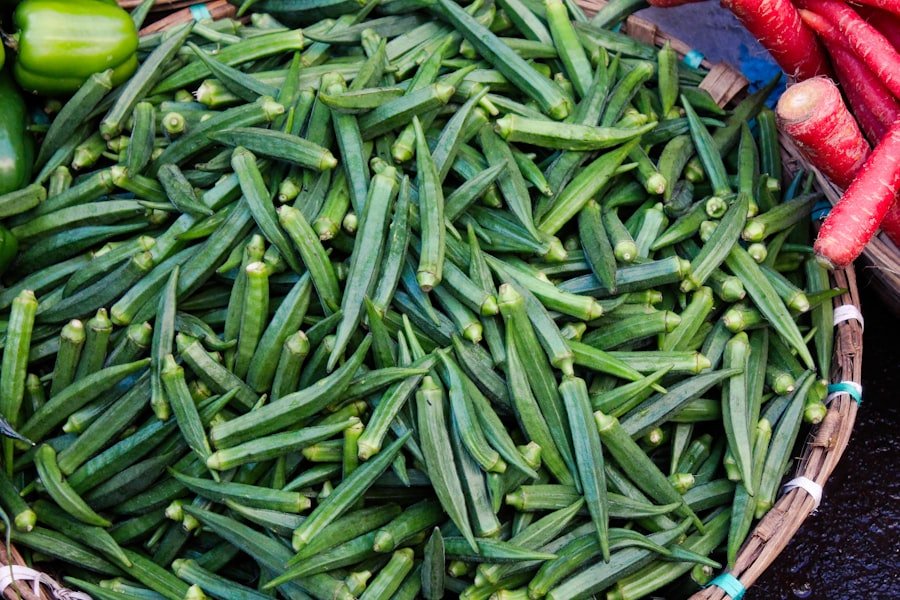
Black spots on okra can mean several different things, from harmless surface sooty mold to insect feeding, fungal disease, bruising, or poor storage. The right fix depends on what the spots look like, whether they wipe off, and whether the pod is still firm and fresh.
Quick Answer
Black spots on okra are most often caused by sooty mold from honeydew-producing insects, fungal leaf or fruit diseases, pest feeding, bruising, or storage injury. If the black film wipes off and the pod is firm, it is usually a surface issue. If the pod is soft, sunken, slimy, or rotting, discard it.
Key Takeaways
- Wipeable black coating usually points to sooty mold growing on sticky honeydew from aphids, whiteflies, scale, mealybugs, leafhoppers, or similar sucking insects.
- Sunken, spreading, soft, or water-soaked spots may indicate disease or decay, especially after wet, humid weather.
- Good airflow, proper spacing, drip watering, regular harvesting, and careful storage reduce most black-spot problems.
- Do not wash harvested okra with soap, detergent, bleach, or produce wash. Rinse edible pods under clean running water before use.
- No common okra variety is “black-spot-proof,” so choose vigorous, locally recommended varieties and manage pests and moisture early.
At a Glance
| Time Required | 10–20 minutes to inspect plants; 1–2 weeks to reduce pest-driven sooty mold after control begins |
| Difficulty | Easy for light sooty mold or spacing issues; moderate if disease pressure is already spreading |
| Tools Needed | Hand lens, gloves, pruning shears, clean water, mulch, drip hose if available, labeled insecticidal soap or horticultural oil if pests are present |
| Cost | Usually low: free for pruning, spacing, and water changes; modest cost for mulch, traps, or labeled pest-control products |
What Black Spots on Okra Usually Mean
Black spots are a symptom, not a diagnosis. The same dark color can come from a surface mold, a plant disease, insect feeding, or post-harvest damage. Start by looking closely at the pod and nearby leaves.
| What You See | Likely Cause | What To Do |
| Black, dusty coating that wipes off | Sooty mold growing on insect honeydew | Control aphids, whiteflies, scale, mealybugs, leafhoppers, or ants; rinse firm pods before cooking |
| Dark, sunken, spreading, or soft spots | Fungal or bacterial disease, fruit rot, or decay | Remove affected pods, improve airflow, avoid wet foliage, and use labeled fungicide only when needed |
| Bumpy, crooked, scarred, or misshapen pods | Stink bug or leaf-footed bug feeding | Harvest often, remove weeds that shelter pests, and inspect pods while they are small |
| Dark patches after harvest or refrigeration | Bruising, excess moisture, or chilling injury | Store unwashed okra dry, avoid crushing, and do not hold it below 45°F |
Warning: Do not eat okra pods that are slimy, foul-smelling, moldy inside, deeply sunken, leaking, or rotting. When in doubt, throw the pod out rather than trying to trim around serious decay.
Identifying the Causes of Okra Black Spots
The fastest way to identify the problem is to inspect the pod, leaves, stems, and nearby insects at the same time. A hand lens helps, but you can often spot the main clues without one.
Sooty Mold From Honeydew-Producing Insects
Sooty mold is a dark, soot-like fungal growth that develops on sticky honeydew left by sap-sucking insects. It does not usually infect the plant tissue directly; it grows on the surface where honeydew collects. The main pests to check for are aphids, whiteflies, soft scale, mealybugs, psyllids, and leafhoppers. Ants can make the problem worse because they feed on honeydew and may protect those pests from natural predators.
To confirm sooty mold, rub the black area gently with a damp finger or cloth. If it smears or wipes off and the pod underneath is still firm, the problem is likely surface mold rather than pod rot.
Fungal and Weather-Related Disease
Wet leaves, poor airflow, overcrowding, and warm humid weather can encourage fungal problems on okra. Leaf spots from organisms such as Alternaria and Cercospora usually show first on foliage, while blossom and fruit blight can attack flowers and young pods during hot, wet periods. Disease spots are more concerning when they are sunken, soft, spreading, or connected with rotting tissue.
Insect Feeding Damage
Stink bugs and leaf-footed bugs can feed on pods and leave them bumpy, crooked, scarred, or unsalable. Aphids and whiteflies are more likely to cause sticky honeydew and sooty mold than direct pod scarring. Spider mites usually cause pale stippling, bronzing, or webbing on leaves rather than a wipeable black coating on pods.
Bruising, Overmaturity, and Storage Injury
Okra pods bruise easily. Dark patches can appear after rough handling, tight packing, washing before storage, or chilling below safe storage temperatures. Old pods also become tough and are more likely to show blemishes. Harvesting while pods are young and handling them gently prevents many post-harvest spots.
Prevention of Okra Black Spots
Prevention works better than rescue treatment. Healthy, well-spaced okra plants dry faster after rain, attract fewer severe pest outbreaks, and produce firmer pods that handle storage better.
Use crop rotation when possible, especially if you have had root-knot nematodes, wilts, or repeated soilborne disease. Avoid planting okra in the same bed year after year. A rotation with unrelated crops helps interrupt pest and disease cycles and supports better soil health.
Keep the area around okra plants weeded, because weeds can shelter insects and reduce airflow. Mulch after the soil has warmed to conserve moisture, reduce soil splash, and suppress weeds. Organic mulch is helpful, but avoid piling it directly against the stem.
Pro Tip: If black spots keep returning, inspect the undersides of leaves early in the morning. Aphids, whiteflies, and other sap-feeding insects are often easier to find before the heat of the day.
Products Worth Considering

100% Organic & Peat-Free: Our organix mulch mix is 100% organic & peat-free. Peat is one of Mother Nature’s most important stores of carbon. Instead of imported peat, the base of our soils is made from upcycled plant matter or wood fines from the United States!

- WATER CONSERVATION : Living mulch retains soil moisture, reducing evaporation and the need for frequent watering.

🌿 100% Organic Mulch: Made from natural wood, GARDENWISE Premium Organic Mulch is free from chemicals and additives, making it perfect for organic gardening and sustainable landscaping.
Proper Planting and Care Techniques
Okra grows best in full sun and well-drained, fertile soil. Plant after the danger of frost has passed and the soil has warmed. Cold, wet soil can slow germination and weaken seedlings, making early disease problems more likely.
| Technique | Benefit |
| Choose a full-sun site with well-drained soil | Helps plants dry quickly and grow vigorously |
| Plant seeds about 1 inch deep after soil warms | Improves germination and reduces seedling stress |
| Thin plants to about 12 inches apart, with rows about 3 feet apart | Improves airflow and makes harvesting easier |
| Use drip irrigation or water at soil level | Keeps foliage drier and reduces disease pressure |
| Harvest every 2–3 days during peak production | Removes tender pods before they become tough, damaged, or overmature |
Before planting, loosen the soil deeply and mix in compost if the bed is low in organic matter. Avoid heavy nitrogen once plants are growing strongly, because excessive tender growth can attract sap-sucking insects.
Choosing Resistant Okra Varieties
Variety choice can help with vigor, yield, harvest ease, and local adaptation, but it should not be treated as a complete cure for black spots. Common home-garden varieties include Clemson Spineless, Burgundy, Cajun Delight, Annie Oakley, Emerald, and Louisiana Green Velvet. Choose varieties recommended for your region, buy seed from a reliable source, and rotate crops if you have had recurring soil disease or nematode problems.
If a seed packet claims resistance, read the exact disease or pest listed. “Vigorous” or “high-yielding” does not mean resistant to sooty mold, aphids, fungal leaf spot, or storage discoloration.
Note: Locally recommended varieties are still useful. They often perform better in your climate, but good spacing, watering, sanitation, and pest monitoring are still required.
Products Worth Considering

OKRA SEEDS 3 VARIETY PACK– Includes Clemson Spineless, Red Burgundy, and Emerald Okra (Abelmoschus esculentus) for tender pods, rich color, and strong garden performance

High Germination Rate - Achieve a lush vegetable garden with our okra seeds, boasting high germination rate for consistent, reliable growth. Perfect for both novice and experienced gardeners, ensuring bountiful harvests with minimal effort.

Name: Clemson Spineless Okra | Type: Heirloom
Organic Pest Control Methods

If the black spots wipe off, focus first on the insects that created the honeydew. Look under leaves and along tender stems for aphids, whiteflies, scale, mealybugs, or leafhoppers. Also watch for ants moving up and down the plant, because they may be feeding on honeydew.
For light infestations, spray plants with a firm stream of water to knock pests off. Remove badly infested leaves if doing so will not strip the plant. Encourage lady beetles, lacewings, parasitic wasps, and other beneficial insects by avoiding unnecessary broad-spectrum insecticides.
If pests continue to build, use a labeled insecticidal soap, horticultural oil, or neem product that is approved for vegetables and for the pest you are treating. Spray coverage matters, especially on the undersides of leaves. Repeat only as the label allows.
Warning: Always read and follow the pesticide label. The label tells you where the product can be used, how much to apply, how long to wait before harvest, and what protective gear is required.
Products Worth Considering
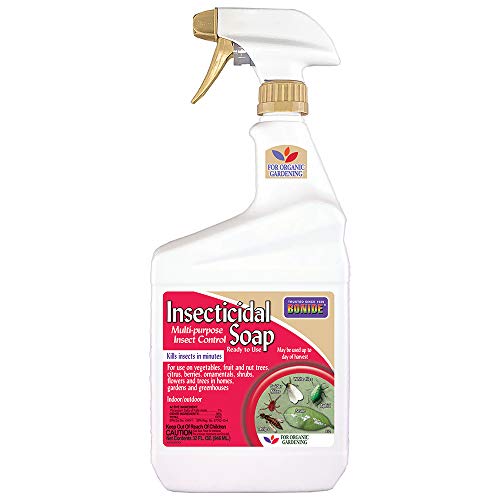
Captain Jack's Insecticidal Super Soap controls species of adelgid, ant, aphid, borer, caterpillar, spider mite, cricket, chinch bug, weevil, fly, thrip, and more

PEST DEFENSE - Insecticidal Super Soap controls species of adelgid, ant, aphid, borer, caterpillar, spider mite, cricket, chinch bug, weevil, fly, thrip, & more.

READY-TO-USE CONTACT SPRAY: No mixing required. Thoroughly spray insecticide on all plant parts, including the underside of leaves. Pests must be sprayed directly to achieve control
Fungal Disease Management
When spots are sunken, soft, spreading, or attached to decaying flowers and pods, treat the problem as possible disease rather than simple sooty mold. Remove infected pods and fallen plant debris promptly. Do not compost heavily diseased material if your compost pile does not heat thoroughly.
Reduce leaf wetness by watering at the soil line, spacing plants properly, and harvesting often so the canopy stays open. If disease appears repeatedly during warm, wet weather, a labeled fungicide may be needed. Organic options such as sulfur, copper, neem oil, or other approved products may be available, but the correct choice depends on the disease and the label.
Do not apply fungicide blindly. If the problem is actually sooty mold from insects, a fungicide will not fix the source of the honeydew. If the problem is bruising or chilling injury, sprays will not help.
Proper Watering and Soil Management
Okra tolerates heat, but drought stress can reduce yield and make plants less resilient. Aim for steady soil moisture rather than frequent shallow watering. Deep watering encourages stronger roots, while drip irrigation keeps leaves and pods drier than overhead sprinklers.
Overwatering or poorly drained soil can stress roots and create disease-friendly conditions. Let the top layer of soil begin to dry between waterings, especially in heavy clay soil. If water stands in the bed after rain, improve drainage before planting another okra crop there.
Use a soil test when possible. A soil test helps you correct pH and nutrient issues without overfertilizing. Adding compost can improve soil structure, but too much high-nitrogen fertilizer can push soft growth that attracts pests.
Avoiding Overcrowding in the Garden
Overcrowding traps humidity around leaves and pods. That extra moisture favors fungal problems and makes it harder to spot pests early. Thin seedlings instead of letting every seedling grow.
For many home gardens, spacing okra plants about 12 inches apart in rows about 3 feet apart is a practical starting point. Larger or heavily branched varieties may need more room. If plants grow into a dense wall, prune lightly to remove damaged leaves and improve airflow, but avoid heavy pruning that shocks the plant during extreme heat.
Harvesting and Storage Tips
Harvest okra while pods are young, tender, and usually about 3–4 inches long, unless your variety stays tender at a larger size. During peak summer production, check plants every 2–3 days. Leaving mature pods on the plant can slow new production and leaves older pods more exposed to insects, bruising, and blemishes.
Wear gloves and long sleeves when harvesting, because even “spineless” okra can irritate skin. Cut pods with a clean knife or shears instead of yanking them. Handle pods gently and avoid packing them tightly in deep containers.
Store okra unwashed until you are ready to use it. Excess moisture during storage can encourage mold and decay. Keep pods dry and cool, but avoid temperatures below 45°F because chilling can cause pitting, discoloration, and faster breakdown.
Note: Rinse okra under clean running water right before cooking or eating. Do not use soap, detergent, bleach, or commercial produce wash on harvested pods.
When to Call a Gardening Expert or Extension Office
If black spots return every season, spread quickly, or affect many plants at once, contact your local Cooperative Extension office or a plant diagnostic clinic. Bring clear photos of the whole plant, close-ups of the spots, and details about watering, spacing, recent weather, and any products used.
Expert help is especially useful if pods are rotting before harvest, leaves are wilting, roots have knots or galls, or the problem affects a commercial crop. A correct diagnosis prevents wasted sprays and helps you plan crop rotation, resistant or locally adapted varieties, and better soil management for the next season.
Frequently Asked Questions
What causes black spots on okra?
Black spots can be caused by sooty mold from honeydew-producing insects, fungal or bacterial disease, insect feeding, bruising, overmaturity, or storage injury. If the black coating wipes off and the pod is firm, sooty mold is likely. If the spot is sunken, soft, or spreading, disease or decay is more likely.
How can I prevent black spots on okra?
Prevent black spots by spacing plants well, watering at the soil line, harvesting often, controlling aphids and whiteflies early, removing diseased pods and plant debris, rotating crops, and storing harvested pods dry and unwashed until use.
Can I still eat okra with black spots?
You can usually eat firm okra if the black coating is only surface sooty mold and rinses off under running water. Do not eat pods that are slimy, rotten, foul-smelling, deeply sunken, leaking, or moldy inside.
How do I treat black spots on okra?
First identify the cause. For wipeable sooty mold, control the honeydew-producing insects. For disease-like spots, remove affected pods, improve airflow, avoid overhead watering, and consider a labeled fungicide if the disease is spreading. For storage spots, harvest younger pods, keep them dry, and avoid chilling below 45°F.
Does neem oil remove black spots from okra?
Neem oil may help manage some soft-bodied insects or certain fungal issues when the product label allows use on vegetables, but it does not repair damaged pod tissue. Use it only after identifying the pest or disease and follow the harvest interval and label directions.
Why do okra pods turn black in the refrigerator?
Okra can darken in storage from bruising, excess moisture, or chilling injury. Store pods unwashed and dry, avoid crushing them, and do not keep them below 45°F for best quality.
Sources
- UC IPM: Sooty Mold — supports the explanation of honeydew, sooty mold, insect sources, and management.
- NC State Extension: Sooty Molds — supports sooty mold control by suppressing honeydew-producing insects.
- Texas A&M AgriLife Extension: Okra — supports okra planting, spacing, watering, pesticide-label caution, and disease monitoring.
- Oklahoma State University Extension: Okra Production — supports irrigation, disease pressure, harvest size, handling, and storage temperature guidance.
- Texas Plant Disease Handbook: Okra — supports okra disease descriptions and cautions about susceptible varieties.
- FDA: Selecting and Serving Produce Safely — supports the recommendation not to wash harvested produce with soap, detergent, bleach, or produce wash.