
Organizing emergency supplies is about more than keeping a closet tidy. Your water, food, medications, first-aid items, documents, lighting, communication tools, and household-specific supplies should be easy to find and ready to move if you must leave quickly. A simple storage system, clear labels, and regular checks can make your emergency kit much more useful when normal routines are disrupted.
Quick Answer
Organize emergency supplies by keeping them in labeled, easy-to-carry containers in accessible locations. Separate water, food, first aid, medications, documents, lighting, communication gear, and household-specific items. Keep additional kits at work and in your vehicle, inspect supplies every six months, and update the contents whenever your household’s needs change.
Key Takeaways
- Keep emergency supplies in clearly labeled containers that are easy to reach and, when appropriate, easy to carry.
- Store at least 1 gallon of water per person per day for three days; the CDC recommends trying to store a two-week supply when practical.
- Include more than food and water: add first aid, lighting, communication tools, medications, sanitation items, documents, chargers, cash, and household-specific supplies.
- Inspect expiration dates, packaging, batteries, and equipment about every six months and reassess your household’s needs at least yearly.
- Keep separate supplies for home, work, and your vehicle so you are not dependent on reaching one location during an emergency.
At a Glance
| Time Required | About 30–60 minutes for an initial organization pass, plus periodic checks |
| Difficulty | Beginner |
| Tools Needed | Storage bin or duffel, sealable bags, labels, permanent marker, and inventory checklist |
| Cost | Varies; you can start with suitable supplies and containers you already own and build the kit over time |
The Importance of Organized Spaces for Emergency Preparedness
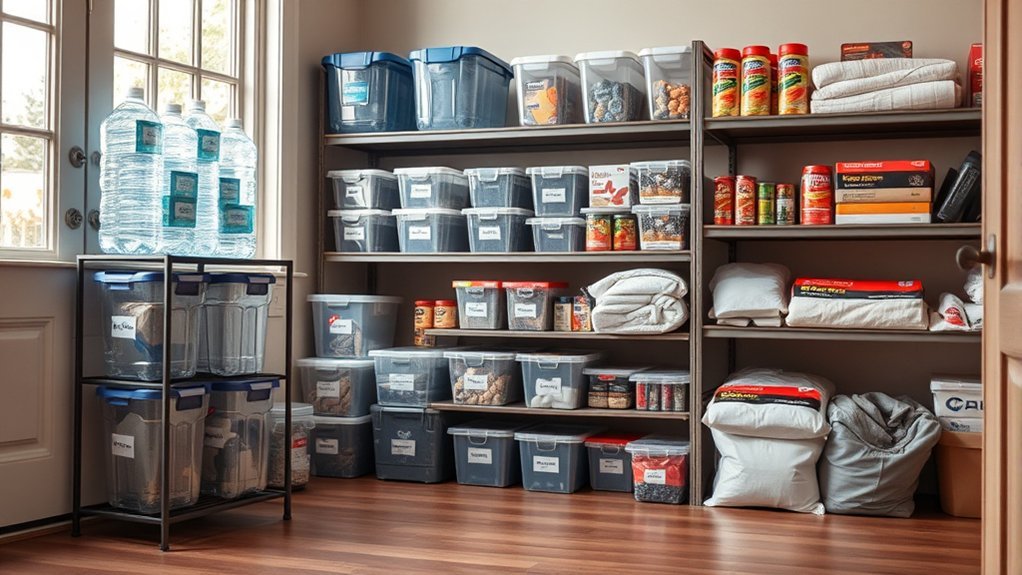
When an emergency happens, you may have only a short time to find medicine, water, a flashlight, important documents, or a go-bag. A designated storage system reduces searching and helps every household member know where essential supplies are kept.
Ready.gov recommends keeping emergency-kit items in airtight plastic bags and placing the complete kit in one or two easy-to-carry containers, such as plastic bins or duffel bags. Your exact setup can differ depending on whether the supplies are intended for staying at home or evacuating.
Group related items together. For example, keep first-aid supplies in one module, food in another, lighting and batteries together, and copies of documents in a waterproof pouch. Place frequently needed items where you can reach them without unloading the entire kit.
Pro Tip: Put a dated inventory sheet inside the lid of your main emergency bin. When you add, use, replace, or remove something, update the sheet immediately so your next inspection is faster.
Step-by-Step Guide to Building Your Basic Disaster Supplies Kit
A useful disaster supplies kit should cover basic needs while remaining organized enough to use under stress. Build the core kit first, then customize it for your household and local hazards.
- Choose the right containers. Use sturdy plastic bins, backpacks, or duffel bags that are appropriate for the weight of the contents. A portable go-bag should be light enough for the intended person to carry.
- Store emergency water. The CDC recommends at least 1 gallon per person per day for three days and suggests trying to store a two-week supply when possible. People who are pregnant, ill, living in hot climates, or caring for pets may need more.
- Add several days of food. Choose shelf-stable foods your household will actually eat and that require little preparation. Include a manual can opener when canned foods are part of the kit.
- Add essential safety and communication supplies. Include a flashlight, extra batteries, battery-powered or hand-crank radio, first-aid kit, whistle, phone chargers or backup power, sanitation supplies, and local or offline maps.
- Add documents and practical essentials. Keep copies of important identification, insurance and medical information, emergency contacts, relevant prescription information, spare keys, and some emergency cash in protected storage.
- Customize the kit. Add prescription medications, medical equipment, glasses, hearing-aid batteries, infant supplies, menstrual products, special dietary foods, mobility items, comfort items for children, and pet food, water, medications, leash or carrier as needed.
- Label and record everything. Mark bins by category and keep an inventory with purchase or storage dates, relevant expiration or best-quality dates, and the next inspection month.
The CDC recommends storing at least 1 gallon of water per person per day for three days and trying to store a two-week supply when possible.
Best Practices for Storing Supplies
Store emergency supplies where they are protected but still easy to reach. A closet near an exit, a dedicated pantry shelf, or another accessible interior area may work better than a remote attic or an area blocked by furniture.
Use sealable bags to protect small items from moisture, and keep the main kit in a sturdy container. Boxed foods can be placed in tightly closed plastic or metal containers to help protect them from pests and moisture.
Do not treat every emergency supply the same. Water needs suitable food-grade storage containers. Medicines may require specific temperatures. Batteries should be protected from damage and checked for leakage. Important papers should be kept in a water-resistant or waterproof pouch.
Avoid storing emergency supplies next to gasoline, pesticides, household chemicals, or other contaminants. The CDC also advises keeping stored emergency water away from direct sunlight and toxic substances.
Warning: Do not store medication, water, or food in conditions that conflict with their labels or safety requirements. Heat, freezing temperatures, floodwater, chemicals, and damaged packaging can make some supplies unsafe or ineffective.
The Importance of Designated Storage Areas
Designated storage areas make emergency supplies easier to find and maintain. Instead of scattering flashlights, batteries, food, first-aid items, and documents throughout the home, assign each category a predictable location.
- Main home kit: Keep the largest collection of emergency supplies in an accessible area that all responsible household members know.
- Go-bags: Keep portable evacuation supplies where they can be retrieved quickly without entering a dangerous part of the home.
- Work kit: Keep basic food, water, medication, comfortable shoes, communication items, and other personal necessities where permitted at work.
- Vehicle kit: Carry first aid, water, shelf-stable snacks, flashlight, phone power, visibility equipment, weather-appropriate clothing, and vehicle-specific supplies.
Customize each location instead of making four identical kits. Your home can hold heavier water reserves, while a go-bag should prioritize portability. A vehicle kit may need seasonal changes for extreme heat or winter weather.
How to Keep Your Medications Organized for Emergencies?
Medication planning deserves its own section because medicines can be affected by heat, moisture, flooding, loss of refrigeration, and interrupted pharmacy access.
Keep an up-to-date medication list showing each medicine’s name, dose, purpose, and instructions. Add relevant pharmacy, prescriber, allergy, and emergency-contact information. Keep a protected copy with your emergency documents and another accessible copy where appropriate.
The FDA recommends protecting medications from possible water damage and planning for medicines that require refrigeration. Keep medicine bottles or packages properly identified rather than relying on an unlabeled container.
Ask your pharmacist or healthcare professional how much emergency medication you can obtain and how each product should be stored. Requirements differ by medicine, and some temperature-sensitive products may have special rules when refrigeration is interrupted.
Note: If medicine has contacted floodwater, been exposed to excessive heat, or been stored outside its required temperature range, follow FDA guidance and contact a pharmacist, healthcare professional, or manufacturer when you are unsure whether it remains usable.
Essential Food Storage Tips for Emergency Preparedness
Emergency food should be shelf-stable, easy to prepare, appropriate for your household’s dietary needs, and stored where heat, moisture, pests, and household chemicals are less likely to damage it.
Choose foods your family already eats so they can be rotated into normal meals before quality declines. Include options that do not depend on electricity and remember a manual can opener for cans that require one.
Food Container Selection
- Protect packaged foods: Use tightly closed plastic or metal outer containers when necessary to reduce exposure to pests and moisture.
- Keep foods dry: Choose a cool, dry storage location rather than a damp basement corner or hot attic.
- Label clearly: Mark the purchase or storage date where useful so older supplies are easy to identify.
- Use FIFO rotation: Move older items forward and use them first, replacing them with newer stock during normal grocery shopping.
Inspect packages during every kit check. Do not rely on food that is leaking, contaminated, or otherwise damaged. For canned goods, serious swelling, leakage, or significant rust or damage is a reason to discard the product.
Expiration Date Monitoring
Printed dates require some judgment. According to the USDA Food Safety and Inspection Service, many labels such as “Best if Used By” refer primarily to quality rather than automatically marking the day a shelf-stable food becomes unsafe.
Follow product-specific instructions and true use-by requirements when applicable. Also consider packaging condition and storage history. Rotate food before quality becomes poor so your emergency kit remains appetizing and practical rather than becoming a collection of forgotten cans.
Embracing Vertical Storage Solutions for Efficiency
Vertical shelving can make emergency supplies easier to see, but it must be used safely. Emergency water is heavy, so keep large water containers and other heavy items on lower, stable shelves rather than overhead.
- Lower shelves: Store water and heavier bins low to reduce lifting and tip-over hazards.
- Eye-level shelves: Keep first aid, lighting, radio, batteries, and frequently checked items within easy reach.
- Upper shelves: Reserve higher areas for lightweight blankets, empty bags, or other non-breakable items.
- Keep pathways clear: Do not stack emergency bins where they block doors, hallways, utilities, or evacuation routes.
Labels facing outward make inventory checks faster. Avoid stacking so many containers that you must dismantle the entire storage area to reach one critical item.
How to Maintain Clutter-Free Storage Areas
A clutter-free emergency-storage area is not about minimalist decorating. It is about making critical supplies visible, reachable, and easy to inspect. Remove unrelated household items that block the kit and avoid using emergency bins as long-term storage for things that have nothing to do with preparedness.
Regularly Assess Belongings
Use each scheduled kit inspection to remove damaged supplies, rotate food, check water, test equipment, and confirm that household-specific items still match current needs.
- Check dates and condition: Inspect medicines, foods, batteries, first-aid products, and other dated items.
- Test equipment: Confirm flashlights, radios, chargers, and battery packs still work.
- Update sizes and needs: Children’s clothing, diapers, food needs, medical equipment, prescriptions, and pet supplies can change.
- Replace used items: Anything borrowed from the emergency kit should be replaced promptly.
Implement Daily Routines
You do not need to reorganize the emergency kit every day. Instead, use simple household routines that prevent supplies from disappearing between formal inspections.
| Routine | What to Do |
|---|---|
| After Using an Item | Replace it or record it on the restock list immediately. |
| During Grocery Shopping | Rotate suitable emergency food into normal meals and replace it with newer stock. |
| Every Six Months | Inspect dates, packaging, water, batteries, first aid, medications, and equipment. |
| Once a Year | Review changes in household members, medical needs, pets, vehicles, work locations, and local hazards. |
Optimize Storage Solutions
Organize supplies by function rather than by appearance. A practical system might use clearly labeled modules such as:
- Water
- Food and can opener
- First aid and medical information
- Prescription medications
- Lighting, radio, and power
- Sanitation and hygiene
- Documents, contacts, cash, and maps
- Children, pets, or special medical needs
Place the most time-sensitive supplies where they can be reached immediately. The goal is to avoid digging through clothing or food to find a flashlight, medication, or first-aid item.
Involving Your Family in Organization Efforts
Everyone who is old enough to participate should know where the emergency supplies are stored and which bags are intended for evacuation. Show household members how the labels work and where important items such as first aid, flashlights, water, medication information, and emergency contacts are located.
Give family members age-appropriate responsibilities. A child may help check pet supplies or confirm that comfort items are packed, while an adult can handle medications, documents, water, and equipment testing.
Also discuss what happens if family members are separated. Keep emergency contact information with the kit and make sure children who are able to do so know important names and phone numbers.
Customize supplies for local risks. A household exposed to winter storms may need different clothing and vehicle supplies than one preparing for hurricanes, wildfire evacuation, flooding, earthquakes, or extreme heat. Follow local emergency-management instructions for the hazards in your area.
How to Keep Your Emergency Kit Up-to-Date
A kit is only useful if its contents still work. Instead of opening it once a year and assuming everything is fine, use a recurring inspection schedule and update it whenever something changes in your household.
Regular Inventory Checks
The CDC recommends checking family emergency-kit expiration dates and functionality every six months. A six-month schedule is easy to remember if you tie it to two predictable dates each year.
- Check water: Follow dates on commercially bottled water. Replace home-filled stored water every six months.
- Check food: Rotate older supplies and inspect packaging condition.
- Check medication: Confirm quantities, dates, prescriptions, and storage requirements.
- Test equipment: Turn on flashlights and radios and inspect batteries and power banks.
- Review documents: Update contact, insurance, medical, and identification copies as needed.
- Check household-specific items: Replace outgrown clothing, outdated infant supplies, changed pet supplies, or obsolete medical items.
Update Expiration Dates
Use a written or digital inventory to record items that need replacement. Do not assume that every date printed on food has the same meaning, but always follow medication expiration dates and product-specific safety instructions.
Replace damaged, leaking, contaminated, or unreliable items immediately rather than waiting for the next scheduled review. Batteries that leak, compromised first-aid packaging, damaged food containers, or medicines exposed to unsafe conditions should receive prompt attention.
Review the overall kit at least yearly even when every product remains within date. A new baby, different medication, new pet, change of job, move to another climate, or new medical device can change what your household needs during an emergency.
Frequently Asked Questions
How much emergency water should I store?
The CDC recommends at least 1 gallon per person per day for three days and suggests trying to store a two-week supply if possible. You may need more for hot climates, illness, pregnancy, pets, or other household needs.
Where is the best place to store an emergency kit?
Keep your main kit in a cool, accessible location that household members know and can reach quickly. Avoid areas exposed to excessive heat, moisture, chemicals, or blocked evacuation paths. Heavy items such as water are safest on stable lower shelves.
How often should I check my emergency supplies?
Inspect expiration dates, package condition, batteries, first-aid items, medications, and equipment about every six months. Review the overall needs of your household at least once a year and whenever a major change occurs.
Should medications be stored inside an emergency kit?
Include appropriate emergency medication supplies when possible, but follow each medicine’s labeled storage requirements. Keep an updated medication list, protect medicine from water damage, and ask your pharmacist or healthcare professional about refrigeration, refill quantities, and other product-specific requirements.
Do I need separate emergency kits for home, work, and my car?
Yes, separate supplies can help because you may not be at home when an emergency occurs. Your home kit can hold larger reserves, while work and vehicle kits should focus on portable essentials appropriate to those locations.
What should I keep in a vehicle emergency kit?
Useful basics include first-aid supplies, water, shelf-stable food, a flashlight, phone power, visibility or signaling equipment, basic vehicle tools, and clothing or blankets appropriate for local weather. Inspect vehicle supplies seasonally because cars can experience extreme temperatures.
Sources
- Ready.gov — Build A Kit — basic disaster-supply categories, portable containers, and preparedness essentials.
- CDC — How to Create an Emergency Water Supply — water quantities, food-grade containers, storage conditions, and six-month water replacement.
- CDC — Emergency Kit Checklist for Families — essential supplies, household-specific needs, and six-month kit checks.
- FDA — Safe Drug Use After a Natural Disaster — medication lists, water protection, temperature concerns, and damaged medicine guidance.
- USDA FSIS — Food Product Dating — explains the meaning and limitations of food date labels.
- American Red Cross — Survival Kit Supplies — emergency food, water, communication, documents, medical, family, and location-specific supplies.
Conclusion
An organized emergency kit makes preparedness practical. Keep water, food, first aid, medications, communication gear, documents, sanitation supplies, and household-specific items in predictable locations, while maintaining smaller kits for work and your vehicle. Store heavy items safely, protect supplies from damaging conditions, and make sure everyone in your household knows where important items are kept.
Inspect the kit about every six months, replace or rotate items when needed, and reassess your household’s needs at least yearly. A few scheduled checks can keep a forgotten storage bin from becoming an outdated kit and turn it into supplies you can actually depend on during an emergency.