

Selecting the appropriate equipment is a fundamental step in the journey of photography, particularly when it comes to capturing the breathtaking vistas and intricate details found along cliff walks. The choice of camera can significantly influence the quality of your images. While professional DSLRs and mirrorless cameras offer superior image quality and versatility, many photographers find that high-end compact cameras or even smartphones can yield impressive results, especially with the right techniques.
A camera with manual settings allows for greater control over exposure, shutter speed, and aperture, which is crucial when dealing with the dynamic lighting conditions often encountered on cliff walks. In addition to the camera body, lenses play a pivotal role in determining the outcome of your photographs. A wide-angle lens is particularly beneficial for capturing expansive landscapes, allowing you to include more of the scene in a single frame.
Conversely, a telephoto lens can help isolate specific features of the landscape, such as distant cliffs or unique rock formations. Furthermore, investing in a sturdy tripod is essential for stabilizing your camera during long exposures or in windy conditions, which are common on cliff edges. Accessories such as polarizing filters can enhance colors and reduce glare from water surfaces, while neutral density filters allow for longer exposure times, creating a dreamy effect in moving water.
Key Takeaways
- Choose equipment that suits your photography style and needs, such as a DSLR camera for high-quality images or a compact camera for portability.
- Experiment with different angles to find the most visually appealing and unique perspectives for your cliff walk photography.
- Understand how natural lighting can enhance or detract from your photos, and consider the time of day and weather conditions for the best results.
- Use composition techniques such as the rule of thirds, leading lines, and framing to create visually striking and balanced images.
- Capture the movement of the ocean, wildlife, or people on the cliff walk to add dynamism and interest to your photos.
- Edit and enhance your photos using software to adjust exposure, contrast, and colors for a polished and professional look.
- Be prepared for different weather conditions by bringing protective gear for your equipment and yourself, and adjusting your settings accordingly.
- Prioritize safety by staying on designated paths, avoiding unstable edges, and being aware of your surroundings at all times.
Finding the Perfect Angle
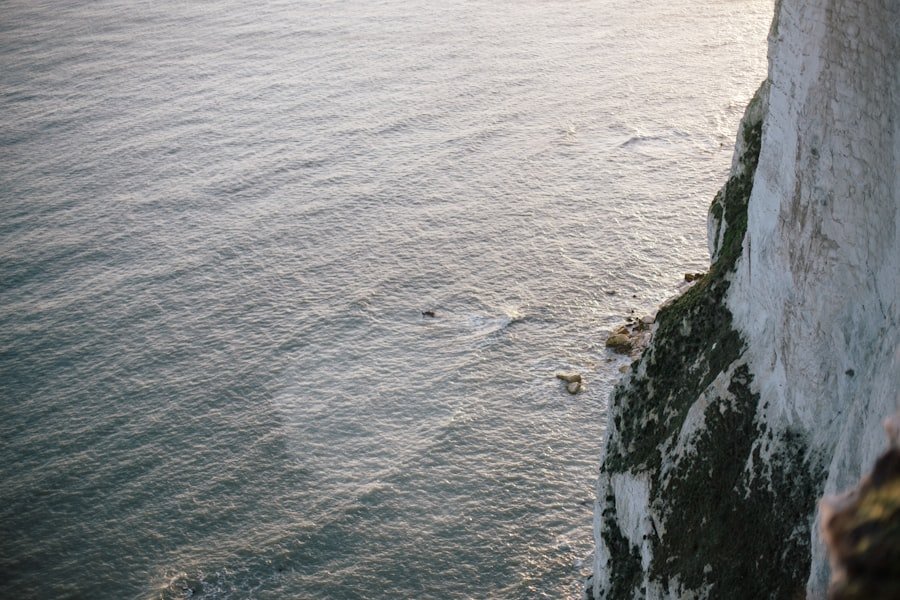
The angle from which you shoot can dramatically alter the perception of your photographs. When photographing cliff walks, it’s essential to explore various perspectives to find the most compelling composition. A low angle can emphasize the grandeur of towering cliffs, making them appear even more imposing against the sky.
Conversely, shooting from a higher vantage point can provide a sweeping view of the landscape below, showcasing the intricate patterns of the terrain and the interplay of light and shadow. Experimenting with different angles also allows you to capture unique details that might otherwise go unnoticed. For instance, positioning yourself at an angle that highlights the texture of rocks or the movement of waves crashing against the cliffs can add depth and interest to your images.
Additionally, incorporating foreground elements—such as wildflowers or grasses—can create a sense of depth and lead the viewer’s eye into the scene. The key is to remain open to exploration; sometimes, the best shots come from unexpected angles that you might not initially consider.
Understanding Lighting
Lighting is one of the most critical aspects of photography, influencing mood, texture, and color in your images. Natural light can vary dramatically throughout the day, and understanding how to work with these changes is essential for capturing stunning cliff walk photographs. The golden hours—shortly after sunrise and just before sunset—are often considered the best times for outdoor photography.
During these times, the soft, warm light casts long shadows and enhances colors, creating a magical atmosphere that can transform even ordinary scenes into extraordinary images. However, shooting during midday can also yield interesting results if approached thoughtfully. The harsh overhead sun can create stark contrasts and deep shadows, which may be used creatively to emphasize textures in rock formations or to highlight the ruggedness of cliffs.
In such conditions, it may be beneficial to seek out shaded areas or to use reflectors to bounce light onto your subject. Understanding how to manipulate light—whether through natural means or with additional equipment—can elevate your photography and help you capture the essence of your surroundings.
Composition Techniques
| Technique | Description |
|---|---|
| Rule of Thirds | Dividing the image into nine equal parts using two horizontal and two vertical lines, and placing the subject at the intersection points. |
| Leading Lines | Using lines in the image to lead the viewer’s eye towards the main subject or focal point. |
| Symmetry and Patterns | Creating balance and harmony in the image by using symmetrical elements or repeating patterns. |
| Depth of Field | Controlling the area in the image that appears sharp and in focus, creating a sense of depth. |
| Frame within a Frame | Using elements within the image to create a frame around the main subject, drawing attention to it. |
Mastering composition is vital for creating visually appealing photographs that resonate with viewers. The rule of thirds is a foundational principle that can guide your framing decisions. By dividing your frame into a grid of nine equal parts and placing key elements along these lines or at their intersections, you can create a balanced and engaging composition.
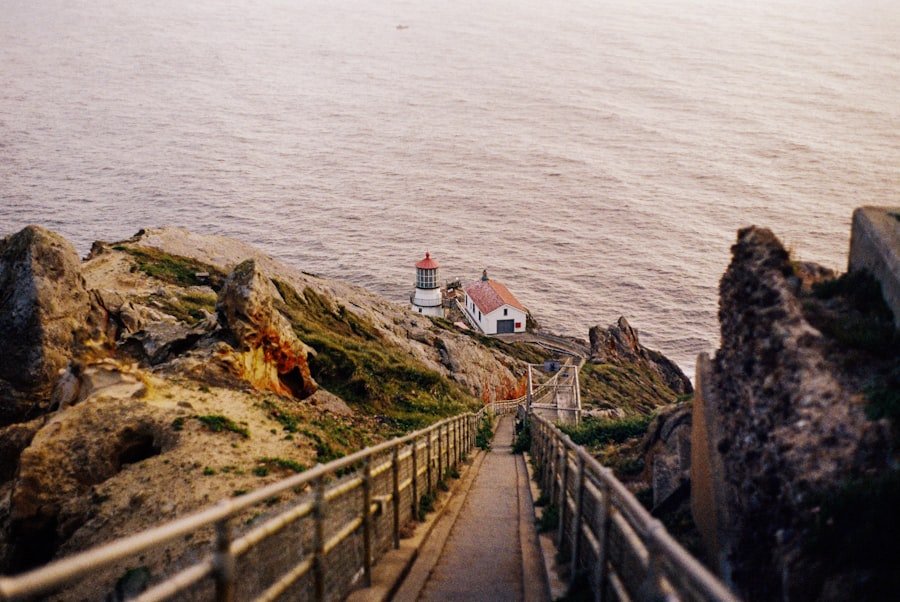
For instance, positioning a cliff edge along one vertical line while placing a dramatic sky along the top horizontal line can draw attention to both elements and create a sense of harmony. Beyond basic rules, exploring leading lines can enhance your compositions significantly. Natural lines found in the landscape—such as paths, rivers, or rock formations—can guide the viewer’s eye through the image and create a sense of depth.
Additionally, incorporating layers into your photographs adds complexity; foreground elements can frame your subject while background features provide context. This technique invites viewers to explore every part of the image rather than focusing solely on a single point of interest.
Capturing the Movement
Cliff walks often present dynamic scenes filled with movement—waves crashing against rocks, birds soaring overhead, or even hikers traversing narrow paths. Capturing this movement effectively requires an understanding of shutter speed and how it affects motion in your images. A fast shutter speed freezes action, allowing you to capture sharp details of splashing waves or birds in flight.
Conversely, using a slower shutter speed can create a sense of motion; for example, blurring water as it cascades over rocks can evoke feelings of tranquility and fluidity.
Utilizing burst mode can be particularly helpful when photographing fast-moving subjects; this allows you to take multiple shots in quick succession, increasing your chances of capturing that perfect moment.
Additionally, panning techniques—where you move your camera along with a moving subject—can create striking images that convey speed and energy.
Editing and Enhancing
Post-processing is an integral part of modern photography that allows you to refine your images and bring your creative vision to life. Software such as Adobe Lightroom or Photoshop provides powerful tools for adjusting exposure, contrast, saturation, and sharpness. Basic edits like cropping can improve composition by removing distracting elements from the frame or emphasizing key subjects within your photograph.
Moreover, adjusting white balance can correct color casts caused by varying lighting conditions, ensuring that your images reflect the true beauty of the scene. Advanced editing techniques can further enhance your photographs. For instance, using layers in Photoshop allows for selective adjustments; you might brighten a specific area of a cliff face while leaving other parts untouched.
Additionally, techniques such as HDR (High Dynamic Range) imaging enable you to capture a wider range of tones by combining multiple exposures into one image. This is particularly useful in high-contrast scenes where both shadows and highlights are present. However, it’s crucial to maintain a natural look; over-editing can detract from the authenticity of your photographs.
Tips for Shooting in Different Weather Conditions
Weather conditions can significantly impact both the experience of shooting on cliff walks and the resulting photographs. Overcast days often provide soft, diffused light that minimizes harsh shadows and highlights; this can be ideal for capturing details in rock formations or lush vegetation without worrying about blown-out highlights. Rainy weather can also create unique opportunities; wet surfaces reflect light beautifully and enhance colors, adding vibrancy to your images.
Conversely, shooting in bright sunlight requires careful consideration to avoid overexposed highlights and deep shadows.
If you find yourself facing strong winds or unpredictable weather changes common on cliff walks, securing your equipment is paramount; using weather-sealed gear or protective covers can safeguard against moisture and dust while ensuring that you remain focused on capturing stunning images.
Safety Precautions for Cliff Walk Photography
While cliff walks offer breathtaking views and incredible photographic opportunities, they also come with inherent risks that must be managed carefully. Safety should always be a priority when venturing near steep edges or unstable terrain. Wearing appropriate footwear with good grip is essential for navigating rocky paths safely; hiking boots designed for rugged terrain provide stability and support while reducing the risk of slips or falls.
Additionally, it’s wise to familiarize yourself with the area before embarking on your photography adventure. Researching trail conditions and potential hazards—such as loose rocks or sudden drops—can help you prepare adequately. Carrying essential safety gear like a first aid kit, extra water, and navigation tools ensures that you are equipped for any situation that may arise during your outing.
Always inform someone about your plans and expected return time; this precaution adds an extra layer of safety when exploring remote locations where help may not be readily available. By prioritizing safety alongside creativity and technical skill, photographers can fully immerse themselves in the beauty of cliff walks while capturing stunning images that reflect their experiences in these awe-inspiring landscapes.
If you’re planning a visit to the First Cliff Walk viewpoint, renowned for its breathtaking vistas and perfect photo opportunities, it’s essential to come prepared with some photography tips. To capture the stunning landscapes, consider using a wide-angle lens to encompass the vastness of the scenery and experiment with different times of the day to play with natural lighting. For more inspiration on capturing the beauty of nature, you might find it interesting to explore the delightful world of Asian melon, which offers its own unique visual appeal. Check out this related article for more insights:
