

Garlic, a staple in kitchens around the world, is not only valued for its culinary applications but also for its numerous health benefits. Harvesting garlic is a crucial step in the cultivation process, as it directly impacts the quality and longevity of the bulbs. The timing and method of harvesting can significantly influence the flavor, texture, and storage potential of garlic.
Understanding the intricacies of garlic harvesting is essential for both home gardeners and commercial growers alike. This article delves into the various aspects of garlic harvesting, from recognizing the right time to pull the bulbs from the ground to ensuring they are properly cured and stored for maximum shelf life. The process of harvesting garlic is not merely about pulling it from the soil; it involves a keen understanding of the plant’s growth cycle and environmental factors.
Garlic is typically planted in the fall or early spring, depending on the variety and local climate conditions. As the plants grow, they undergo a series of developmental stages that culminate in bulb formation. Knowing when to harvest garlic requires careful observation and an appreciation for the signs that indicate readiness.
This article will explore these signs, the ideal conditions for curing, and best practices for storing garlic to ensure that it remains flavorful and potent for as long as possible.
Key Takeaways
- Garlic should be harvested when the lower leaves have turned brown and dried, but the upper leaves are still green and healthy.
- Factors affecting the timing of garlic harvest include the variety of garlic, weather conditions, and the planting date.
- Signs that garlic is ready for harvest include the browning and drying of the lower leaves, as well as the visible formation of cloves within the bulb.
- The best time to harvest garlic is in the morning on a dry day, to ensure the bulbs are at their peak flavor and aroma.
- Properly curing garlic involves hanging the bulbs in a warm, dry, and well-ventilated area for 2-4 weeks to allow them to dry and develop their full flavor.
Understanding the Ripening Process of Garlic
The ripening process of garlic is a fascinating journey that begins with planting individual cloves. Each clove has the potential to grow into a full bulb, which typically consists of several smaller cloves encased in a papery skin. As garlic plants grow, they develop green leaves that photosynthesize and contribute to the energy needed for bulb formation.
This process can take several months, during which time the plant undergoes various physiological changes. The ripening phase is marked by a shift in focus from leaf growth to bulb development, which is critical for determining when to harvest. As garlic matures, it enters a phase known as “bulbing,” where the energy produced by the leaves is directed toward enlarging the underground bulbs.
This stage is influenced by several factors, including temperature, soil quality, and moisture levels. Garlic typically requires a period of cool weather followed by warmer temperatures to stimulate bulb growth effectively. During this time, growers must monitor their plants closely, as any stressors—such as drought or excessive rain—can impact bulb size and quality.
Understanding this ripening process is essential for determining the optimal harvest time and ensuring that the garlic reaches its full potential.
Factors Affecting the Timing of Garlic Harvest
Several factors can influence when garlic should be harvested, making it essential for growers to be vigilant throughout the growing season. One of the primary factors is the variety of garlic being cultivated. There are two main types: hardneck and softneck garlic, each with distinct growth patterns and maturation timelines.
Hardneck varieties tend to mature earlier than softneck types, often requiring different harvesting strategies. Additionally, local climate conditions play a significant role; regions with cooler temperatures may see garlic maturing at different times compared to warmer climates. Soil health is another critical factor affecting garlic harvest timing.
Nutrient-rich soil promotes robust growth and can lead to larger bulbs, while poor soil conditions may stunt development. Growers should also consider irrigation practices; too much or too little water can stress plants and affect their readiness for harvest. Pest and disease pressures can further complicate matters, as infestations or infections can lead to premature harvesting or reduced bulb quality.
By understanding these factors, growers can make informed decisions about when to harvest their garlic for optimal results.
Signs that Garlic is Ready for Harvest
| Signs that Garlic is Ready for Harvest |
|---|
| Yellowing and browning of the lower leaves |
| Soft and papery outer skins |
| Visible cloves within the bulb |
| Strong garlic aroma |
| Stiff, upright stems |
Recognizing the signs that garlic is ready for harvest is crucial for ensuring high-quality bulbs. One of the most noticeable indicators is the condition of the leaves. As garlic matures, the lower leaves will begin to yellow and die back while the upper leaves remain green.
A general rule of thumb is to wait until about one-third of the leaves have turned brown before considering harvest. This visual cue signals that the bulbs have reached their full size and are ready to be pulled from the ground. Another sign to look for is the formation of a hard outer skin on the bulbs.
As garlic matures, it develops protective layers that help preserve its freshness during storage. If you gently dig around a bulb and find that it has formed a firm outer layer, it’s likely time to harvest.
These signs are essential for determining when to harvest garlic, as waiting too long can lead to split bulbs or reduced storage life.
The Best Time to Harvest Garlic
Timing is everything when it comes to harvesting garlic. The best time to pull garlic from the ground typically falls between late spring and early summer, depending on local climate conditions and planting times. For most regions in North America, this translates to late June through early July.
However, specific timing can vary based on factors such as variety and weather patterns during the growing season. Observing local agricultural calendars and consulting with fellow growers can provide valuable insights into optimal harvest times. Harvesting garlic during dry weather is also advisable, as wet conditions can lead to issues such as rot or mold during curing.
Ideally, growers should aim to harvest on a sunny day when the soil is dry but not overly parched. This not only makes pulling the bulbs easier but also helps prevent damage during handling. By paying attention to both environmental conditions and plant indicators, growers can ensure they harvest their garlic at just the right moment for maximum flavor and storage potential.
How to Properly Cure Garlic
Curing garlic is an essential step that follows harvesting and plays a significant role in preserving its flavor and extending its shelf life. The curing process involves drying out the harvested bulbs in a controlled environment to allow them to develop their characteristic taste while preventing spoilage. To properly cure garlic, begin by gently shaking off any excess soil from the bulbs without washing them, as moisture can lead to rot during storage.
Once cleaned, garlic should be laid out in a single layer in a well-ventilated area away from direct sunlight. Ideal locations include shaded porches or garages with good airflow. It’s important not to overcrowd the bulbs; proper spacing allows air circulation, which is crucial for effective curing.
During this time, growers should monitor their garlic regularly for any signs of mold or decay.
Ideal Conditions for Curing Garlic
The conditions under which garlic is cured significantly impact its quality and longevity. Ideally, curing should take place in an environment with low humidity levels—around 60% or lower—since high humidity can promote mold growth and spoilage. Temperature also plays a critical role; a range between 70°F and 80°F (21°C – 27°C) is generally considered optimal for curing garlic effectively.
Good air circulation is another vital component of successful curing. Growers can enhance airflow by placing bulbs on racks or screens rather than directly on solid surfaces like tables or countertops. This setup allows air to circulate around all sides of each bulb, promoting even drying.
Additionally, avoiding direct sunlight during curing helps maintain flavor integrity while preventing overheating that could compromise bulb quality.
Length of Time Needed for Curing Garlic
The length of time required for curing garlic varies based on several factors including environmental conditions and bulb size. Generally speaking, most garlic varieties require about two to four weeks of curing time before they are ready for storage. During this period, the outer skins will dry out completely while the inner cloves continue to mature in flavor.
Growers should regularly check on their curing garlic throughout this period, looking for signs that indicate readiness such as dry outer skins and firm bulbs. If any bulbs show signs of mold or decay during curing, they should be removed immediately to prevent contamination of healthy bulbs. Once cured properly, garlic will have a papery outer layer that protects it during storage while enhancing its flavor profile.
Checking for Readiness After Curing
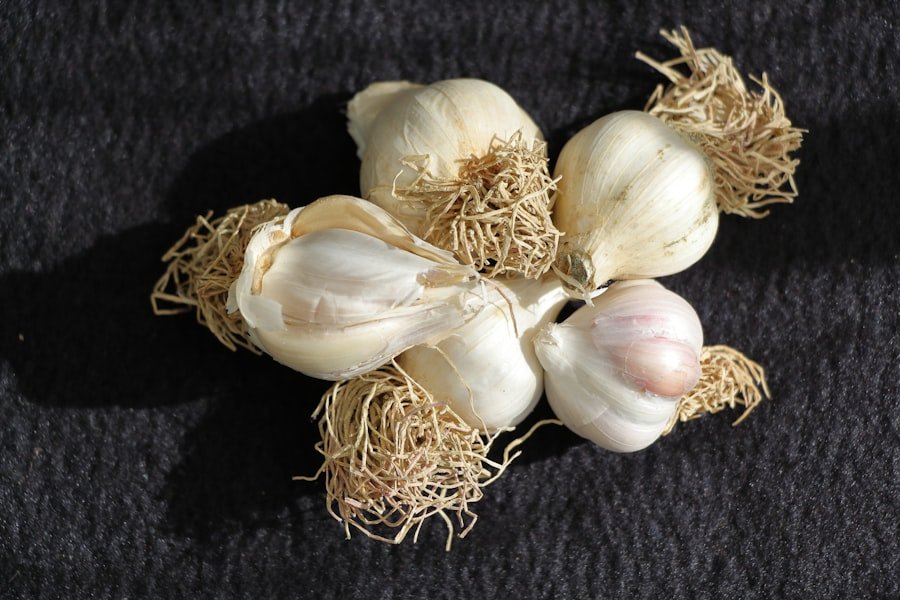
After completing the curing process, it’s essential to check each bulb for readiness before storing them away for long-term use. A well-cured bulb will have a dry outer skin that feels papery to the touch while maintaining firmness when squeezed gently. The roots should also be dry and brittle; if they feel moist or spongy, this could indicate incomplete curing or potential spoilage.
Another important aspect to consider is whether any bulbs have developed soft spots or signs of mold during curing; these should be discarded immediately as they can compromise other stored bulbs’ quality. Once all bulbs have been inspected and deemed ready for storage, they can be trimmed down by cutting off excess roots and leaves while leaving about an inch of stem intact for easy handling.
Storing Cured Garlic
Proper storage techniques are crucial for maintaining the quality of cured garlic over time. Once cured and inspected for readiness, garlic should be stored in a cool, dark place with good ventilation—ideally at temperatures between 60°F and 65°F (15°C – 18°C). A pantry or cellar works well if these conditions are met; however, avoid storing garlic in plastic bags or containers that trap moisture as this can lead to rot.
For longer-term storage options, some growers choose to braid softneck varieties together using their stems before hanging them in a cool area; this not only saves space but also adds an aesthetic touch to kitchen decor. Hardneck varieties may not braid as easily due to their stiff necks but can still be stored effectively using mesh bags or baskets that allow airflow around each bulb.
Tips for Maximizing the Shelf Life of Cured Garlic
To maximize the shelf life of cured garlic, several best practices can be implemented during both storage and handling processes. First and foremost, always ensure that only fully cured bulbs are stored; any moisture left in improperly cured garlic will significantly reduce its longevity and increase spoilage risk. Regularly inspect stored garlic every few weeks for any signs of decay or sprouting; removing affected bulbs promptly helps prevent contamination from spreading throughout your stockpile.
Additionally, consider using breathable containers such as paper bags or mesh sacks rather than airtight options which trap moisture inside. Finally, keep an eye on temperature fluctuations in your storage area; consistent temperatures help maintain quality over time while extreme changes can lead to sprouting or spoilage issues down the line. By following these guidelines diligently throughout both curing and storage phases, you’ll ensure that your homegrown garlic remains flavorful and fresh long after harvest season has ended.
FAQs
What is the purpose of curing garlic after harvest?
Curing garlic after harvest helps to improve its flavor, increase its shelf life, and make it easier to store.
How long does it take to cure garlic after harvest?
Garlic typically takes 2-4 weeks to cure after harvest, depending on the drying conditions.
What are the ideal conditions for curing garlic?
Garlic should be cured in a warm, dry, well-ventilated area with good air circulation. The ideal temperature for curing garlic is around 70-80°F (21-27°C).
How do you know when garlic is fully cured?
Garlic is fully cured when the outer skins are dry and papery, the roots are dry and brittle, and the necks are tight and firm.
Can garlic be cured outdoors?
Garlic can be cured outdoors if the weather is warm and dry, but it should be protected from direct sunlight and rain.
What is the best way to store cured garlic?
Cured garlic should be stored in a cool, dry, well-ventilated place, such as a pantry or cellar. It can be stored in mesh bags, braided into garlic ropes, or placed in a single layer in a wooden crate or basket.
