

When embarking on the journey of growing baby okra, selecting the appropriate variety is paramount. Baby okra, known for its tender pods and delicate flavor, comes in several cultivars, each with unique characteristics. Some popular varieties include ‘Baby Bubba,’ which is a compact plant that produces small, tender pods, and ‘Clemson Spineless,’ renowned for its spineless pods that are easy to harvest.
The choice of variety can significantly influence not only the yield but also the taste and texture of the okra. For instance, ‘Emerald’ is another excellent choice, known for its vibrant green color and high productivity, making it a favorite among home gardeners. In addition to flavor and yield, consider the growing conditions in your area.
Some varieties are more tolerant of heat and drought, while others may thrive in cooler climates. For example, ‘Annie Oakley II’ is a heat-tolerant variety that can withstand high temperatures, making it suitable for southern regions. Conversely, if you live in a cooler area, you might opt for ‘Burgundy,’ which not only offers a unique color but also performs well in less-than-ideal conditions.
Understanding the specific needs and characteristics of each variety will help you make an informed decision that aligns with your gardening goals.
Key Takeaways
- Choose a baby okra variety that is suitable for your climate and soil conditions
- Prepare the soil by adding organic matter and ensuring good drainage
- Plant baby okra seeds 1 inch deep and 12-18 inches apart in rows
- Water baby okra regularly and fertilize with a balanced fertilizer every 4-6 weeks
- Keep an eye out for pests and diseases, and use organic methods to manage them
Preparing the Soil for Planting Baby Okra
The foundation of a successful baby okra crop lies in the soil preparation. Okra thrives in well-draining, loamy soil rich in organic matter. Before planting, it is essential to conduct a soil test to determine pH levels and nutrient content.
Ideally, okra prefers a slightly acidic to neutral pH range of 6.0 to 7.0. If your soil is too acidic, you can amend it with lime; if it’s too alkaline, adding sulfur can help balance the pH. Additionally, incorporating organic matter such as compost or well-rotted manure can enhance soil fertility and improve its structure.
Once the soil has been tested and amended as necessary, it’s time to prepare the planting bed. Clear the area of any weeds or debris that could compete with your okra plants for nutrients and water. Tilling the soil to a depth of at least 12 inches will help aerate it and promote root development.
After tilling, rake the soil to create a smooth surface for planting. If you’re planting in rows, ensure they are spaced adequately apart to allow for air circulation and ease of maintenance. A well-prepared soil bed sets the stage for healthy growth and robust yields.
Planting and Spacing Baby Okra
When it comes to planting baby okra, timing is crucial. Okra is a warm-season crop that thrives in temperatures between 70°F and 95°F (21°C to 35°C). It is best to wait until all danger of frost has passed and the soil temperature has reached at least 65°F (18°C) before sowing seeds directly into the ground.
In many regions, this means planting in late spring or early summer. If you’re starting seeds indoors, do so about 4-6 weeks before the last expected frost date to give your plants a head start. Spacing is another critical factor in ensuring healthy growth.
Baby okra plants should be spaced approximately 12 to 18 inches apart within rows, with rows spaced about 3 feet apart. This spacing allows adequate room for air circulation and sunlight penetration while minimizing competition for nutrients. When planting seeds, sow them about 1 inch deep into the soil.
If you’re transplanting seedlings, be careful not to disturb their roots too much during the process. Proper planting techniques will lead to vigorous plants that produce an abundant harvest.
Watering and Fertilizing Baby Okra
| Week | Watering (inches) | Fertilizing (times) |
|---|---|---|
| 1 | 1 | 0 |
| 2 | 1.5 | 1 |
| 3 | 2 | 1 |
| 4 | 2.5 | 2 |
Watering is essential for the successful growth of baby okra, particularly during its early stages when seedlings are establishing their root systems. Okra requires consistent moisture but is sensitive to overwatering, which can lead to root rot and other issues. A general rule of thumb is to provide about 1 inch of water per week, either through rainfall or supplemental irrigation.
During particularly hot or dry spells, you may need to increase watering frequency to ensure the plants do not become stressed. Fertilization plays a vital role in promoting healthy growth and maximizing yields. Before planting, incorporating a balanced fertilizer into the soil can provide essential nutrients that support early development.
Once the plants are established, side-dressing with a nitrogen-rich fertilizer can encourage lush foliage and pod production. Organic options such as fish emulsion or compost tea can also be effective in providing nutrients without the risk of chemical buildup in the soil. Monitoring your plants for signs of nutrient deficiencies—such as yellowing leaves—can help you adjust your fertilization strategy accordingly.
Managing Pests and Diseases
Like any crop, baby okra is susceptible to various pests and diseases that can hinder growth and reduce yields. Common pests include aphids, spider mites, and flea beetles, which can damage leaves and pods if left unchecked. Implementing integrated pest management (IPM) strategies can help mitigate these issues effectively.
For instance, introducing beneficial insects like ladybugs can naturally control aphid populations, while regular monitoring can help catch infestations early.
To prevent these diseases, ensure proper spacing between plants for adequate airflow and avoid overhead watering, which can create a humid environment conducive to fungal growth.
Crop rotation is another effective strategy; by rotating okra with non-related crops each season, you can reduce the buildup of soil-borne pathogens. If disease symptoms do appear, promptly remove affected plants to prevent further spread and consider applying organic fungicides as needed.
Pruning and Training Baby Okra Plants
Pruning baby okra plants may not be as common as with other crops like tomatoes or peppers; however, it can still be beneficial in certain situations. As okra plants grow taller, they may become top-heavy or leggy, especially if they are not receiving adequate sunlight due to overcrowding or shading from nearby plants. Light pruning can help maintain an open canopy that allows sunlight to penetrate through the foliage, promoting even growth and better pod development.
Training baby okra plants involves supporting them as they grow taller. While most varieties do not require staking due to their sturdy nature, providing support can be advantageous in windy areas or if heavy fruit loads cause bending or breaking of stems. Using bamboo stakes or trellises can help keep plants upright while allowing for better air circulation around them.
This practice not only enhances plant health but also makes harvesting easier by keeping pods off the ground.
Harvesting Baby Okra at the Right Time
Timing is critical when it comes to harvesting baby okra; picking at the right moment ensures optimal flavor and tenderness. Generally, baby okra should be harvested when pods are about 2 to 4 inches long—this is when they are still young and tender before they begin to mature and develop a fibrous texture. Checking your plants every couple of days during peak production will help you catch pods at their prime.
To harvest baby okra, use a sharp knife or garden shears to cut the pods from the stem rather than pulling them off by hand; this prevents damage to both the plant and surrounding pods. It’s advisable to wear gloves during harvesting as some varieties may have prickly hairs on their stems that can irritate the skin. Regular harvesting encourages continued production; if pods are left on the plant too long, it may signal to the plant that it has completed its reproductive cycle, leading to reduced yields.
Storing and Preserving Baby Okra
Once harvested, proper storage techniques are essential for maintaining the freshness of baby okra. Ideally, freshly picked okra should be used within a few days for optimal flavor and texture; however, if you need to store it longer, refrigeration is key. Place unwashed okra pods in a paper bag or wrap them in a damp paper towel before placing them in a perforated plastic bag in the refrigerator’s crisper drawer.
This method helps maintain humidity while preventing moisture buildup that could lead to spoilage. For longer-term preservation, freezing is an excellent option for baby okra. Before freezing, blanching the pods in boiling water for about 3 minutes helps preserve color and texture while killing any surface bacteria.
After blanching, immediately transfer the pods to an ice bath to halt cooking before draining and drying them thoroughly.
This method allows you to enjoy your homegrown baby okra long after the growing season has ended.
Cooking and Enjoying Baby Okra
Baby okra is a versatile ingredient that can be enjoyed in various culinary applications due to its tender texture and mild flavor profile. One popular way to prepare baby okra is by sautéing it with garlic and olive oil until lightly browned; this simple method enhances its natural flavors while retaining its crispness. Additionally, baby okra can be added to stir-fries or vegetable medleys for added color and nutrition.
Another traditional preparation method involves frying baby okra after coating it in cornmeal or batter; this creates a delightful crunch that pairs well with dipping sauces or as a side dish alongside southern-style meals like fried chicken or catfish. For those who prefer healthier options, roasting baby okra in the oven with spices such as paprika or cumin can bring out its earthy flavors while providing a satisfying crunch without excess oil.
Saving Seeds for Future Planting
Saving seeds from your baby okra plants is an excellent way to ensure continuity in your gardening efforts while also preserving specific traits you may have come to appreciate in your chosen variety. To save seeds effectively, allow some pods on your plants to mature fully until they turn brown and dry out on the vine; this indicates that they have reached full maturity for seed saving purposes. Once harvested, carefully open the dried pods to extract the seeds inside.
Rinse them gently under cool water to remove any remaining pulp or debris before spreading them out on a paper towel or screen to dry completely—this step is crucial as moisture can lead to mold during storage. Once dry, store your seeds in a cool, dark place in labeled envelopes or airtight containers; this will help maintain their viability for future planting seasons.
Troubleshooting Common Baby Okra Growing Problems
Despite careful planning and execution, growing baby okra may present challenges that require troubleshooting skills from gardeners. One common issue is poor pod development or reduced yields; this can often be attributed to inadequate pollination or nutrient deficiencies. Ensuring that your plants are well-pollinated may involve attracting pollinators by planting flowers nearby or gently shaking plants during flowering periods.
Another frequent problem is leaf curl or discoloration, which may indicate pest infestations or disease issues such as viral infections. Regular monitoring of your plants for signs of distress—such as wilting leaves or unusual spots—can help catch problems early on before they escalate into more significant issues requiring intervention. Implementing preventive measures such as crop rotation and maintaining healthy soil conditions will also contribute significantly to minimizing potential problems throughout the growing season.
By understanding these various aspects of growing baby okra—from selecting varieties to managing pests—you can cultivate a thriving garden that yields delicious produce while enjoying the process along the way.
FAQs
What is baby okra?
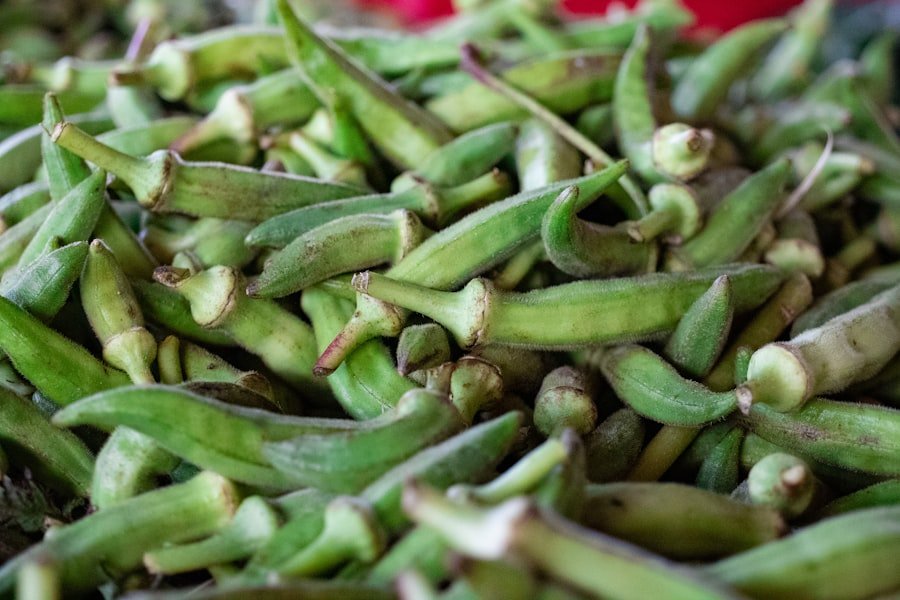
Baby okra, also known as young okra or tender okra, refers to the immature pods of the okra plant. These pods are harvested when they are small and tender, typically around 2-3 inches in length.
How is baby okra different from mature okra?
Baby okra is smaller and more tender than mature okra. It has a more delicate texture and a milder flavor. Mature okra, on the other hand, can be tougher and have a slightly more pronounced taste.
How is baby okra used in cooking?
Baby okra can be used in a variety of dishes, including soups, stews, stir-fries, and curries. It can also be pickled, grilled, or fried. Baby okra is often prized for its ability to thicken soups and stews due to its natural mucilage content.
What are the nutritional benefits of baby okra?
Baby okra is a good source of fiber, vitamins, and minerals. It is particularly high in vitamin C, vitamin K, and folate. It also contains antioxidants and has been associated with various health benefits, including improved digestion and heart health.
How should baby okra be stored?
Baby okra should be stored in the refrigerator, ideally in a perforated plastic bag to maintain its freshness. It is best to use baby okra within a few days of purchasing or harvesting for the best flavor and texture.
