

When embarking on the journey of growing potatoes in containers, the first and foremost consideration is the choice of the container itself. The ideal container should be spacious enough to accommodate the growth of the potato plants while also allowing for adequate drainage. Common choices include large pots, fabric grow bags, and even repurposed containers like old barrels or buckets.
A container with a capacity of at least 5 gallons is generally recommended for optimal growth, as this size provides sufficient room for the root system to expand and for multiple tubers to develop.
Potatoes are particularly susceptible to rot if their roots sit in waterlogged soil.
Therefore, selecting a container with drainage holes is essential. If using a solid container without holes, one can create drainage by adding a layer of gravel or stones at the bottom. This not only facilitates water movement but also helps prevent soil compaction, which can hinder root development.
Additionally, consider the material of the container; while plastic is lightweight and retains moisture well, materials like terracotta or ceramic can provide better aeration but may require more frequent watering.
Key Takeaways
- Choose a container that is at least 10-15 gallons in size and has good drainage for growing potatoes.
- Select certified disease-free seed potatoes from a reputable source for planting in containers.
- Prior to planting, cut seed potatoes into pieces with at least 2 eyes each and allow them to cure for a few days.
- Plant seed potatoes in containers with the eyes facing up and cover with 3-4 inches of soil, adding more as the plants grow.
- Use a well-draining, nutrient-rich soil mix and fertilize with a balanced fertilizer to support healthy potato growth in containers.
Selecting the Best Seed Potatoes for Container Planting
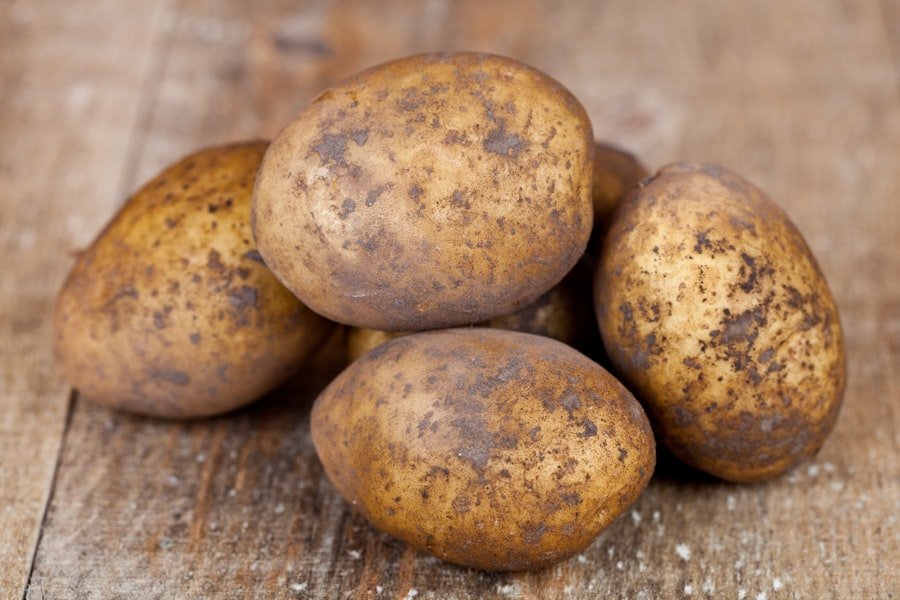
The selection of seed potatoes is a pivotal step in ensuring a successful harvest. Not all potato varieties are suited for container growth, so it’s essential to choose those that thrive in limited space. Varieties such as ‘Red Pontiac,’ ‘Yukon Gold,’ and ‘Fingerling’ potatoes are particularly well-suited for container gardening due to their compact growth habits and high yield potential.
These varieties not only adapt well to confined spaces but also offer diverse flavors and culinary uses, making them popular choices among home gardeners. When selecting seed potatoes, it’s crucial to source certified disease-free tubers from reputable suppliers. This minimizes the risk of introducing pests and diseases into your garden.
Look for firm, healthy potatoes with no signs of decay or sprouting. If you have access to local gardening clubs or farmers’ markets, consider purchasing seed potatoes from these sources, as they often offer varieties that are well-adapted to your local climate. Additionally, if you’re feeling adventurous, you can experiment with heirloom varieties that may not be widely available but can provide unique flavors and textures.
Preparing Seed Potatoes for Planting
Preparation of seed potatoes is an essential step that can significantly influence the success of your container-grown crop. Before planting, it’s advisable to “chit” your seed potatoes, which involves allowing them to sprout before they go into the soil. This process typically takes about two to four weeks and can be initiated by placing the seed potatoes in a cool, light area where they can develop short sprouts or “chits.” The presence of these sprouts indicates that the potatoes are ready to grow and will lead to a more vigorous plant once planted. Once your seed potatoes have developed chits, it’s time to prepare them for planting. If your seed potatoes are larger than the size of a golf ball, consider cutting them into smaller pieces, ensuring that each piece has at least one or two eyes (the small dimples on the surface where sprouts emerge).
Allow these cut pieces to cure for a day or two in a cool, dark place; this helps form a protective callus over the cut surfaces, reducing the risk of rot when planted in moist soil. Proper preparation not only enhances germination rates but also contributes to healthier plants and ultimately a more bountiful harvest.
How to Plant Seed Potatoes in Containers
| Container Size | Potato Varieties | Planting Depth | Spacing | Soil Requirements |
|---|---|---|---|---|
| 5 gallons or larger | Early, mid-season, and late varieties | 4-6 inches | 12 inches apart | Loose, well-draining soil with compost |
Planting seed potatoes in containers requires careful attention to depth and spacing to ensure optimal growth conditions. Begin by filling your chosen container with a few inches of high-quality potting mix or soil specifically designed for container gardening. This initial layer should provide a stable base for the seed potatoes.
Place the prepared seed potatoes on top of this layer, ensuring that they are spaced adequately apart—typically about 12 inches apart for larger varieties and closer for smaller ones. Once the seed potatoes are positioned correctly, cover them with an additional layer of soil, approximately 4 to 6 inches deep. It’s important not to bury them too deeply, as this can hinder their ability to sprout effectively.
After planting, gently water the soil until it is moist but not soggy; this initial watering helps settle the soil around the tubers and provides them with the moisture needed to begin their growth cycle. As the plants emerge and grow taller, you will need to add more soil around their stems—a process known as hilling—to encourage further tuber development.
Proper Soil and Fertilizer for Container-Grown Potatoes
The choice of soil and fertilizer plays a crucial role in the health and productivity of container-grown potatoes. A well-draining potting mix is essential; it should be rich in organic matter and nutrients while allowing excess water to escape easily. Many gardeners opt for a blend that includes peat moss, compost, and perlite or vermiculite to achieve this balance.
This combination not only provides essential nutrients but also promotes aeration and moisture retention—key factors for healthy potato growth. Fertilization is another critical aspect of potato cultivation in containers. Potatoes are heavy feeders and benefit from a balanced fertilizer that contains nitrogen, phosphorus, and potassium (N-P-K).
A slow-release fertilizer can be mixed into the soil at planting time, providing a steady supply of nutrients as the plants grow. Additionally, during the growing season, consider applying a liquid fertilizer every few weeks to support robust growth and tuber development. Monitoring nutrient levels is vital; if leaves appear yellow or stunted, it may indicate a deficiency that needs addressing.
Watering and Sunlight Needs for Container-Grown Potatoes

Watering practices are paramount when growing potatoes in containers, as they have specific moisture requirements that must be met for optimal growth. Container-grown potatoes typically require consistent moisture; however, overwatering can lead to root rot and other issues. A good rule of thumb is to check the top inch of soil—if it feels dry to the touch, it’s time to water.
Aim for deep watering sessions that allow moisture to penetrate thoroughly without saturating the soil. Sunlight exposure is equally important for container-grown potatoes. Ideally, these plants should receive at least six hours of direct sunlight each day to thrive.
If you’re growing potatoes in an area with limited sunlight, consider using reflective materials around your containers or moving them throughout the day to maximize exposure. In regions with extremely hot climates, providing some afternoon shade can help prevent stress on the plants while still allowing them ample sunlight during cooler parts of the day.
Managing Pests and Diseases in Container-Grown Potatoes
Pest management is an integral part of successfully growing potatoes in containers. Common pests such as aphids, Colorado potato beetles, and spider mites can pose significant threats to your crop if not managed effectively. Regularly inspecting your plants for signs of infestation is crucial; look for discolored leaves or visible insects on stems and undersides of leaves.
Handpicking pests or using insecticidal soap can be effective methods for controlling minor infestations without resorting to harsh chemicals. Diseases can also affect container-grown potatoes, with blight being one of the most notorious culprits. To minimize disease risk, practice crop rotation by not planting potatoes in the same container year after year.
Additionally, ensure good air circulation around your plants by avoiding overcrowding and maintaining proper spacing between containers. If you notice any signs of disease—such as wilting leaves or dark spots—remove affected plants immediately to prevent spread and consider applying organic fungicides as a preventive measure.
Hilling and Mulching Techniques for Container-Grown Potatoes
Hilling is a technique that involves adding soil around the base of potato plants as they grow taller. This practice serves multiple purposes: it supports the plant structure, encourages tuber formation along buried stems, and helps control weeds that may compete for nutrients and water. As your potato plants reach about 6 inches in height, gently mound additional soil around their stems without covering the leaves completely.
This process can be repeated several times throughout the growing season as needed. Mulching is another beneficial technique that complements hilling by helping retain moisture in the soil while suppressing weeds. Organic materials such as straw, grass clippings, or shredded leaves make excellent mulch options for container-grown potatoes.
Apply a layer of mulch about 2-3 inches thick around your plants after hilling; this will help maintain consistent soil moisture levels and regulate temperature fluctuations within the container environment.
Recognizing Signs of Growth and Development in Container-Grown Potatoes
As your potato plants grow, there are several key indicators that signal healthy development and progress toward harvest time. Initially, you will notice green shoots emerging from the soil; these are signs that your seed potatoes have successfully sprouted and are beginning their growth cycle. As time passes, healthy foliage will develop—look for vibrant green leaves that are robust and free from discoloration or wilting.
As summer progresses, you may observe flowering on your potato plants; this is an exciting sign that tubers are forming underground. While not all potato varieties produce flowers, those that do often indicate that they are maturing well. Additionally, keep an eye on leaf health; yellowing leaves may suggest nutrient deficiencies or overwatering issues that need addressing promptly.
Harvesting and Storing Container-Grown Potatoes
Harvesting container-grown potatoes requires careful timing and technique to ensure maximum yield and quality. Generally speaking, new potatoes can be harvested about two weeks after flowering begins; these young tubers are small but tender and flavorful. For mature potatoes, wait until the foliage begins to yellow and die back—this typically occurs several weeks after flowering has finished.
At this point, gently dig into the soil with your hands or a small garden fork to avoid damaging the tubers. Once harvested, proper storage is essential for maintaining potato quality over time. Ideally, freshly harvested potatoes should be cured in a cool, dark place with good ventilation for about two weeks; this allows their skins to toughen up and helps prevent rot during storage.
After curing, store your potatoes in a cool (around 45-50°F), dark location such as a basement or root cellar in breathable bags or boxes—avoid plastic bags as they trap moisture and promote decay.
Troubleshooting Common Issues with Container-Grown Potatoes
Even with careful planning and execution, challenges may arise when growing potatoes in containers. One common issue is poor growth or low yields; this can often be traced back to inadequate sunlight exposure or nutrient deficiencies in the soil mix used. If you notice stunted growth or yellowing leaves, reassess your watering practices and consider supplementing with additional fertilizer tailored for root vegetables.
Another frequent problem is pest infestations; if you find evidence of pests despite preventive measures, it may be necessary to implement more aggressive control strategies such as introducing beneficial insects like ladybugs or using organic pesticides specifically designed for vegetable crops. Additionally, if you encounter diseases like blight despite taking precautions, consider rotating your crops annually and ensuring proper sanitation practices between growing seasons to minimize future risks. By understanding these various aspects of container potato cultivation—from choosing appropriate containers to managing pests—you can create an environment conducive to healthy growth and bountiful harvests while enjoying the satisfaction of growing your own food at home.
FAQs
What are seed potatoes?
Seed potatoes are small potatoes that are specifically grown and harvested to be used for planting and growing new potato plants.
Why plant seed potatoes in containers?
Planting seed potatoes in containers allows for greater control over the growing environment, especially for those with limited garden space. Containers also make it easier to manage soil quality and moisture levels.
What type of containers are suitable for planting seed potatoes?
Containers for planting seed potatoes should be at least 10-15 gallons in size and have good drainage. Options include plastic or wooden containers, grow bags, or even repurposed items such as buckets or large pots.
When should seed potatoes be planted in containers?
Seed potatoes are typically planted in containers in early spring, once the soil has warmed up and there is no longer a risk of frost. The exact timing will depend on the local climate and growing conditions.
How should seed potatoes be prepared for planting in containers?
Before planting, seed potatoes should be cut into pieces, each containing at least one eye or sprout. These pieces should then be allowed to dry and form a protective layer before planting to reduce the risk of rot.
What is the best soil for planting seed potatoes in containers?
A well-draining, nutrient-rich soil mix is ideal for planting seed potatoes in containers. A mix of potting soil, compost, and perlite or vermiculite can provide the necessary nutrients and drainage for healthy potato growth.
How should seed potatoes be planted in containers?
Seed potatoes should be planted about 4-6 inches deep in the soil mix, with the eyes or sprouts facing upward. Multiple seed potatoes can be planted in a single container, with spacing of about 8-12 inches between each potato.
How should seed potatoes in containers be cared for as they grow?
Seed potatoes in containers should be watered regularly to keep the soil evenly moist, but not waterlogged. They should also be placed in a location that receives at least 6-8 hours of sunlight per day and be provided with a balanced fertilizer as they grow.
When can seed potatoes in containers be harvested?
Seed potatoes can typically be harvested in 10-12 weeks after planting, once the plants have flowered and the foliage begins to yellow and die back. The exact timing will depend on the variety of potato and growing conditions.
