

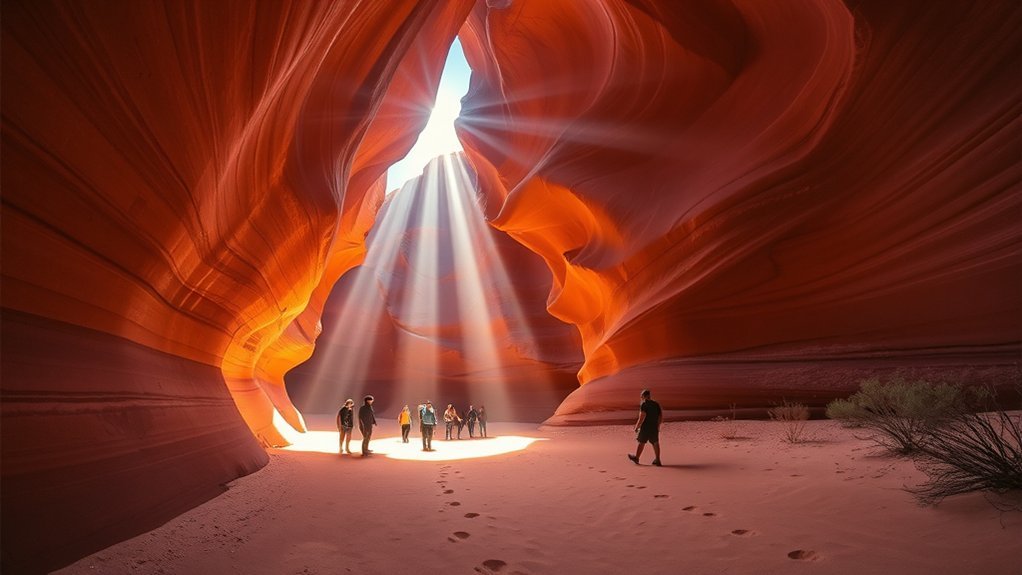
Sunlight slices down like silk ribbons into the canyon, painting the sandstone in copper and rose hues, and you’ll want to be there when it happens. You’ll need a guided tour on Navajo land, a reservation, and a sense of timing to catch the best light with fewer people. This guide will walk you through which canyon to pick, when to go, how to get there, what to bring, and how to shoot those iconic photos so you don’t miss the moment.
About Antelope Canyon and Navajo Land
Antelope Canyon sits on Navajo land near Page, Arizona, and you’ll need an authorized Navajo guide to enter either the Upper or Lower canyon; both require reservations and usually include a Navajo Nation permit in the booking. You’ll approach a narrow slot canyon carved by flash floods, its smooth walls displaying layered reds and golds. Guided tours keep you safe on uneven footing and explain how seasonal water flow shaped the rock. Expect closures during monsoon or snow; check weather and tour operator updates and build flexibility into your schedule. Bring sturdy shoes, a light jacket, and a camera with a steady hand—lighting changes quickly. Respect tribal rules, stick with your guide, and leave no trace.
Upper Vs Lower Vs Antelope Canyon X
When choosing between Upper, Lower, and Canyon X, think about how terrain, light and timing, and cost will shape your visit. Upper gives you easy walking and midday light beams ideal for photos, Lower demands ladders and offers more overall light but fewer beams, and Canyon X offers longer, less crowded tours with moderate hiking at a lower price. Match your mobility, photo goals, and budget to the canyon that fits best.
Accessibility & Terrain
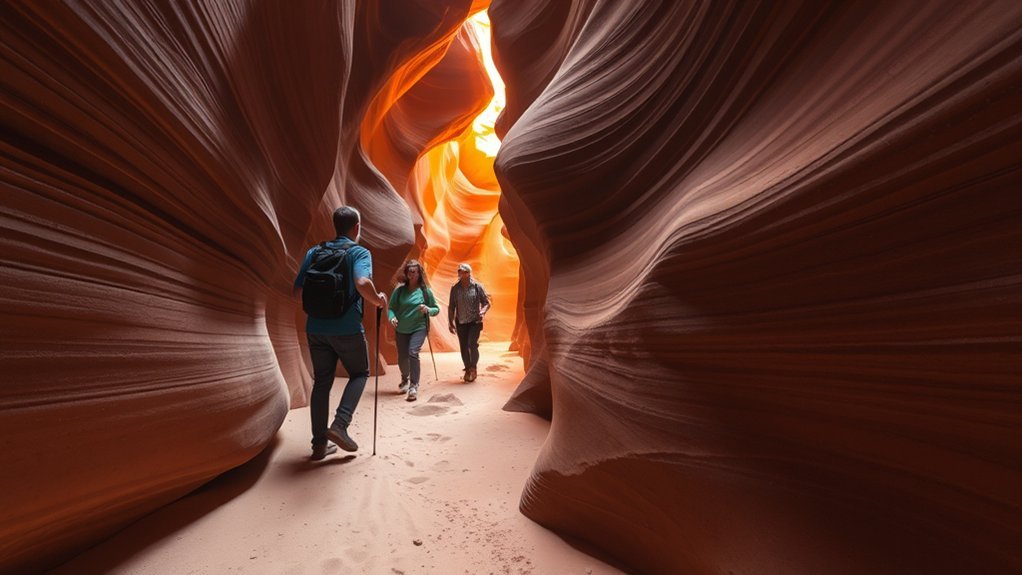
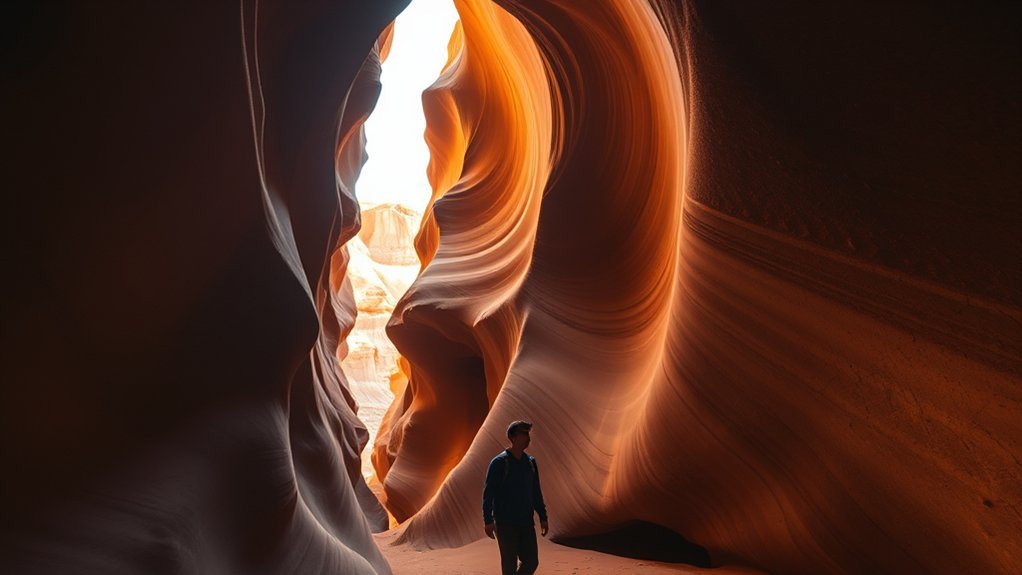
Although they all share sandy floors and narrow slot passages, the three canyons differ in how easy they are to move through: Upper is the most accessible with a ground‑level entrance and minimal climbing (you will, however, take a bumpy truck ride), Lower demands negotiating steep metal staircases at both ends, and Canyon X sits between them with moderate hikes and some elevation gain while offering a quieter, less crowded experience. Consider terrain when choosing: Upper Antelope Canyon’s flat, sandy floor makes it easiest for mixed groups and those with limited mobility, though uneven sand still requires steady footing. Lower Antelope Canyon’s stairs and tighter squeezes need stronger joints and careful steps. Canyon X rewards a bit more hike with privacy and manageable elevation.
Light & Photo Timing
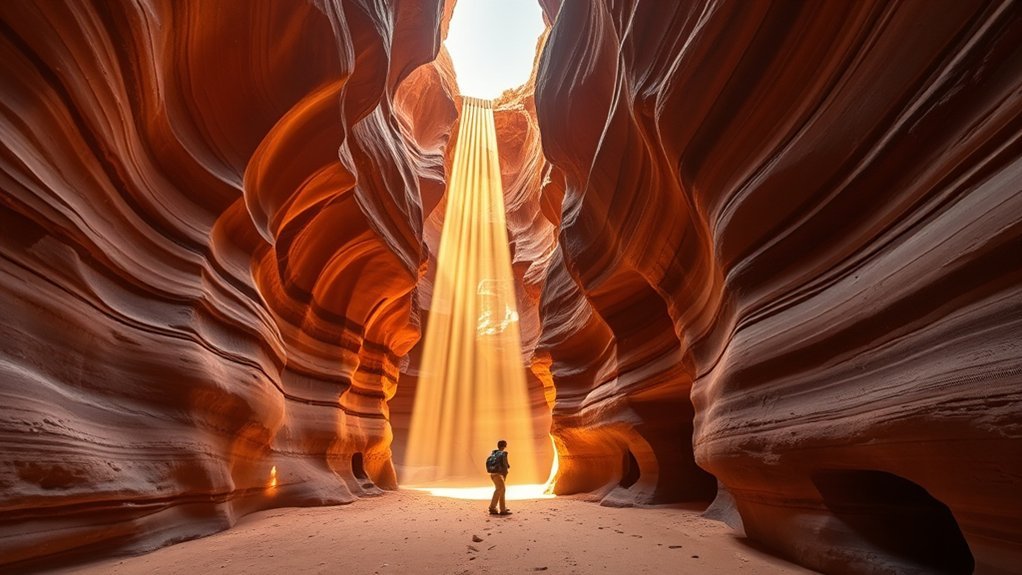
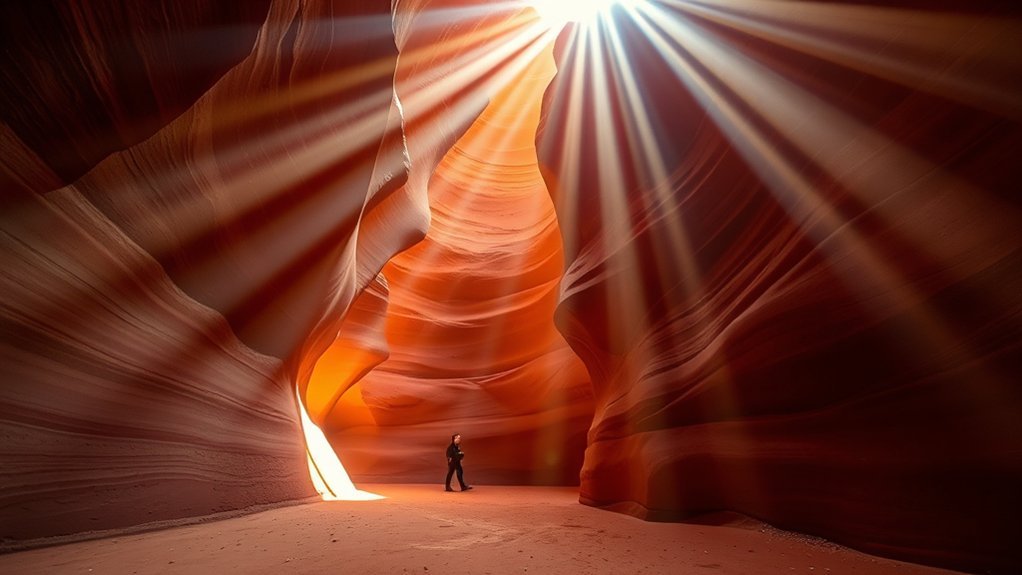
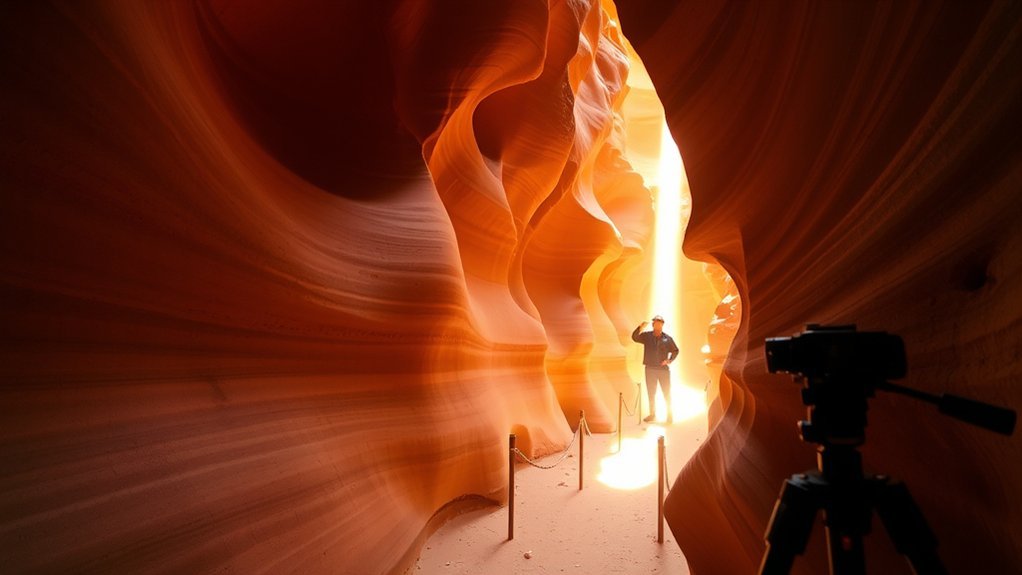
If you’re aiming for dramatic sunbeams, plan your Upper Canyon visit for late morning—roughly 10:30 AM to 1:30 PM in summer—when light plunges straight down and creates the iconic shafts photographers chase; an Upper Antelope Canyon tour gives you about 30 minutes in that peak window, so arrive ready. For softer contrast and vivid striations, choose Lower Antelope Canyon in the morning or late afternoon; its shallow V-shape scatters light differently and rewards slower exploration on longer photography tours. Antelope Canyon X mixes bright chambers and shadowed slots, so you can work varied exposures any time of day and often with fewer people. Pack a fast lens, tripod-friendly gear, and plan shots around the canyon’s natural shafts and reflected color for the best results.
Crowd Levels & Costs
Because popularity, size, and lighting needs vary, your choice of canyon will shape both the experience and the price you’ll pay: expect differing crowd levels and costs among options. Upper Antelope Canyon draws the biggest midday crush for light beams and commands the highest fees—roughly $50–$90—plus tight 30‑minute visits guided by strict tour operators. Lower Antelope Canyon handles the most overall foot traffic thanks to a larger chamber, costs about $40–$80, and gives you a longer, more relaxed walk. Canyon X offers the quietest visit—around 350 daily visitors—and the best value near $60, with more time to linger. Compare schedules, group sizes, and tour operators’ policies to match crowds, comfort, and budget.
When to Visit for Best Light and Fewer Crowds
Plan your visit around light and crowds to get the most striking photos and a calmer experience: for the classic sunbeams in Upper Antelope Canyon aim for late March through early October, with guided tours between about 10:30 AM and 1:30 PM, while Lower Canyon benefits from morning or late-afternoon visits, and Antelope Canyon X is a good all-day alternative that stays less crowded—visit November through late February for fewer people and better rates overall. You’ll find the best time to visit depends on whether you prioritize beams or solitude. Morning and late-afternoon slots reduce crowds and harsh light. If you want steady solitude, pick Antelope Canyon X any hour. Off-season trips cut costs and open quieter windows for photography and reflection.
How to Get There and Parking Tips
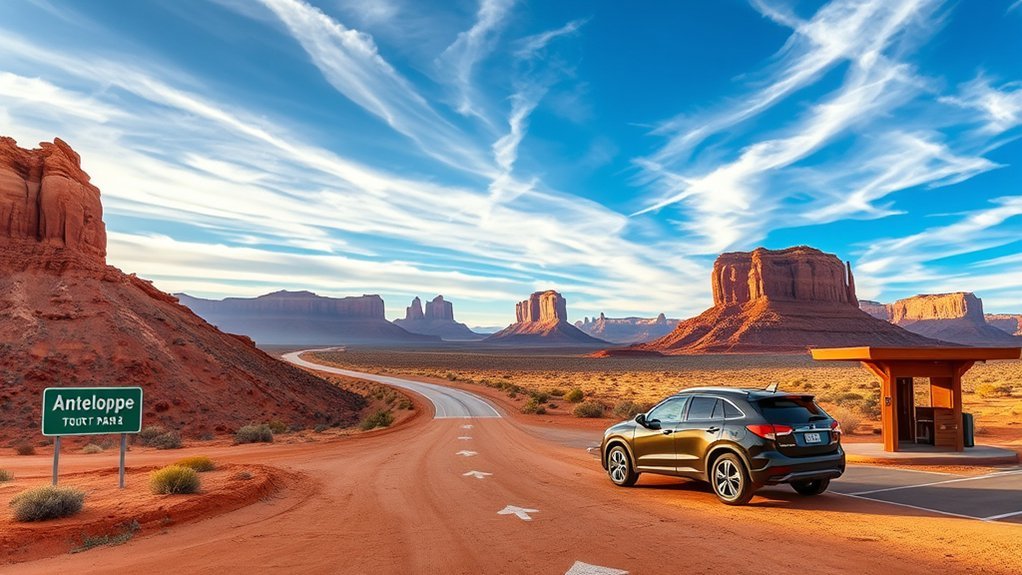
Though the canyon sits just ten minutes east of Page, AZ, getting there smoothly takes a bit of pre-trip thinking—especially since all visits require a guided tour and timed arrivals. You’ll drive from Page (or about four‑and‑a‑half hours from Phoenix), follow signs to Upper or Lower Antelope Canyon, and park in the designated parking lot near the Tribal Park Entrance or the Lower Canyon gate. Arrive at least 15 minutes early so the tour company can check you in; tours run up to two hours with walking and loading time included. Reservations with an authorized Navajo guide are mandatory, so don’t assume availability — book months in advance through reputable Antelope Canyon Tours to secure your slot.
Booking Tours: Costs, Operators, and Permits
Booking a tour is the single most important step — slots fill up months ahead, prices typically run $40–$90 per person, and every operator folds the $8 Navajo permit into the fee. You’ll want to reserve well in advance for popular Upper Canyon runs, which cost more because of transport and demand. Only authorized operators can take you in — Antelope Canyon Tours, Inc., Tsebighanilini, Ken’s Tours and Dixie’s Tours are common names to compare. Confirm any extra charges and available discounts (early morning or last-minute) before you pay. Practical tips:
- Check availability across multiple operators when booking tours.
- Compare costs including the $8 permits and transport fees.
- Ask about cancellation policies and group sizes.
- Keep reservation confirmations handy on arrival.
What to Expect on a Guided Tour
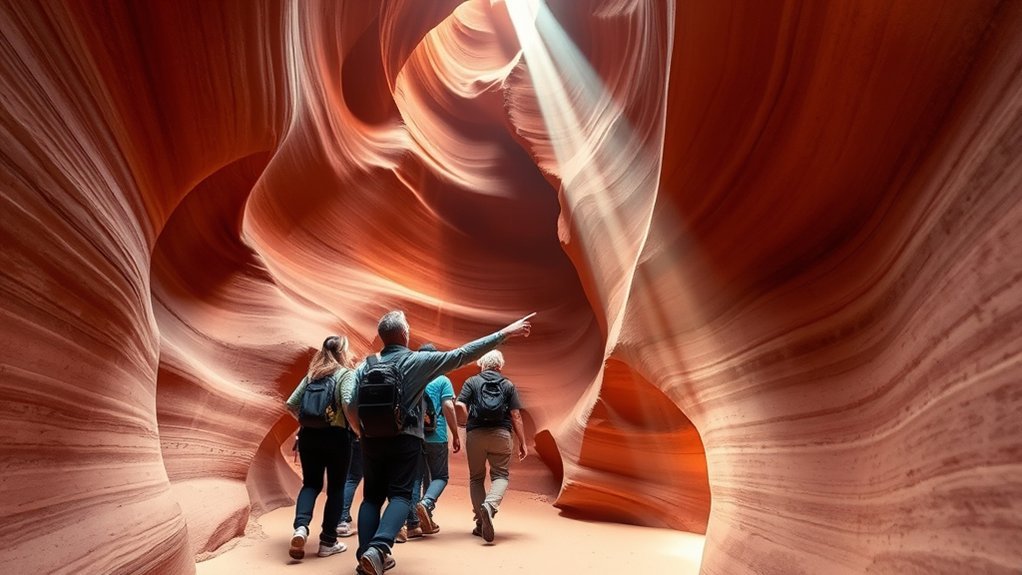
When you join a guided Antelope Canyon tour, expect a tightly paced 60–90 minute experience where you’ll spend roughly 30–60 minutes actually inside the slot, following a knowledgeable Navajo guide who’ll explain the geology, cultural history, and best spots for photos. You’ll meet at a designated pickup, listen to safety and timing instructions, then approach the narrow canyon entrances. Upper’s ground-level entry feels easier underfoot; Lower requires climbing steep metal staircases and moving through tighter passages. Your guide will position the group for light shafts, suggest framing and exposure tips, and manage traffic during peak midday crowds. Tours run to schedule, so expect limited lingering time and follow your guide’s cues to keep things smooth.
What to Pack and What to Leave Behind
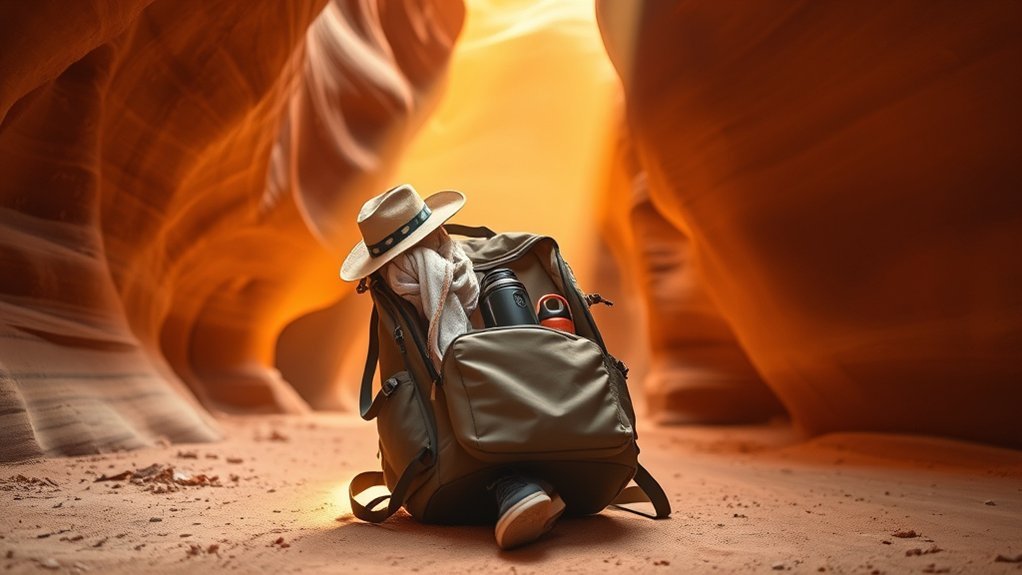
Because the canyon is dusty, sun-exposed, and time-limited, pack smart: closed-toe shoes, layered clothing, sunscreen, a hat, and a full water bottle, and opt for glasses over contacts to keep grit out of your eyes. You’ll move quickly through tight corridors and won’t find trash cans or restrooms, so bring only essentials and protect gear from sand.
- Closed-toe shoes — stable, dusty-friendly footwear for uneven ground.
- Water bottle & sunscreen — hydrate and shield your skin; reapply as needed.
- Glasses & layered clothing — protect eyes and adjust to temperature shifts.
- Camera care — cover DSLR when idle; no tripods, monopods, or selfie sticks allowed.
Leave bags, food, and loose gear behind to stay compliant and focused on the canyon.
Accessibility, Stairs, and Physical Requirements
Think about how mobility affects which canyon you can reasonably visit: Upper Antelope has a ground-level entrance that’s far more wheelchair-friendly, while Lower requires steep metal staircases and Canyon X needs a moderate hike plus 98 wooden steps. If you use a wheelchair or have trouble with heights or stairs, tell your guide ahead of time so they can advise on options or accommodations. Expect uneven footing inside the canyons and plan for assistance if you’ll need help getting in and out.
Wheelchair Access Limits
Although some parts of the Antelope Canyon area are more forgiving than others, wheelchair users and visitors with limited mobility should plan carefully because access varies a lot between the three sections. Upper Antelope Canyon offers the best option—ground-level entrance helps, but you’ll still face a bumpy truck ride; mention accessibility challenges and ask about accommodations when making advance reservations. Lower is tough for anyone with mobility issues. Antelope Canyon X requires moderate hiking and some elevation change.
- Upper Antelope Canyon: easiest entry, truck ride required—confirm assistance.
- Lower Antelope Canyon: significant barriers; not recommended for many wheelchairs.
- Antelope Canyon X: moderate hike; assess stamina and balance.
- Booking tip: always state limited mobility needs when reserving.
Stairs and Ladders
One clear thing to know before you go: the three Antelope Canyon areas differ sharply in stairs and ladders, so plan based on your mobility and comfort with steps. You’ll encounter steep metal staircases in Lower Antelope — a tough descent at the start and a steady climb out — which accentuates its V-shaped passage and dramatic light but demands fitness. Upper Antelope is the opposite: ground-level entrance and mostly flat walking, offering the best accessibility for those with mobility issues, families, and older visitors. Antelope Canyon X sits between them: expect about 98 wooden steps and an exposed hike between North and South sections. Choose your canyon with honest regard for stairs and ladders and your physical limits.
Nearby Attractions: Horseshoe Bend, Lake Powell, and More
When you visit Antelope Canyon, don’t miss the nearby sights that extend the experience—from the dizzying Horseshoe Bend overlook just a few miles away to the vast shoreline of Lake Powell. You can reach Horseshoe Bend via a flat 0.6-mile trail with shaded rest areas; the 1,000-foot drop yields unforgettable sunrise and sunset views. Lake Powell offers over 2,000 miles of shoreline for boating and paddling; rentals make exploration easy. Glen Canyon Dam, which created the reservoir, and Navajo Bridge add geological context. For farther drives, Navajo National Monument, Monument Valley and Four Corners deepen your trip.
- Hike Horseshoe Bend trail (easy, scenic)
- Rent boats on Lake Powell
- Visit Glen Canyon Dam/Navajo Bridge
- Day trips to Navajo National Monument
Photography Tips and Rules for Capturing the Canyon
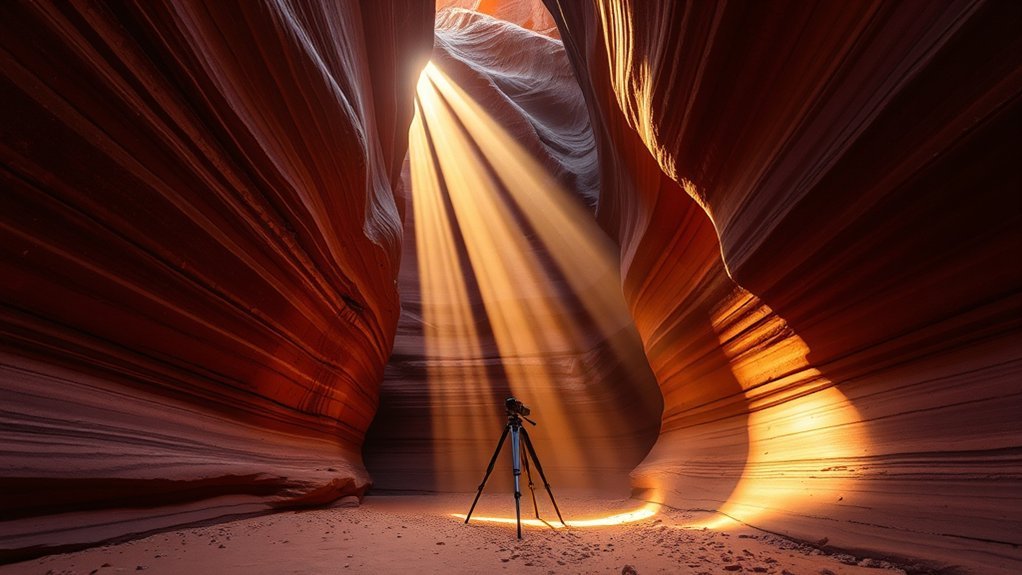
When you prepare to shoot Antelope Canyon, know what’s allowed—no tripods, monopods, or selfie sticks—so plan handheld techniques and protective covers for your gear. Use a DSLR with a wide-angle lens, stop down for sharp texture, and favor moderate ISOs and steady shutter speeds to handle low light without blur. Watch the light windows and mid-day beam window (roughly 10:30 AM–1:30 PM in summer), compose for sweeping curves and texture, and stay mindful of guides and other visitors.
Allowed Gear and Restrictions
Although the canyon welcomes photographers, you’ll need to travel light and stay mindful: only closed bags are allowed and items like tripods, monopods, selfie sticks, food, and drinks must be left behind to protect the fragile sandstone. Respecting allowed gear and restrictions keeps the slot canyon pristine and your equipment safe; your tour guide will remind you. Cover your DSLR when not shooting to block sand, and consider glasses instead of contacts to avoid irritation. Stay aware of others—don’t block passages when framing shots. Timing matters for light, so plan but don’t rush the group.
- Pack only closed bags and minimal camera gear.
- Leave tripods, monopods, selfie sticks, food, drinks outside.
- Keep camera covered between shots.
- Follow your tour guide’s directions.
Best Camera Settings
Now that you’ve packed light and respected the gear rules, focus on camera settings to make the canyon’s colors and textures sing. Use a wide-angle lens (16–24mm) to capture sweeping curves and tight corridors. Set a low ISO (100–400) to keep noise down; bring a tripod for longer exposures. Aim for f/8–f/11 to keep foreground and background crisp. Start with a shutter speed of 1/30–1/60s and adjust for available light. Bracket exposures where bright beams meet shadowed walls to preserve highlights.
| Setting | Recommendation | Why it helps |
|---|---|---|
| Lens | 16–24mm wide-angle lens | Capture expanses and narrow passages |
| ISO | 100–400 low ISO | Minimize noise in natural light |
| Exposure | f/8–f/11, 1/30–1/60s | Sharp depth, controlled motion |
Composition and Lighting Tips
Start by looking up and down: the canyon’s curves, textures, and shafts of light will dictate your composition, so move slowly and frame both sweeping arcs and intimate details. You’ll find peak photography opportunities in Upper Antelope Canyon around mid-day for dramatic light beams; Lower rewards morning or late-afternoon shooting for ideal contrast and color. Use a polarizer to boost saturation and cut glare on sandstone. Adjust camera settings to higher ISO and faster shutter speeds to fight low light and movement, and keep gear covered from dust when idle.
- Shoot verticals to emphasize curves and flow.
- Isolate details for texture studies.
- Include a human for scale in wide shots.
- Bracket exposures to capture full tonal range.
Frequently Asked Questions
What Is the Best Way to Visit Antelope Canyon?
Book guided tours early and arrive prompt; you’ll follow local regulations and safety precautions, get photography tips from guides, wear proper shoes, carry water, and observe the canyon’s beauty responsibly while minimizing impact and tripod use.
How Much Time Do You Need in Antelope Canyon?
Plan about two hours total; you’ll spend 30–60+ minutes inside, so arrive 15 minutes early. Bring photography tips, follow safety guidelines, watch weather conditions, and check accessibility options so your visit’s smooth and rewarding.
What Is the Best Month to Go to Antelope Canyon?
Mid‑March is the best month to go: you’ll get best weather, dramatic seasonal colors and ideal photography tips for light beams at noon, though crowd levels rise—plan early or late visits if you want fewer people.
Which Antelope Canyon Tour Is Better?
Upper’s better for dramatic light beams and easy access, but you’ll pick based on priorities: tour types, guided tours, photography options, and group sizes — choose Upper for photos, Lower for adventure, Canyon X for relaxed, smaller groups.
Conclusion
Think of Antelope Canyon as a book written in light and stone: you show up, guided by Navajo stewards, and turn pages of narrow slots, staircases and beams. Visit when the sun writes its clearest lines, arrive early, pack water and patience, leave tripods or stubborn plans behind. Like careful reading, your respect reveals deeper passages — so book a tour, watch the light, and let the canyon’s quiet chapters reshape how you see the world.
