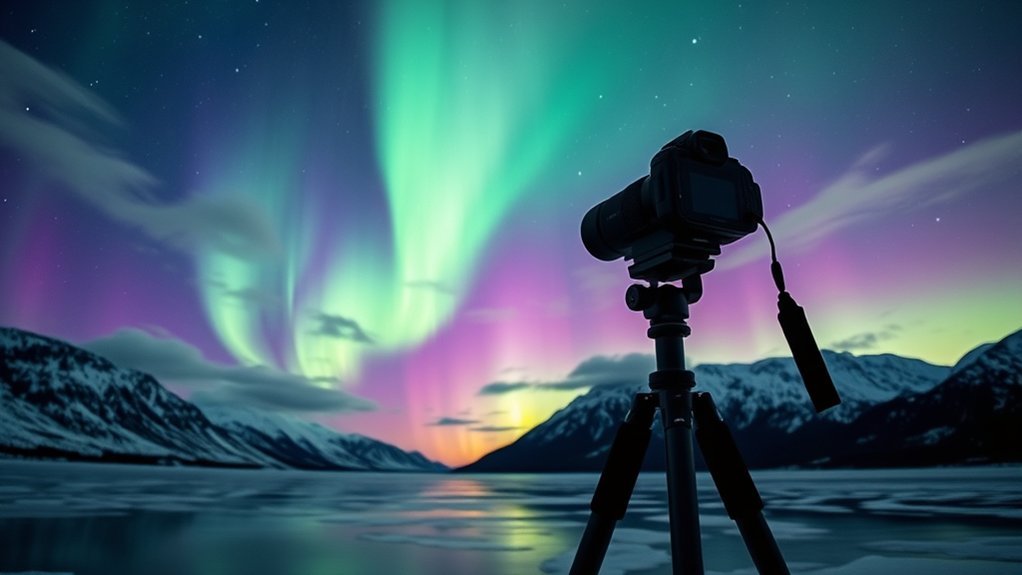
Photographing the northern lights in Alaska takes more than pointing a camera at the sky. You need darkness, a clear forecast, stable equipment, suitable camera settings, and a plan for working safely in cold conditions. The aurora can brighten or change speed within seconds, so preparation helps you react before the display fades.
Quick Answer
For aurora photography in Alaska, use a sturdy tripod, a camera with manual controls, and a fast wide-angle lens. Start near f/2.8, ISO 1600, and a 5-second exposure. Focus manually on a bright star, shoot RAW, review the histogram, and shorten the exposure when the aurora moves quickly.
Key Takeaways
- Alaska’s main aurora-viewing season runs approximately from August 21 through April 21.
- A fast wide-angle lens, manual controls, RAW capture, spare batteries, and a stable tripod form the core photography kit.
- Use shorter exposures for bright, fast aurora and longer exposures for faint, slow movement.
- Focus on a star with magnified live view instead of turning the lens blindly to its infinity stop.
- Check aurora activity, clouds, wind, road conditions, and local access rules before leaving.
- Protect yourself from frostbite and hypothermia, and protect cold equipment from indoor condensation.
At a Glance
| Time Required | 20–30 minutes for setup, plus one to three hours or more for watching and shooting |
| Difficulty | Beginner to intermediate; manual exposure and focus require practice |
| Tools Needed | Manual-control camera, fast wide-angle lens, tripod, charged batteries, memory cards, headlamp, lens cloth, and cold-weather clothing |
| Cost | No added equipment cost if you own the gear; rentals, transportation, lodging, and guided tours vary |
Essential Gear for Aurora Photography
A stable and cold-ready kit gives you more time to concentrate on the sky. Pack the following items before leaving:
- Camera with manual controls: A DSLR, mirrorless camera, or advanced compact camera should let you control aperture, shutter speed, ISO, focus, and file format.
- Fast wide-angle lens: A full-frame equivalent of about 14–24mm captures a large section of sky. An aperture of f/2.8 or wider collects more light.
- Sturdy tripod: Extend the thickest leg sections first, keep the center column low, and press the feet firmly into snow or stable ground.
- Remote release or self-timer: A two-second timer is usually enough to prevent movement caused by pressing the shutter.
- Spare batteries: Carry at least two fully charged spares in an inside pocket. Cold batteries may recover some power after warming.
- Memory cards: RAW files and repeated test shots use more space than expected, so carry a formatted spare.
- Red-light headlamp: Red light helps you see the controls while preserving more of your night vision. Turn it off during exposures.
- Lens cloth and blower: Use them to remove snow, moisture, and loose particles without rubbing grit across the glass.
- Sealable equipment bag: Place the cold camera inside before entering a warm building or vehicle to reduce condensation.
- Cold-weather clothing: Wear moisture-wicking base layers, insulation, a wind-resistant shell, warm boots, a hat, and gloves that still let you operate the camera.
Pro Tip: Practice changing ISO, shutter speed, magnified focus, and playback brightness while wearing gloves. Doing this at home is much easier than learning the controls in darkness and subzero wind.
Recommended Cameras and Lenses
You do not need the newest flagship camera to photograph the aurora. Useful features matter more than a particular brand: manual exposure, RAW capture, acceptable high-ISO quality, magnified live view, a clear rear screen, reliable controls, and access to a fast wide-angle lens.
Capable Camera Examples
The following cameras remain capable options, especially if you already own one or find a good used example:
- Nikon D850: A high-resolution full-frame DSLR with strong dynamic range and good high-ISO image quality.
- Canon EOS R6: A full-frame mirrorless camera with useful low-light performance and a tilting screen.
- Sony A7 III: An older but capable full-frame mirrorless camera with good battery life and broad lens support.
- Fujifilm X-T4: A smaller APS-C mirrorless camera with direct controls, RAW capture, and good color output.
These are examples rather than a definitive current ranking. A newer entry-level camera paired with a fast lens may outperform an expensive body fitted with a slow kit lens. Check the manufacturer’s stated operating-temperature range and protect every camera from snow and moisture.
Ideal Lens Types
A fast wide-angle lens between about 14mm and 24mm on a full-frame camera is a flexible choice. For APS-C cameras, roughly 10–16mm provides a similar field of view. Aim for f/2.8 or wider when possible.
A prime lens may provide a wider aperture and good sharpness at a lower price. A wide zoom gives you more framing flexibility when the aurora changes position. If you include a close foreground, remember that a very wide aperture creates shallow depth of field. You may need to focus carefully, move farther from the foreground, or capture a separate foreground exposure.
Understanding Aurora Camera Settings
The correct northern lights camera settings depend on the aurora’s brightness, speed, your lens, moonlight, and the amount of detail you want in the foreground. Treat every suggested value as a starting point, then adjust after reviewing a test image.
Exposure Triangle Basics
- Aperture: Start with the widest useful aperture, commonly f/1.8 to f/2.8. Stop down slightly if stars are distorted near the corners or the foreground needs more depth of field.
- Shutter speed: Use a shorter exposure to preserve fine detail in fast-moving curtains. Use a longer exposure when the aurora is faint and slow.
- ISO: Raise ISO only as much as needed for a usable exposure. ISO brightens the recorded signal but can make noise more visible.
- Balance: Open the aperture first, select a shutter speed that preserves the desired movement, and then set ISO for suitable brightness.
Practical ISO Starting Points
ISO performance varies by camera, so labels such as “low noise” or “high noise” are not universal. Start near ISO 1600, inspect the image and histogram, and then adjust.
| Aurora Condition | Aperture | Shutter Speed | ISO |
|---|---|---|---|
| Bright and fast | f/1.8–f/2.8 | 1–4 seconds | 800–3200 |
| Moderate movement | f/2–f/2.8 | 4–8 seconds | 1600–3200 |
| Faint and slow | f/1.4–f/2.8 | 8–20 seconds | 1600–6400 |
These ranges align with the adaptable approach in Canon’s aurora photography guidance. Your camera may need a lower or higher ISO. Avoid judging exposure only from a bright rear screen; check the histogram and highlight warning as well.
Shutter Speed Selection
Begin near five seconds. If the aurora turns into a smooth green blur, shorten the exposure to one to four seconds and raise ISO if needed. If the aurora barely appears, try 10–20 seconds while watching for star trails and lost structure.
A 30-second exposure can work for a very faint, slow display, but it is not the default choice. It can smear auroral curtains, blur moving clouds, and elongate stars. Review the image at high magnification instead of trusting the small preview.
Focus, White Balance, and File Format
- Focus: Switch to manual focus. Magnify a bright star or distant light in live view, turn the focus ring until it looks smallest and sharpest, and take a test image. Do not assume the lens’s infinity stop is accurate.
- White balance: Start around 3500–4000K. Adjust to suit snow, moonlight, and the natural color of the scene.
- File format: Shoot RAW for greater control over white balance, shadows, highlights, and noise. RAW+JPEG is useful if you also want an immediately shareable file.
- Image stabilization: Turn lens or body stabilization off when the camera is locked firmly on a tripod unless your manual specifically recommends leaving it on.
- Long-exposure noise reduction: Consider turning it off when the aurora is changing quickly because the camera may become unavailable for another exposure of equal length.
Note: Moonlight is not always a problem. It can illuminate snow, mountains, cabins, and trees, creating a stronger foreground. A bright moon may reduce contrast in a faint aurora, so plan according to the photograph you want.
Best Time of Year to Photograph the Aurora
The aurora can occur throughout the year, but Alaska’s summer sky is often too bright to see it. The commonly recognized viewing season is approximately August 21 through April 21.
According to the University of Alaska Fairbanks Geophysical Institute, the statistical chance of auroral activity over Interior Alaska is roughly twice as high around the March and September equinoxes as around a solstice. This does not guarantee a display. Clouds, daylight, location, and short-term space weather still control what you can photograph.
| Period | What to Expect |
|---|---|
| Late August–September | Returning darkness, autumn foregrounds, and favorable equinox statistics |
| October–February | Long nights and snow-covered scenes, with increasingly severe cold in Interior Alaska |
| March | Useful darkness, favorable equinox statistics, and generally milder conditions than midwinter |
| Early–mid April | Shorter dark windows; check local sunset, twilight, and cloud conditions carefully |
A long night creates more viewing time, but darkness alone does not mean stronger auroral activity. Clear skies and favorable geomagnetic conditions must occur together.
Ideal Locations in Alaska for Aurora Viewing
The strongest location combines darkness, an open view, safe legal access, manageable clouds, and a useful foreground. Scout during daylight and save the parking location before returning at night.
- Fairbanks and Interior Alaska: Fairbanks sits beneath the auroral oval and provides access to darker areas outside the city. Interior Alaska often has clearer conditions than the wetter coast.
- Denali National Park area: Limited light pollution and mountain scenery can create excellent compositions. The National Park Service identifies Denali as a strong aurora-viewing location, but many visitor services and portions of park access are limited during winter.
- Anchorage area: Escaping the city’s light pollution can produce wide views without requiring travel to Interior Alaska. Coastal clouds can still block a strong display, so check the local forecast.
- Chena Hot Springs area: The area near Fairbanks is well known for aurora viewing. Check current hours, reservations, road conditions, parking rules, and property access before traveling.
Avoid stopping on a roadway or snow berm. Use a maintained pullout or designated parking area where your vehicle remains visible and does not block traffic or snow-removal equipment.
Tips for Planning Your Aurora Photography Trip
- Check official aurora forecasts: Review the UAF forecast for Alaska and NOAA’s Aurora Dashboard. Forecasts indicate probability, not a promise.
- Check clouds and wind: A strong geomagnetic forecast is useless beneath solid cloud. Wind also affects tripod stability and frostbite risk.
- Scout in daylight: Find a safe parking area, solid tripod position, unobstructed sky, and a clear route back to the vehicle.
- Check access: Confirm road status, park closures, business hours, and private-property rules on the day of the shoot.
- Plan the composition: Look for mountains, trees, cabins, reflective water, or snow that can provide scale and depth.
- Prepare the equipment: Charge batteries, format memory cards, clean the lens, set RAW capture, and attach the tripod plate indoors.
- Tell someone your plan: Share your destination and expected return time when traveling beyond a developed viewing area.
- Remain flexible: Aurora timing and cloud breaks are unpredictable. Be prepared to wait or move only when travel remains safe.
Warning: Do not risk frostbite, hypothermia, unsafe driving, thin ice, or a dangerous roadside position for a photograph. The National Weather Service warns that extreme cold and wind can cause frostbite or hypothermia quickly. Leave immediately if you become confused, unusually tired, numb, clumsy, or unable to stop shivering.
Step-by-Step Northern Lights Shooting Technique
- Stabilize the camera: Place the tripod on firm ground, shorten unnecessary leg extensions, and secure the camera strap so it cannot flap in the wind.
- Choose manual exposure: Set manual mode, RAW format, a wide aperture, five seconds, and ISO 1600 as an initial test.
- Focus accurately: Magnify a bright star or distant light in live view and focus manually. Recheck focus if the lens is bumped or the temperature changes greatly.
- Frame the scene: Leave space for the aurora while including a simple foreground. Check the frame edges for headlights, people, signs, and tripod legs.
- Take a test exposure: Use a remote release or two-second timer. Review sharpness, histogram, auroral detail, and foreground brightness.
- Match shutter speed to movement: Shorten the exposure when the aurora brightens or moves rapidly. Lengthen it carefully when the display is faint.
- Adjust ISO last: Raise ISO if the shutter must remain short. Lower ISO if highlights clip or the sky becomes unnecessarily bright.
- Keep shooting: Auroral shapes change quickly. Reframe, capture vertical and horizontal versions, and check focus periodically.
Composition Techniques
- Use a foreground subject to show scale instead of filling the frame with empty sky.
- Keep the horizon level unless a deliberate angle improves the scene.
- Watch for bright road lights, headlamps, or building lights that can overpower the aurora.
- Try both wide landscape frames and tighter compositions that isolate interesting curtains or rays.
- If people appear in the foreground, ask them to remain still and avoid shining lights toward other photographers.
Photographing the Aurora With a Smartphone
Recent phones can record a bright aurora when they support Night mode or manual controls. Place the phone on a tripod or stable support, use the main camera rather than digital zoom, turn off the flash, and use a three-second timer. If a Pro mode is available, try RAW capture, manual focus near infinity, ISO 800–1600, and a two- to eight-second exposure.
Phone Night modes may combine several frames, so fast auroral movement can look soft. Shorten the capture when possible and keep the lens clean. Avoid holding the phone by hand during a multi-second exposure.
Troubleshooting Common Aurora Photo Problems
| Problem | Likely Cause | Fix |
|---|---|---|
| Stars look soft | Missed focus, tripod movement, or condensation | Refocus with magnified live view, stabilize the tripod, and inspect the front element |
| Aurora looks like a green blur | Exposure is too long for its movement | Shorten the shutter speed and raise ISO if necessary |
| Green areas lose detail | Highlights are overexposed | Lower ISO or use a shorter exposure; check individual color-channel clipping |
| Image has heavy noise | High ISO, underexposure, or strong shadow recovery | Open the aperture, lengthen the exposure if movement allows, and expose more accurately |
| Foreground is black | Little moonlight or exposure chosen only for the sky | Use moonlight, choose a reflective snowy foreground, or make a separate longer foreground exposure |
| Lens fogs after going inside | Warm indoor air reaches cold equipment | Seal the camera in its bag before entering and let it warm gradually |
Post-Processing Your Aurora Images
Post-processing should reveal the detail recorded in the RAW file without turning the aurora into an unnatural neon shape.
- Correct the lens profile: Apply the appropriate lens correction and remove obvious chromatic aberration.
- Set white balance: Adjust temperature and tint until snow and the night sky look believable.
- Recover highlights: Reduce highlights if bright green areas have lost texture. Fully clipped detail cannot be restored.
- Adjust exposure and contrast: Make small changes while protecting the natural darkness of the scene.
- Control color: Use vibrance or selective color carefully. Avoid pushing greens and purples beyond what the file can support.
- Reduce noise: Apply moderate luminance and color-noise reduction. Excessive reduction can erase stars and auroral texture.
- Sharpen selectively: Sharpen stars, landscape edges, and defined auroral structure without emphasizing noise in the whole sky.
- Crop for composition: Remove distracting edges while keeping enough foreground and sky to preserve scale.
If you blend a separate foreground exposure with an aurora exposure, use frames captured from the same tripod position and close in time. Disclose composites when the editing method matters to the audience or publication.
Safety Considerations While Photographing in Alaska
- Dress in layers: Use a moisture-wicking base layer, insulating middle layers, and a wind-resistant outer shell. Cover exposed skin.
- Limit cold exposure: Warm up before numbness or loss of coordination develops. Do not wait until you feel severely cold.
- Carry emergency supplies: Keep warm clothing, water, food, a charged phone, a power bank, and basic winter emergency equipment in the vehicle.
- Check communication coverage: Some viewing locations have weak or no mobile signal. Download maps before leaving.
- Use safe parking: Never stop in an active traffic lane, on a blind curve, or where deep snow may trap the vehicle.
- Scout ice and terrain: Identify drop-offs, water, uneven snow, and slippery surfaces during daylight. Never assume natural ice is safe.
- Respect wildlife and property: Keep your distance from animals and follow posted rules. Do not enter private land without permission.
- Travel with another person: A companion can help with navigation, cold-related symptoms, vehicle trouble, and emergencies.
Frequently Asked Questions
What clothing should I wear while photographing the aurora in Alaska?
Wear a moisture-wicking base layer, one or more insulating layers, and a wind-resistant outer shell. Add insulated boots, wool or synthetic socks, a warm hat, neck protection, and insulated gloves. Bring extra layers because you may stand still for long periods.
Which apps or websites can track aurora activity?
Use the University of Alaska Fairbanks Aurora Forecast and NOAA’s Aurora Dashboard as primary sources. Mobile apps such as My Aurora Forecast can provide alerts, but compare every alert with cloud cover, local weather, and actual sky conditions.
Can I use a tripod for aurora photography in extreme cold?
Yes. A stable tripod is essential for multi-second exposures. Avoid touching bare metal with uncovered skin, keep snow out of the leg locks, shorten the center column, and secure loose straps. Confirm that the legs are firmly planted before attaching the camera.
How do I protect my camera from freezing temperatures?
Check the camera’s operating-temperature guidance, protect it from falling snow, and keep spare batteries warm. Before moving cold equipment into a warm building or vehicle, seal it inside a camera bag or airtight bag and let it warm gradually before opening the bag.
What is the best way to manage battery life in cold weather?
Start with fully charged batteries and carry several spares in an inside pocket. Reduce unnecessary image review, wireless connections, and screen time. Replace a weak cold battery with a warm spare; the cold battery may regain usable power after warming.
Should I shoot the northern lights in RAW or JPEG?
RAW is the better choice because it preserves more information for correcting white balance, recovering shadows and highlights, and reducing noise. RAW+JPEG gives you both editing flexibility and a file that is ready to share quickly.
Why does the aurora look blurry in my photos?
The exposure may be too long for the aurora’s movement, the focus may be inaccurate, or the tripod may have moved. Shorten the shutter speed, refocus on a star with magnified live view, and stabilize the tripod before taking another test image.
Sources
- University of Alaska Fairbanks Geophysical Institute Aurora Forecast — Alaska forecasts, seasonal darkness, clear-sky requirements, and equinox statistics
- NOAA Space Weather Prediction Center Aurora Dashboard — short-term aurora visibility and activity forecasts
- Travel Alaska Northern Lights Viewing Tips — Alaska’s commonly recognized aurora-viewing season
- National Park Service: Aurora Borealis in Denali — Denali’s latitude, dark skies, and limited light pollution
- Canon: Photographing Auroras — equipment, exposure, focus, and cold-weather camera guidance
- National Weather Service Cold Safety — frostbite, hypothermia, wind chill, and extreme-cold precautions