

Selecting the appropriate equipment is a fundamental step in the journey of photography, particularly when aiming to capture stunning landscapes. The choice of camera can significantly influence the quality of the images produced. While professional DSLRs and mirrorless cameras offer superior image quality and versatility, many photographers find that high-end compact cameras or even smartphones can yield impressive results, especially with the right techniques.
For landscape photography, a camera with a larger sensor, such as a full-frame or APS-C sensor, is often preferred due to its ability to capture more light and detail. This is particularly beneficial in low-light conditions, such as during dawn or dusk when the landscape is bathed in soft, golden light. In addition to the camera body, lenses play a crucial role in landscape photography.
Wide-angle lenses are typically favored for their ability to capture expansive scenes, allowing photographers to include more of the landscape in a single frame. A lens with a focal length between 14mm and 24mm is often ideal for this purpose. However, telephoto lenses should not be overlooked; they can compress distances and highlight specific elements within a landscape, creating a unique perspective.
Furthermore, investing in a sturdy tripod is essential for long exposure shots and ensuring stability, particularly in windy conditions or when shooting at slower shutter speeds. Filters, such as polarizers and neutral density filters, can also enhance images by reducing glare and allowing for longer exposures during bright daylight.
Key Takeaways
- Choose the right equipment for your photography needs, such as a tripod for stability and a wide-angle lens for landscape shots.
- Time your shot to capture the best lighting, such as the golden hour for warm, soft light, or the blue hour for dramatic, cool tones.
- Find the best vantage point to capture unique and interesting perspectives, such as high ground or low angles.
- Be prepared to deal with weather conditions by protecting your gear and adjusting your settings for different lighting situations.
- Use long exposure techniques to create stunning effects, such as smooth water or streaking clouds, by adjusting your shutter speed.
Timing Your Shot
Timing is an essential element in landscape photography that can dramatically alter the mood and quality of an image. The golden hour, which occurs shortly after sunrise and just before sunset, is often regarded as the best time for capturing landscapes. During these periods, the sunlight is softer and warmer, casting a beautiful glow over the scenery.
This natural light enhances colors and textures, making landscapes appear more vibrant and inviting. Photographers often plan their outings around these times to take advantage of the optimal lighting conditions. However, timing extends beyond just the golden hour.
The changing seasons can also provide unique opportunities for capturing landscapes in different moods and colors. For instance, autumn brings a spectacular display of foliage, while winter can transform a familiar scene into a serene wonderland of snow and ice. Additionally, weather patterns can create dramatic effects; stormy skies can add intensity to an image, while clear blue skies may evoke a sense of tranquility.
Understanding how different times of day and seasonal changes affect light and atmosphere allows photographers to make informed decisions about when to shoot for maximum impact.
Finding the Best Vantage Point
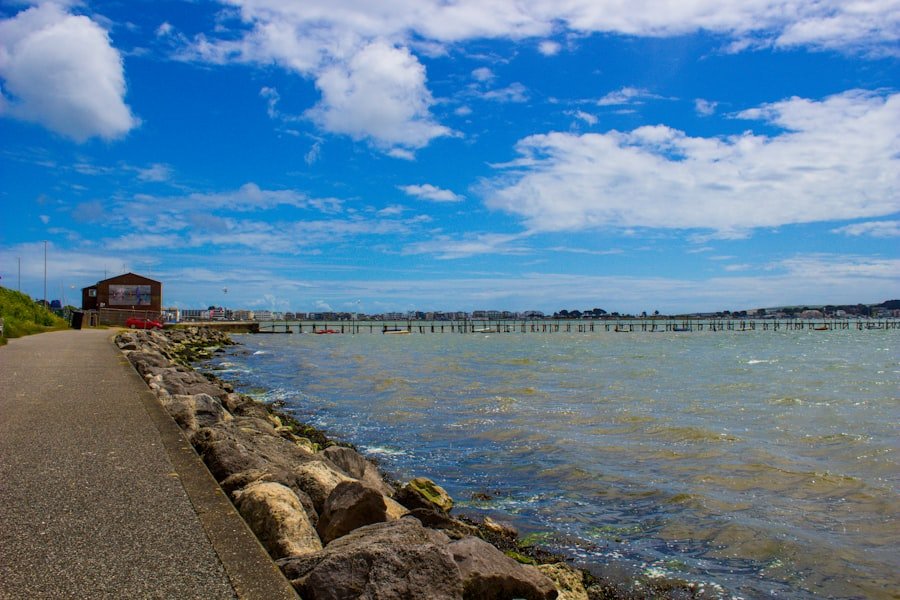
The vantage point from which a photograph is taken can significantly influence its composition and overall impact. Exploring various angles and perspectives can reveal hidden details and create more dynamic images. For instance, shooting from a higher elevation can provide a sweeping view of the landscape below, while getting low to the ground can emphasize foreground elements such as flowers or rocks, adding depth to the composition.
It’s essential for photographers to be willing to experiment with different positions and heights to discover what works best for each scene. In addition to physical elevation, considering the direction of light is crucial when selecting a vantage point. Backlighting can create silhouettes that add drama to an image, while side lighting can enhance textures and details.
Photographers should also be mindful of leading lines within the landscape that can guide the viewer’s eye through the image. Roads, rivers, or pathways can serve as effective compositional tools that draw attention to the main subject. By thoughtfully choosing their vantage point, photographers can create compelling images that resonate with viewers.
Dealing with Weather Conditions
| Weather Condition | Impact | Recommended Actions |
|---|---|---|
| Heavy Rain | Poor visibility, slippery roads | Drive slowly, use headlights |
| Snow | Road blockage, low traction | Use snow chains, drive cautiously |
| High Winds | Difficulty controlling vehicle | Hold steering wheel firmly, reduce speed |
| Fog | Reduced visibility | Use fog lights, maintain safe distance |
Weather conditions are an ever-present variable in landscape photography that can either enhance or hinder a shoot.
Overcast days can produce soft, diffused light that minimizes harsh shadows and highlights details in the landscape that might otherwise be lost in bright sunlight.
Conversely, stormy weather can create dramatic skies filled with texture and movement, adding an element of excitement to photographs. Photographers should embrace varying weather conditions rather than shy away from them; each type of weather offers unique opportunities for creativity. Preparation is key when dealing with unpredictable weather.
Photographers should always check forecasts before heading out and be ready for sudden changes in conditions. Carrying protective gear for both the camera and oneself is essential; rain covers for cameras and weather-appropriate clothing can make a significant difference in comfort and equipment safety. Additionally, understanding how different weather conditions affect light quality can help photographers adapt their techniques accordingly.
For example, during rain showers, colors may appear more saturated due to increased moisture in the air, creating opportunities for striking images.
Using Long Exposure Techniques
Long exposure techniques are a powerful tool in landscape photography that allow photographers to capture motion in a way that adds an ethereal quality to their images. By using slower shutter speeds, photographers can create smooth water effects in rivers or oceans, transforming turbulent waves into serene glass-like surfaces. This technique is particularly effective during twilight hours when light levels are low enough to require longer exposures without overexposing the image.
To achieve long exposures, photographers often use neutral density (ND) filters that reduce the amount of light entering the lens without affecting color balance. This enables them to use slower shutter speeds even in bright daylight conditions. Additionally, using a tripod is essential for stabilizing the camera during these extended exposures; any movement could result in unwanted blurriness.
Experimenting with different exposure times allows photographers to find the perfect balance between capturing motion and maintaining clarity in static elements of the scene.
Incorporating Composition and Framing

Composition is one of the most critical aspects of landscape photography that determines how effectively an image communicates its subject matter. The rule of thirds is a foundational principle that suggests dividing an image into nine equal parts using two horizontal lines and two vertical lines. Placing key elements along these lines or at their intersections creates balance and draws the viewer’s eye into the photograph.
However, while this rule serves as a useful guideline, it’s important for photographers to feel free to break it when it enhances their vision. Framing within an image can also add depth and context to a landscape photograph. Natural frames such as tree branches or rock formations can guide the viewer’s eye toward the main subject while adding layers to the composition.
Photographers should consider how different elements interact within their compositions and strive for harmony between them to create visually compelling images.
Editing and Post-Processing
Editing and post-processing are integral parts of modern landscape photography that allow photographers to refine their images further after capture. Software such as Adobe Lightroom or Photoshop provides tools for adjusting exposure, contrast, saturation, and sharpness—enabling photographers to enhance their original vision while maintaining authenticity. For instance, adjusting highlights and shadows can help recover details lost in bright or dark areas of an image, while fine-tuning colors can bring out the vibrancy of a sunset or autumn foliage.
Moreover, post-processing offers opportunities for creative expression beyond mere correction. Techniques such as dodging and burning allow photographers to selectively lighten or darken areas of an image, guiding attention toward focal points or enhancing textures. Additionally, merging multiple exposures through HDR (High Dynamic Range) techniques can capture a broader range of tones than what a single exposure might allow—particularly useful in high-contrast scenes where both highlights and shadows need attention.
Ultimately, editing should serve to elevate an image while remaining true to its original essence.
Respecting Local Regulations and Etiquette
As landscape photographers venture into natural spaces, it is imperative that they respect local regulations and etiquette to preserve these environments for future generations. Many national parks and protected areas have specific guidelines regarding where photographers can go and what they can do to minimize their impact on wildlife and ecosystems. Understanding these regulations not only helps protect nature but also fosters goodwill between photographers and local communities.
Additionally, practicing good etiquette involves being mindful of other visitors who share these spaces. Photographers should strive to be courteous by not obstructing trails or viewpoints and by keeping noise levels down so as not to disturb wildlife or other nature enthusiasts. It’s also important to leave no trace; this means packing out all trash and being careful not to damage plants or disturb habitats while setting up shots.
By adhering to these principles, photographers contribute positively to the preservation of natural landscapes while enjoying their craft responsibly.
The Jet d’Eau in Geneva is one of the city’s most iconic landmarks, offering a stunning viewpoint for both locals and tourists. For photography enthusiasts looking to capture the perfect shot of this magnificent fountain, timing is key. The best time to photograph the Jet d’Eau is during the golden hour, either at sunrise or sunset, when the light casts a warm glow on the water. Additionally, using a tripod can help stabilize your camera for long exposure shots, creating a silky effect on the water. For more tips on capturing beautiful images, you might find inspiration in this related article that explores the delightful world of Asian melon, offering insights into capturing the essence of natural beauty through photography.
FAQs
What is the Jet d’Eau viewpoint?
The Jet d’Eau viewpoint is a popular tourist attraction in Geneva, Switzerland. It is a large fountain located in Lake Geneva, and it is one of the city’s most famous landmarks.
What are some photography tips for capturing the Jet d’Eau?
When photographing the Jet d’Eau, it’s important to consider the lighting and time of day. The best time to capture the fountain is during the golden hour, just before sunset or after sunrise, when the light is soft and warm. Additionally, using a tripod can help stabilize your camera for long exposure shots of the fountain.
Are there any specific angles or vantage points for photographing the Jet d’Eau?
There are several vantage points around Lake Geneva that offer great views of the Jet d’Eau. Some popular spots for photographing the fountain include the Pont du Mont-Blanc bridge, the Parc des Eaux-Vives, and the Jardin Anglais. Each location provides a unique perspective of the fountain and its surroundings.
What camera settings are recommended for photographing the Jet d’Eau?
For capturing the Jet d’Eau, using a low ISO setting (such as ISO 100 or 200) can help reduce noise in the image. Additionally, using a small aperture (such as f/8 or higher) can ensure that both the fountain and the surrounding landscape are in focus. Experimenting with long exposure shots can also create a beautiful, silky effect with the fountain’s water.
Are there any restrictions or guidelines for photographing the Jet d’Eau?
While there are no specific restrictions for photographing the Jet d’Eau, it’s important to be mindful of other visitors and to respect any designated areas or barriers. Additionally, it’s always a good idea to check the local regulations regarding photography in public spaces.
