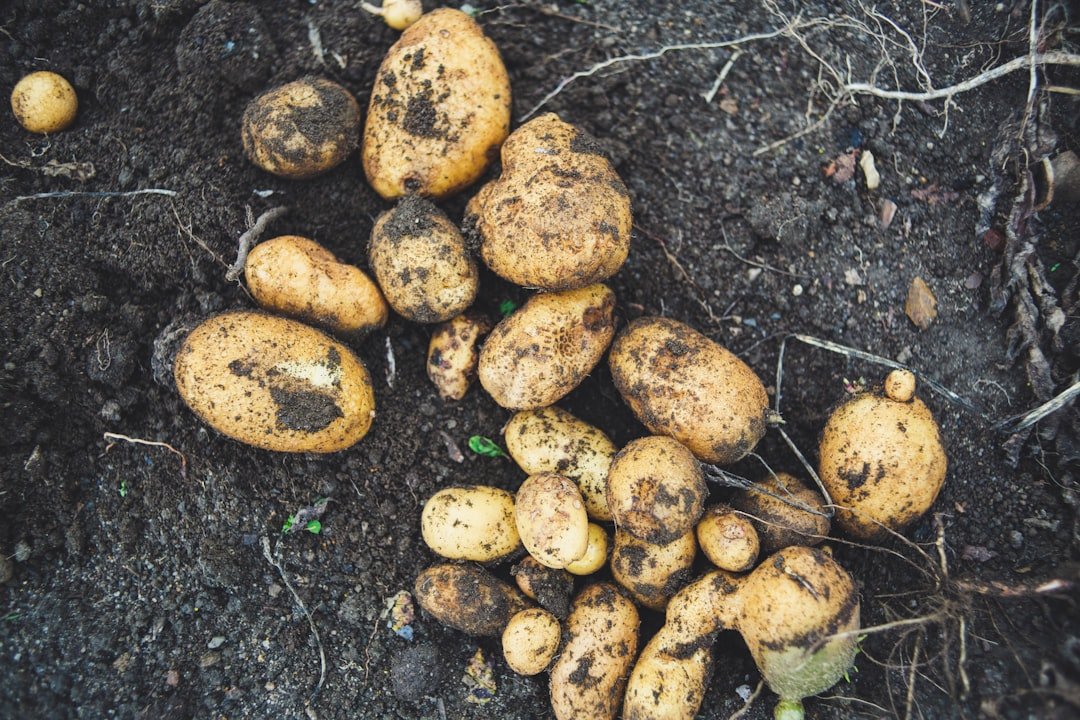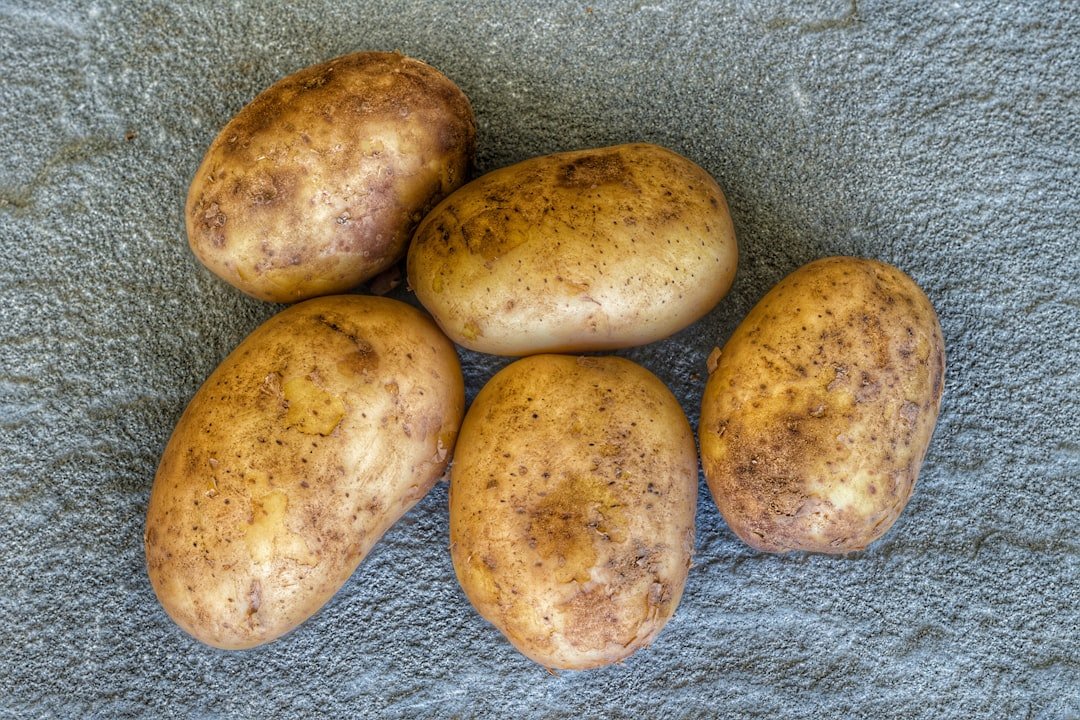
Southern California’s mild winters and long growing season give you more flexibility than gardeners in colder regions. In some areas, you can plant potatoes twice a year. The key is to choose a window that lets the plants form most of their tubers before prolonged heat warms the soil.
Quick Answer
On Southern California’s South Coast, plant potatoes from February through May, with another possible window from June through August for a fall crop. In the Imperial and Coachella desert valleys, plant from December through February. Adjust these dates for your elevation, frost risk, soil temperature, and expected summer heat.
Key Takeaways
- Start with certified seed potatoes rather than grocery-store potatoes, which may carry disease or have been treated to slow sprouting.
- Plant seed pieces about 3 inches deep and 6–12 inches apart once the soil is workable and about 45°F or warmer.
- Use loose, well-drained soil with a pH near 6.0–6.5, and keep the root zone evenly moist rather than alternating between very wet and very dry.
- Hill soil around the stems as the plants grow so developing tubers remain covered and protected from light.
- Plan around heat. Soil temperatures above about 80°F can inhibit tuber development, especially in inland and desert gardens.
At a Glance
| Time Required | About 30–60 minutes to prepare and plant a small bed; roughly 7–17 weeks to harvest, depending on the variety and whether you want new or fully mature potatoes |
| Difficulty | Easy to moderate |
| Tools Needed | Spade or garden fork, clean knife, measuring tape, watering wand or drip line, mulch, and an optional soil thermometer |
| Cost | Low to moderate, depending on the cost of certified seed potatoes, compost, irrigation supplies, and containers |
Understand Southern California’s Potato-Growing Conditions
Southern California generally has mild, wetter winters and warm, dry summers, but conditions vary sharply between the coast, inland valleys, foothills, high-elevation communities, and desert areas. Potatoes produce best when they receive sun while the air and soil remain relatively cool.
Choose a well-exposed location that receives at least four to six hours of direct sunlight. In cool coastal gardens, more sun is usually helpful. In a hot inland garden, light afternoon shade or temporary shade cloth may reduce stress during a short heat wave, but planting at the right time is more effective than trying to grow potatoes through sustained summer heat.
Potatoes can sprout in cool soil, but tuber growth slows sharply when the soil becomes hot. A planting date that avoids prolonged soil temperatures above about 80°F is usually more important than following the calendar alone.
Best Soil for Potatoes
Potatoes grow best in loose, well-drained soil that can also retain moisture evenly. Sandy loam is ideal because the developing tubers can expand without being compressed. You can improve many garden soils by mixing finished compost or another well-decomposed organic amendment into the upper 6–8 inches.
If your garden has dense clay, use a raised bed or large container rather than planting into compacted, waterlogged ground. Avoid working clay while it is wet because this can create hard clods and poor drainage.
Recommended Soil pH
A slightly acidic pH of 6.0–6.5 works well for most home gardens, according to the UC Statewide IPM Program. Common scab is favored by neutral to alkaline conditions, but you should not add sulfur or another acidifying material without first testing the soil.
Note: A calendar date is only a starting point. Soil temperature, drainage, frost exposure, elevation, and the arrival of sustained heat determine whether a particular week is suitable in your garden.
Choose the Best Planting Time
The regional dates below come from California gardening guidance, but they are approximate. Use them together with a soil thermometer and your local weather pattern.
| Southern California area | Approximate planting window | Main timing concern |
|---|---|---|
| South Coast, from San Luis Obispo County south | February–May; another possible window from June–August | A late planting must mature before cool-season growth slows or winter conditions arrive. |
| Imperial and Coachella desert valleys | December–February | Plant early enough for tubers to develop before intense spring heat warms the soil. |
| Inland valleys, foothills, frost pockets, and higher elevations | Use local conditions rather than a single regional month | Wait for workable soil near 45°F while leaving enough cool growing time before sustained heat. |
A useful planting rule is to wait until the soil at planting depth is about 45°F or warmer, the bed is not waterlogged, and a damaging hard freeze is unlikely. Potato shoots can tolerate some cool weather, but prolonged cold and wet soil increases the risk of seed-piece decay.
Pro Tip: Measure the soil temperature in the morning at the planned planting depth for several days. A stable reading is more useful than one warm afternoon measurement.
Choose Potato Varieties for Your Garden
Select a variety according to its maturity period, your expected heat, available space, intended use, and local availability. Early and midseason varieties are often easier in warm inland gardens because they have a better chance of producing before hot soil limits tuber development.
- California-listed choices: UC IPM identifies Norgold Russet, Red LaSoda, Kennebec, and White Rose as common potato varieties for California gardens.
- Other widely available home-garden choices: Yukon Gold and Red Pontiac may also perform well where certified stock is available and the maturity period fits your planting window.
- Russets: Russet Burbank and similar long-season russets need a sufficiently long period of mild weather. They are less forgiving when inland heat arrives early.
- Colorful potatoes: Purple and blue varieties can add color to a fall or cool-season crop, but check the variety’s days to maturity before buying.
For the cleanest start, buy certified seed potatoes from a nursery, garden center, farm supplier, or reputable seed company. Grocery-store potatoes may carry disease or may have been treated with a sprout inhibitor.
Prepare the Soil and Planting Area
Pull weeds, remove old roots and crop debris, and loosen the soil so tubers can expand without obstruction. Do not work the bed when the soil is saturated. A handful of soil should crumble when pressed rather than forming a sticky, dense clump.
| Soil and planting factor | Good target |
|---|---|
| Soil texture | Loose, well-drained loam or sandy loam |
| Soil pH | About 6.0–6.5 |
| Soil moisture | Evenly moist but not saturated |
| Minimum soil temperature | About 45°F at planting depth |
| Spacing within a row | 6–12 inches; closer spacing usually produces more small potatoes |
| Spacing between rows | About 24–36 inches to allow room for access and hilling |
Should You Add Fertilizer?
Use a soil test when possible. If the bed is low in nutrients, mix in a balanced fertilizer according to its label before planting. Finished compost can improve soil structure and contribute nutrients, but excessive nitrogen can produce large leafy plants with disappointing tuber yields.
If growth is weak and a soil test or fertilizer plan supports it, apply a light nitrogen side-dressing after the shoots emerge. Keep concentrated fertilizer away from the stems and water it into the soil.
Prepare Certified Seed Potatoes
- Inspect the seed potatoes: Do not plant pieces that are soft, moldy, badly shriveled, or rotting.
- Leave small tubers whole: A small certified seed potato can be planted without cutting if it is a practical planting size and has healthy eyes.
- Cut larger tubers: Use a clean knife to make blocky pieces weighing about 1½–2 ounces. Each piece needs at least one healthy eye.
- Clean the knife: Sanitize the blade before starting and between any questionable tubers so you do not spread decay organisms from one piece to another.
- Let the cuts heal: Arrange the pieces in a single layer at room temperature for about 1–3 days, or until the cut surfaces are dry and callused.
Do not let cut pieces sit for a long time in direct sun or become severely dehydrated. The goal is a dry protective surface, not a shriveled seed piece.
How to Plant Potatoes Step by Step
- Open the furrows: Make furrows about 3 inches deep in the prepared bed.
- Position the seed pieces: Set each piece cut-side down when practical, with the eyes facing generally upward.
- Space the plants: Leave 6–12 inches between pieces and about 24–36 inches between rows.
- Cover the furrow: Return the soil to ground level without packing it hard.
- Water only as needed: If the soil was evenly moist at planting, avoid repeatedly soaking it before emergence. Water if the seed zone begins to dry.
- Begin hilling: When the shoots reach about 8 inches tall, mound loose soil around the stems while leaving roughly the upper 4 inches exposed.
- Repeat hilling: Add more soil after about 2–3 weeks, and repeat once more if needed. Keep all developing tubers covered.
Hilling does not mean burying the entire plant. Leave enough foliage exposed for photosynthesis while building a broad ridge around the stems.
Growing Potatoes in Containers
Large pots, opaque tubs, and grow bags work well when they drain freely. A container holding about 10–15 gallons gives a compact potato planting useful root and hilling space. Avoid clear containers because light reaching the tubers can cause greening.
Place the seed piece near the lower part of the container in several inches of potting mix. As the shoots grow, add more mix in stages while keeping the top leaves exposed. Container soil dries faster than an in-ground bed, so check moisture frequently during warm or windy weather.
Care for Potato Plants During the Growing Season
Water Consistently
Potatoes have a relatively shallow root system and need uniform moisture. UC IPM advises light, frequent irrigation at least weekly during the growing season, but the actual schedule depends on rainfall, soil texture, temperature, wind, plant size, and whether you are growing in a bed or container.
Check the soil rather than watering by the calendar alone. Water when the upper root zone begins to dry, then wet the soil deeply enough to reach the roots without leaving the bed saturated. Alternating between very dry and very wet conditions can contribute to rough, knobby, cracked, or misshapen tubers.
Moisture is especially important as tubers begin to form and enlarge. Drip or furrow irrigation keeps the foliage drier than overhead watering. If you use a sprinkler, water early enough for the leaves to dry before evening.
Manage Heat
Apply a layer of clean organic mulch after the plants emerge and the soil has warmed enough for healthy growth. Mulch suppresses weeds, reduces moisture loss, and helps moderate soil temperature.
In a hot inland garden, temporary shade cloth can reduce stress during a brief heat wave. It will not fully correct a planting that must grow through weeks of hot soil, so an earlier or later planting window is usually the better solution.
Control Weeds Carefully
Remove weeds while they are small. Use shallow cultivation near the rows because potato roots, stolons, and developing tubers can be damaged by deep hoeing. Hilling and mulch will suppress many later weeds.
Diagnose Common Pests and Diseases
Inspect the plants at least weekly, including the undersides of leaves and the soil near the stems. Southern California potato problems may include aphids, flea beetles, whiteflies, wireworms, potato tuberworm, potato psyllid, common scab, seed-piece decay, early blight, late blight, viruses, and environmental disorders.
| Problem | What you may notice | First response |
|---|---|---|
| Aphids and whiteflies | Clusters of small insects, sticky residue, curled leaves, or weakening growth | Check leaf undersides, remove heavily infested leaves when practical, control weeds, and identify the pest before choosing a treatment. |
| Flea beetles | Many small, round “shot holes” in leaves | Protect young plants, remove nearby host weeds, and monitor whether damage is increasing or only cosmetic. |
| Potato psyllid and zebra chip | Leaf curling, yellowing, stunting, unusual aerial tubers, or dark striping that becomes obvious when affected potatoes are fried | Confirm the insect or symptoms through UC IPM or your local extension office and remove severely affected plants. |
| Potato tuberworm | Mines in leaves or tunneling and contamination in exposed tubers | Keep tubers covered with soil or mulch, close soil cracks, and harvest promptly after maturity. |
| Wireworms | Small holes or tunnels in harvested tubers | Rotate crops, avoid planting immediately into a recently grassy or weedy site when possible, and remove damaged tubers. |
| Common scab | Rough, corky, raised, or sunken patches on the skin | Use certified seed, rotate crops, maintain even moisture during early tuber development, and test the soil before changing its pH. |
| Blight or bacterial decay | Expanding leaf spots, rapidly collapsing foliage, dark lesions, soft stems, or rotting tubers | Remove diseased material, avoid moving contaminated soil, keep foliage dry when possible, and use the UC IPM diagnostic guide before applying a pesticide. |
For current California identification and management information, use the UC IPM potato pest and disease guide. Pesticide registrations and label directions can change, so follow the current product label and avoid treating a problem until you have identified it.
Reduce Pest and Disease Risk
- Plant certified, disease-free seed potatoes.
- Rotate potatoes and other nightshades, including tomatoes, peppers, and eggplants, out of the same bed for several years when space allows.
- Remove volunteer potato plants and infected crop debris.
- Keep tubers covered throughout the season.
- Avoid overwatering and prolonged leaf wetness.
- Maintain enough plant spacing for airflow and access.
- Do not compost badly diseased tubers or foliage unless your composting system reliably destroys the pathogen involved.
Harvest Potatoes at the Right Stage
Harvesting New Potatoes
You can begin checking for small new potatoes about seven to eight weeks after planting or after flowering, depending on the variety and weather. Gently reach into the side of a hill and remove a few developed tubers without pulling up the whole plant.
Harvesting Mature Storage Potatoes
For mature potatoes, wait until the vines yellow and die back. As the vines decline, reduce or stop irrigation so the skins can firm. If the soil is dry and disease pressure is low, leaving the tubers underground briefly can help the skins set.
Choose a dry day. Loosen the soil from outside the hill with a garden fork or spade, then lift carefully to reduce cuts and punctures. Do not leave harvested potatoes exposed to direct sunlight.
Sort the crop before storage. Use cut, bruised, or damaged potatoes first because they are more likely to rot. Keep only sound, mature tubers for longer storage.
Cure, Store, and Preserve the Harvest
Cure Potatoes Before Long-Term Storage
Place sound potatoes in a dark, well-ventilated location at approximately 50–60°F with high humidity. A minimum of 10–14 days may heal minor surface injuries under good conditions, but a curing period of about two to three weeks is a more conservative home-garden target.
Do not cure visibly diseased, wet, or badly damaged potatoes with the main crop. Check the tubers during curing and remove any that soften, leak, smell unpleasant, or develop spreading decay.
Store Potatoes in Cool, Dark Conditions
After curing, store table potatoes in a dark, ventilated place at about 40–46°F with relatively high humidity. Temperatures toward 50°F may be workable for shorter storage but can encourage earlier sprouting and moisture loss. Temperatures below about 38°F can cause starch to convert to sugar, producing unusually sweet potatoes and darker fried products.
Use ventilated boxes, perforated bags, or other containers that allow airflow. Inspect the potatoes periodically and remove spoiled tubers before decay spreads.
Warning: Do not eat potatoes that are substantially green, strongly bitter, badly sprouted, decayed, or severely damaged. Greening can signal increased glycoalkaloids, and ordinary cooking does not reliably remove them.
Preserving Potatoes Safely
Potatoes are a low-acid food. If you want to can them, use a tested pressure-canning method such as the National Center for Home Food Preservation procedure for white potatoes. Do not invent processing times, use a boiling-water canner, or substitute a small pressure cooker for an approved pressure canner.
Tips for Better Future Crops
- Rotate the bed: Avoid repeatedly planting potatoes, tomatoes, peppers, or eggplants in the same soil.
- Keep tubers covered: Hill and mulch before soil cracks or erosion expose developing potatoes.
- Match the variety to the season: An early cultivar may be a safer choice in a garden that heats quickly.
- Water evenly: Avoid cycles of severe dryness followed by heavy saturation.
- Use containers strategically: A container can improve drainage in clay soil, but it will need more frequent moisture checks.
- Record your results: Note the planting date, variety, soil temperature, major heat events, first flowering, pest problems, and harvest date.
- Adjust locally: Southern California gardens differ greatly. Use your records and advice from your local UC Master Gardener program to refine the best planting window.
For more California-specific guidance, see the UC IPM cultural tips for growing potatoes and the UC IPM potato guide.
Frequently Asked Questions
What is the best time to plant potatoes in Southern California?
South Coast gardens commonly plant from February through May, with another possible window from June through August for a fall crop. In the Imperial and Coachella desert valleys, the approximate window is December through February. Use soil temperature, frost risk, elevation, and expected heat to refine these dates.
What conditions do potatoes need in Southern California?
Give potatoes a sunny, well-drained site with loose soil and uniform moisture. A soil pH near 6.0–6.5 is suitable for most gardens. Time the crop so most tuber development occurs before prolonged heat raises the soil temperature.
How deep should I plant seed potatoes?
Plant seed pieces in furrows about 3 inches deep. Space them 6–12 inches apart and leave about 24–36 inches between rows. Hill additional soil around the stems after the shoots reach about 8 inches tall.
Which potato varieties grow well in California?
UC IPM lists Norgold Russet, Red LaSoda, Kennebec, and White Rose as common California choices. Yukon Gold, Red Pontiac, russets, and colorful purple or blue potatoes may also work when certified stock is available and the variety can mature within your local cool-weather window.
How long do potatoes take to mature?
The exact period depends on the cultivar and weather. You may be able to harvest small new potatoes about seven to eight weeks after planting. Fully mature potatoes commonly need several additional weeks, so use the maturity period printed for your chosen variety rather than relying on one universal number.
Can I grow potatoes in a container?
Yes. Use an opaque container or grow bag with drainage. A capacity of about 10–15 gallons provides useful space for a compact planting. Add potting mix in stages as the stems grow, keep the upper leaves exposed, and check moisture more often than you would in an in-ground bed.
Why are my potato plants producing leaves but few potatoes?
Common causes include hot soil, excessive nitrogen, uneven watering, a late-maturing variety, insufficient sunlight, or planting too late for your microclimate. Review the planting date, fertilizer use, soil temperature, and variety maturity period before changing several things at once.
Can I eat a potato that has turned green?
Do not eat potatoes that are substantially green, bitter, badly sprouted, decayed, or severely damaged. Green color itself is chlorophyll, but it can indicate that glycoalkaloid levels have also increased. Keep harvested potatoes in darkness to prevent greening.
Sources
- UC Statewide IPM Program: Cultural Tips for Growing Potato — California planting windows, soil, seed preparation, spacing, hilling, watering, and harvesting.
- UC Statewide IPM Program: Potato Guide — California varieties, pests, diseases, and environmental disorders.
- University of Maryland Extension: Growing Potatoes in a Home Garden — soil temperature, row spacing, planting measurements, and heat effects.
- Penn State Extension: Potatoes in the Garden and the Kitchen — container size, curing conditions, and storage guidance.
- Oregon State University Extension: Harvesting and Storing Homegrown Potatoes — storage temperature, humidity, ventilation, and greening safety.
- National Center for Home Food Preservation: White Potatoes — tested pressure-canning instructions.