The Great Aletsch Glacier is one of Switzerland’s most impressive landscapes to photograph, but there is an important detail to understand before planning your trip: there is no single 23-kilometer hiking route that simply runs from Riederalp to Bettmerhorn. Several marked hikes and four major viewpoints provide different ways to photograph the glacier, from short cable-car-assisted visits to demanding full-day mountain routes.
Quick Answer
The best Aletsch Glacier photo spots are Bettmerhorn, Eggishorn, Moosfluh, Hohfluh and the trails toward Märjelensee. Bettmerhorn and Eggishorn give the strongest broad panoramas, while Moosfluh brings you visually closer to the ice. Choose your hiking route carefully because distances range from short viewpoint visits to difficult 14 to 23 km mountain hikes.
Key Takeaways
- The Great Aletsch Glacier is the largest glacier in the Alps and forms part of the Swiss Alps Jungfrau-Aletsch UNESCO World Heritage property.
- The main official glacier viewpoints are Hohfluh, Moosfluh, Bettmerhorn and Eggishorn.
- Do not treat every Aletsch-area hike as one trail. Official routes have very different distances, elevation changes and difficulty ratings.
- Bettmerhorn is excellent for the glacier’s sweeping bend, while Eggishorn gives one of the broadest high-level panoramas.
- Märjelensee and the trails beneath Bettmerhorn and Eggishorn provide more intimate foregrounds, rock textures and changing perspectives.
- A wide-angle lens is useful for landscapes, while a short telephoto lens helps isolate crevasses, moraines and distant mountain details.
- Check weather, trail conditions and lift schedules before setting out. Long Aletsch hikes should not automatically be considered beginner or family routes.
- Stay on marked trails and never step onto glacier ice without the skills, equipment and appropriate professional guidance required for glacier travel.
At a Glance
| Time Required | From a short viewpoint visit to more than 6 hours of hiking, depending on route |
| Difficulty | Easy-access viewpoints to difficult mountain hikes |
| Tools Needed | Hiking footwear, layered clothing, water, navigation, sun protection and camera gear |
| Cost | Trail access is generally free; cable-car and guided-tour prices depend on the route, season and ticket type |
Which Aletsch Glacier Trail Should You Hike?
The phrase “Aletsch Glacier Trail” can be confusing because visitors use it for several hikes overlooking the Great Aletsch Glacier. Before planning photography stops, choose an official route that matches your fitness, available time and transport plan.
| Route | Distance | Typical Time | Official Overall Difficulty | Best For |
|---|---|---|---|---|
| Riederalp via Moraine Trail to Bettmerhorn | 9.3 km | About 3 hr 30 min | Moderate | Ridge and moraine scenery with a Bettmerhorn finish |
| Bettmerhorn via Märjelensee to Bettmeralp | 14.6 km | About 5 hr 30 min | Difficult | Close glacier perspectives and Märjelensee |
| Moosfluh via Märjelensee to Riederalp | 23.2 km | About 6 hr 15 min | Difficult | A long photography-focused day with extensive glacier views |
The official Riederalp to Bettmerhorn route climbs about 742 meters and finishes at 2,647 meters. The Bettmerhorn-Märjelensee route and the longer Moosfluh-Märjelensee-Riederalp route require considerably more stamina.
Warning: A marked hiking trail overlooking the glacier is not the same as a route across glacier ice. The Great Aletsch Glacier contains crevasses and other alpine hazards. Do not walk onto the glacier as an ordinary hiking shortcut. Aletsch Arena offers guided glacier tours that use appropriate equipment and roped travel.
Topography and Landscape of the Aletsch Glacier Trail
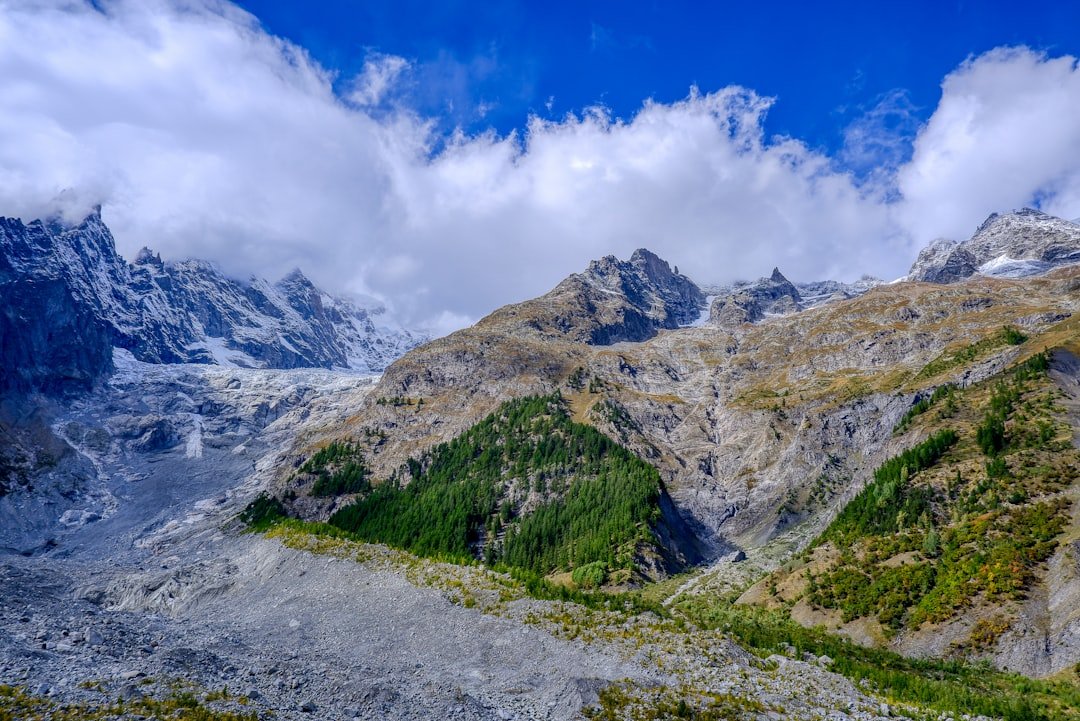
The landscape around the Great Aletsch Glacier changes quickly with elevation. Lower sections near Riederalp and Bettmeralp pass alpine meadows, forest and areas shaped by former glacial moraines. Higher routes move onto open mountain slopes, rocky paths and ridges where the glacier dominates the northern view.
The Great Aletsch Glacier is the largest glacier in the Alps. Aletsch Arena currently describes it as more than 20 kilometers long and about 79 square kilometers in area. Its two dark medial moraines are especially useful photographic features because they create long lines through the ice and help show the direction and enormous scale of the glacier.
The glacier is also part of the Swiss Alps Jungfrau-Aletsch UNESCO World Heritage property. UNESCO highlights the region for its glacial landforms, geological history, alpine ecosystems and evidence of ecological change around retreating glaciers.
Depending on your route, elevation can rise from around 1,900 meters on the car-free plateau to more than 2,600 meters at Bettmerhorn and 2,800 meters at Eggishorn. These differences matter for both hiking effort and photography. Clouds, haze, wind and light can look completely different at the viewpoints compared with the villages below.
The strongest Aletsch Glacier photographs usually combine the ice with a second element of scale, such as a hiker, moraine ridge, mountain lake or surrounding peak.
Best Photo Spots Along the Aletsch Glacier Trails
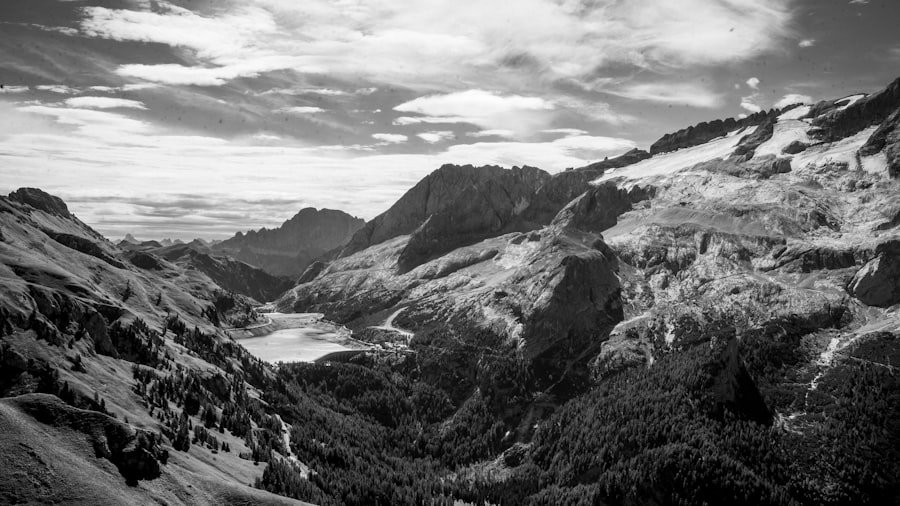
You do not need to complete the longest hike to find excellent Aletsch Glacier photo locations. The official viewpoints spread along the ridge above Riederalp, Bettmeralp and Fiescheralp provide different compositions and distances from the ice.
1. Bettmerhorn Viewpoint
Bettmerhorn Viewpoint, at 2,647 meters, is one of the most useful locations for a first visit. The viewing area is close to the Bettmerhorn mountain station and looks across the glacier’s long straight section and sweeping curve.
This viewpoint works especially well with a wide-angle or standard zoom. Instead of filling the entire frame with ice, include part of the ridge or surrounding peaks to show scale. A telephoto lens can then pick out crevasses, medial moraines and compressed layers of mountains farther up the glacier.
2. Eggishorn Viewpoint
Eggishorn is the highest of the four principal Aletsch Arena viewpoints at about 2,869 meters. From here, the panorama includes a particularly broad sweep of the glacier as well as Konkordiaplatz and high peaks including the Eiger, Mönch and Jungfrau.
Eggishorn is one of the strongest locations for a classic “whole landscape” photograph. A moderately wide focal length can preserve the glacier’s shape without making distant peaks look too small.
Pro Tip: Take both horizontal and vertical compositions at Eggishorn. Horizontal frames emphasize the length of the glacier, while a vertical frame can connect foreground rocks, the ice and the high mountains in distinct visual layers.
3. Moosfluh Viewpoint
Moosfluh sits at about 2,333 meters and provides an unobstructed view of the Great Aletsch Glacier. It is also the starting point for the demanding 23.2 km circuit through the Märjelensee area to Riederalp.
From a photography perspective, Moosfluh is excellent for showing the glacier in relation to the nearby slopes. Use foreground rock, vegetation or hikers rather than zooming directly into the ice for every frame.
4. Hohfluh Viewpoint
Hohfluh, around 2,227 meters, gives another strong view across the glacier and Valais peaks. It can be incorporated into walks from the Riederalp side and provides a different angle on the glacier’s curves.
Hohfluh is useful when you want a quieter mountain context rather than only the highest possible viewpoint. Its elevation still gives enough separation to see the ice as a broad river running through the mountain landscape.
5. Märjelensee and the Glacier-Side Trail
Märjelensee adds water, stone and alpine terrain to compositions that would otherwise be dominated by ice and mountain ridges. On the Bettmerhorn and Moosfluh routes, the trail toward Märjela gradually changes your relationship with the glacier, offering closer-looking perspectives and more obvious evidence of the landscape shaped by ice.
Water levels and exact visual conditions around alpine lakes vary, so do not arrive expecting a perfect mirror reflection. Instead, look for rocks, shoreline curves and small pools that create foreground interest.
6. Aletschbord on the Belalp Side
Aletschbord lies on the Belalp side of the broader Aletsch region rather than directly along the main ridge routes above Riederalp and Bettmeralp. It offers another panoramic perspective toward the Great Aletsch Glacier and can be a worthwhile alternative for photographers exploring the opposite side of the valley.
It should be treated as a separate excursion rather than as another stop on the Bettmerhorn-Märjelensee hike.
Best Time to Photograph the Aletsch Glacier
Summer and early autumn are the most practical periods for the high hiking routes because snow-free trail access is more likely. However, exact opening periods vary from year to year. Snow, maintenance, rockfall, storms and other alpine conditions can affect routes even within the normal hiking season.
Before leaving, check the Aletsch Arena live status report for current hiking-trail, lift and viewpoint information.
Morning Light
Morning conditions can produce clean air and well-defined mountain layers. Earlier light can also reveal subtle texture in the glacier before strong midday contrast develops. If your planned viewpoint depends on a cable car, check the first operating time rather than assuming you can arrive for sunrise.
Late Afternoon and Evening
Lower-angle light can add shape to ridges, moraines and crevasses. Sunset photography can be beautiful, but a cable-car-assisted daytime visit and an after-sunset mountain hike are very different undertakings. Never plan a dark descent casually. Carry suitable navigation and lighting equipment and know your return route.
Cloudy Weather
Overcast conditions are not necessarily bad for glacier photography. Soft light can make ice texture easier to expose without losing highlights. Low clouds may also create dramatic separation between the glacier and surrounding peaks.
Note: Mountain weather can change quickly. Prioritize safe hiking conditions over a specific photograph, especially when visibility, thunderstorms, snow or strong wind are possible.
Wildlife and Flora Along the Aletsch Glacier Trails
| Wildlife or Plant | Photography Note |
|---|---|
| Alpine ibex | Possible in high-alpine areas, but never count on a sighting or approach wildlife for a photograph. |
| Chamois | May be seen on mountain slopes; a telephoto lens lets you photograph from a respectful distance. |
| Marmots | Listen for warning calls and avoid surrounding burrows or blocking escape routes. |
| Edelweiss | Photograph plants where they grow and do not pick them. |
| Gentian flowers | Use a close focusing distance or longer lens rather than stepping off trail into delicate vegetation. |
The Aletsch region contains a range of alpine and subalpine habitats. Lower areas include meadows and forest, while higher terrain supports plants adapted to short growing seasons, wind, cold and thin soils. UNESCO specifically recognizes the area’s variety of alpine habitats and the plant succession that occurs on land exposed as glaciers retreat.
The Aletsch Forest is especially notable for its old Swiss stone pines. Wildlife such as chamois and golden eagles is also associated with the wider protected landscape.
Wildlife sightings are never guaranteed. If you encounter an animal, photograph it without chasing, feeding or surrounding it. The Swiss Alpine Club advises hikers to stay on paths, avoid disturbing wild animals and respect protected areas.
Tips for Capturing Stunning Photos on the Aletsch Glacier Trail
Use the Glacier’s Lines
The Aletsch Glacier naturally creates strong leading lines. Its medial moraines, edges and curves can guide the viewer’s eye toward Konkordiaplatz and the surrounding high peaks. Try positioning these lines diagonally rather than always centering the glacier.
Show Scale
The glacier is so large that photographs can make it look surprisingly flat. Add a person, ridge, trail, building or foreground boulder to show scale. A tiny hiker against the glacier can often communicate size better than a frame filled entirely with ice.
Protect Glacier Highlights
Bright ice can cause a camera’s meter to produce inconsistent results. Check the histogram or highlight warning and avoid clipping large areas of detailed ice. If your camera supports RAW capture, RAW files provide more flexibility when balancing bright ice and darker mountains later.
Try More Than a Wide-Angle Lens
A wide-angle lens is useful for panoramic scenes, but it is not automatically the best choice. A standard or short telephoto focal length can make the glacier’s bends, moraines and distant mountains appear more substantial in the frame.
Use a Polarizer Carefully
A circular polarizing filter can reduce some glare from water and strengthen contrast, but very wide lenses can produce uneven polarization across a blue sky. Rotate the filter while watching the result rather than assuming maximum polarization will look best.
Experiment With Foregrounds
Flowers, stone, small lakes, trail curves and hikers can give the photograph depth. Get low when safe to do so, but remain on durable or marked surfaces rather than trampling vegetation for a cleaner composition.
Make the Tripod Earn Its Weight
A sturdy tripod helps with low-light landscapes, bracketing and carefully composed frames. On a long 14 to 23 km hike, however, every extra kilogram matters. If you mainly expect bright daylight photography, a lighter support system may be more practical.
Pro Tip: Before changing lenses, capture one wide establishing photograph, one medium composition and one tight detail. This simple three-frame approach gives you a more complete visual story of the glacier.
Hiking Safety and Route Planning
Photography can make hikers move more slowly than normal route estimates suggest. A route listed as 5 hours 30 minutes may take substantially longer if you repeatedly stop, set up a tripod or wait for changing light.
The Swiss Alpine Club recommends evaluating distance, elevation, difficulty and weather before a mountain hike. It also recommends suitable footwear, protection from rain, cold and sun, a first-aid kit, emergency equipment and a mobile phone.
- Check the official route and current status before leaving.
- Start with enough daylight for your planned pace and photography stops.
- Carry water and food rather than assuming every section has refreshments.
- Wear hiking footwear with reliable grip.
- Carry an insulating layer and rain protection even when the valley is warm.
- Use sunscreen, sunglasses and a hat because UV exposure is strong at altitude.
- Carry an offline map or other reliable navigation method.
- Do not leave marked trails to reach a better camera angle.
- Tell someone your route and expected return time on longer outings.
- Turn back when weather, fatigue or trail conditions make continuing unsafe.
In Switzerland, the Swiss Alpine Club lists the European emergency number as 112 and REGA mountain-rescue assistance as 1414. Do not rely on having mobile reception everywhere in mountain terrain.
Importance of Preserving the Aletsch Glacier Landscape
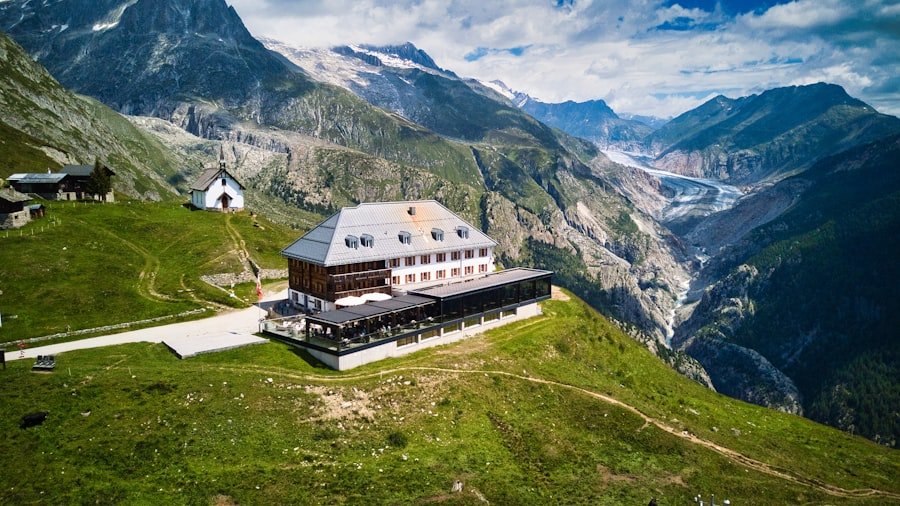
The Great Aletsch Glacier is not only a dramatic photography subject. It is part of a protected landscape with major geological and ecological significance. UNESCO identifies glacier retreat and the plant succession that follows it as important features for understanding environmental change in the Swiss Alps.
The glacier has retreated substantially from its historical maximum. Aletsch Arena notes that around 1860 the glacier extended roughly 3 kilometers farther than it does today and its edge stood considerably higher beside the Aletsch Forest. Modern glacier changes continue to be monitored scientifically.
Glacier Monitoring in Switzerland, or GLAMOS, maintains long-term datasets for Swiss glacier length, mass balance and volume change. These records provide a stronger basis for discussing glacier change than relying on a single dramatic photograph or year-to-year observation.
Visitors can help protect the landscape through simple choices: stay on marked paths, carry waste out, avoid picking alpine plants, give animals space and obey local restrictions. Responsible photography should never damage the subject being photographed.
A strong glacier photograph can document beauty and change at the same time, but protecting the landscape matters more than reaching a particular camera position.
Photography Equipment and Gear for the Aletsch Glacier Trail
A DSLR or mirrorless camera with interchangeable lenses gives you the most flexibility, but excellent photographs are also possible with a compact camera or modern phone. What matters most is carrying equipment you can safely manage for the distance you intend to hike.
Useful Camera Gear
- Wide or standard zoom: useful for broad glacier landscapes and mountain foregrounds.
- Short or medium telephoto: helpful for compressing mountain layers and isolating glacier details.
- Spare batteries: cold conditions can reduce battery performance.
- Extra memory card: useful if you shoot RAW files, panoramas or video.
- Lens cloth: useful for moisture, dust and fingerprints.
- Circular polarizer: can reduce glare and strengthen some landscape colors.
- Tripod: useful for low light, panoramas and deliberate compositions when its weight is justified.
- Camera rain cover or dry bag: valuable when mountain weather changes unexpectedly.
Hiking Gear Matters Just as Much
Do not let camera equipment displace essential hiking equipment. Water, food, weather protection, navigation, sun protection and basic emergency supplies have greater priority than an extra lens on a long mountain route.
A heavy camera backpack can also change how difficult a route feels. The 23.2 km Moosfluh-Märjelensee-Riederalp outing includes more than 1,100 meters of ascent, so carrying several lenses and a large tripod can significantly increase fatigue.
Conclusion and Final Thoughts on Photographing the Aletsch Glacier Trail
Photographing the Aletsch Glacier is less about following one famous “trail” and more about choosing the right combination of viewpoints and hiking routes. Bettmerhorn, Eggishorn, Moosfluh and Hohfluh provide distinct panoramas, while the Märjelensee routes create closer-looking compositions with lakes, rock and glacial terrain.
The biggest planning mistake is assuming that every route is suitable for every visitor. An easy cable-car-assisted viewpoint visit and a 23.2 km mountain hike are completely different experiences. Match your route to your fitness, weather, available daylight and photography goals.
Once on the mountain, slow down enough to notice the glacier’s curves, moraines, changing light and relationship with the surrounding landscape. Those details often produce stronger photographs than simply trying to fit the entire glacier into every frame.
Photograph the Aletsch Glacier with enough distance to understand its scale, enough patience to notice its details and enough care to leave the alpine landscape exactly as you found it.
If you’re planning a visit to the Aletsch Glacier trail to capture some breathtaking photos, you might also be interested in exploring other delightful experiences. For instance, the article on Exploring the Delightful World of Asian Melon offers a refreshing look at unique flavors and culinary adventures. Just as the Aletsch Glacier provides stunning natural vistas, the world of Asian melons presents a feast for the senses, making it a read for those who appreciate the diversity of our planet.
Frequently Asked Questions
What is the Aletsch Glacier trail?
The term is commonly used for hiking routes overlooking the Great Aletsch Glacier, but there is not one single official route matching every description. Popular options include the 9.3 km Riederalp-to-Bettmerhorn hike, the 14.6 km Bettmerhorn-Märjelensee-Bettmeralp route and the 23.2 km Moosfluh-Märjelensee-Riederalp circuit.
What are the best photo spots along the Aletsch Glacier trails?
Bettmerhorn, Eggishorn, Moosfluh and Hohfluh are the four principal Aletsch Arena glacier viewpoints. Märjelensee and the glacier-side hiking sections below Bettmerhorn and Eggishorn provide additional foregrounds and closer-looking perspectives.
What should I bring for an Aletsch Glacier hike?
Bring hiking footwear with good grip, water, food, layered clothing, rain protection, sun protection, navigation, a mobile phone and basic emergency supplies. For photography, add only the camera equipment you can comfortably carry for the distance and elevation gain.
Are guided tours available on the Aletsch Glacier?
Yes. Aletsch Arena offers guided glacier experiences with mountain professionals. These are different from ordinary hiking trails because travel on glacier ice requires appropriate skills, route knowledge and safety equipment.
Is the Aletsch Glacier trail suitable for beginners?
Some viewpoints are easy to reach using mountain lifts, but the longer hiking routes should not be described as beginner trails. The 9.3 km Riederalp-to-Bettmerhorn route is rated moderate, while the 14.6 km Bettmerhorn-Märjelensee and 23.2 km Moosfluh-Märjelensee routes are rated difficult overall.
Can I walk onto the Aletsch Glacier from the hiking trail?
Do not independently walk onto glacier ice as an extension of a normal hike. Glaciers contain crevasses and changing hazards that may not be obvious from the surface. Use an appropriately guided glacier tour if you want to travel on the ice.
When is the best time to photograph the Aletsch Glacier?
Summer and early autumn are generally the most practical periods for high hiking routes, subject to current trail and weather conditions. Morning and late-afternoon light can add depth, but lift schedules may limit access at sunrise or sunset. Always check current operating and trail information before planning around a specific light window.
How do I check whether Aletsch hiking routes are open?
Use the official Aletsch Arena status report before your hike. Route and lift conditions can change because of weather, snow, maintenance or mountain hazards, so a live status page is more reliable than an old blog or static itinerary.
Sources
- Aletsch Arena: Great Aletsch Glacier — glacier facts, official viewpoints and glacier-change context.
- Aletsch Arena: Riederalp to Bettmerhorn — official distance, elevation, duration and difficulty information.
- Aletsch Arena: Bettmerhorn via Märjelensee to Bettmeralp — official route information for the 14.6 km hike.
- Aletsch Arena: Moosfluh via Märjelensee to Riederalp — official route information for the 23.2 km hike.
- UNESCO World Heritage Centre: Swiss Alps Jungfrau-Aletsch — World Heritage status, geology, ecosystems and glacier-retreat context.
- Swiss Alpine Club: Safety When Hiking — mountain-hiking planning, equipment, weather and safety recommendations.