Photographing the Chapel Bridge in Lucerne is less about finding one official viewing platform and more about choosing the right position along the Reuss River. The covered wooden bridge, octagonal Water Tower, Old Town façades, river reflections, and surrounding mountains give photographers several compositions within a compact area. A phone is enough for a strong image, but thoughtful timing, camera position, and framing can make the scene much more memorable.
Quick Answer
For the best Chapel Bridge viewpoint, photograph from the banks of the Reuss River so you can include both the bridge and Water Tower. Early morning usually offers fewer people, while late afternoon, golden hour, and blue hour add softer light. Walk both riverbanks before choosing your final composition.
Key Takeaways
- The Reuss riverbanks give you the most useful wide views of Chapel Bridge and the Water Tower.
- Early morning and late evening are useful for avoiding the busiest periods, while golden hour and blue hour can provide softer or more colorful light.
- Start with a wide-to-normal view, then move farther away before using a longer focal length for a tighter bridge-and-tower composition.
- Use the bridge roofline, railings, river edge, reflections, and Old Town façades as compositional elements rather than photographing the bridge in isolation.
- The bridge is accessible free of charge at any time, but the Water Tower is not generally open to the public.
At a Glance
| Time Required | About 30–60 minutes for several viewpoints; allow longer if you want golden-hour and blue-hour images. |
| Difficulty | Easy urban photography, although pedestrian traffic can make tripod work and clean compositions more challenging. |
| Tools Needed | Smartphone or camera; wide-to-normal lens; optional short telephoto lens, polarizing filter, and compact tripod for low-light work. |
| Cost | Chapel Bridge access is free; transportation and photography-equipment costs vary. |
Finding the Best Chapel Bridge Viewpoint
There is no need to search for a single raised platform called the Chapel Bridge viewpoint. For most photographers, the useful viewpoints are simply different positions along the Reuss River. Switzerland Tourism specifically recommends the riverbanks for views that combine the Chapel Bridge and Water Tower.
The bridge currently runs from the Lucerne Theatre side of the Reuss toward St. Peter’s Chapel at Rathausquai, passing the Water Tower along the way. Instead of stopping at the first opening you see, walk around the area and compare how the tower overlaps the bridge from different positions.
South Bank Near the Lucerne Theatre
The south-bank side is useful when you want a broad view across the river toward the bridge, tower, and Old Town. Step backward along the river until the bridge has enough space around it. This is especially useful with a smartphone, because standing farther back can produce a cleaner composition than immediately switching to an ultra-wide setting.
Rathausquai and the St. Peter’s Chapel Side
Cross to the opposite side and repeat the process. Even a small change in position alters how the Water Tower, bridge roof, river, and background buildings overlap. This is why perspective matters so much here: two photographers using the same camera can produce very different images simply by standing in different places.
Photographing From Inside the Bridge
Do not limit the visit to exterior postcard views. The covered walkway contains historic triangular paintings beneath the roof. Use the repeating beams, roof structure, and walkway as leading lines, but stay aware of people moving in both directions.
Lucerne Tourism notes that the bridge’s painting cycle dates to the early 17th century and that many panels were affected by the 1993 fire. Photographing these details gives the set more historical depth than a collection made entirely from the riverbank.
Note: The Chapel Bridge is accessible free of charge at any time according to Switzerland Tourism. The adjoining Water Tower is an important part of the composition but is not generally open to the public.
Choosing the Right Time of Day for the Best Lighting
The time of day strongly changes how Chapel Bridge photographs look. Golden hour occurs around sunrise and sunset when the sun is low in the sky. The light is often warmer and more directional, and shadows can become longer and softer than they are around midday.
For Chapel Bridge, early morning has another practical advantage. Switzerland Tourism recommends early morning or late evening when you want to avoid larger crowds. Fewer pedestrians make it easier to photograph the bridge itself and to use a tripod without creating an obstruction.
Sunrise and Early Morning
Arrive before the light you want rather than at the exact moment of sunrise. This gives you time to check both banks, decide how you want the Water Tower positioned, clean the lens, and make test exposures. Morning can work particularly well when your goal is a quieter bridge scene.
Late Afternoon and Golden Hour
Late-day light can give warm color to the buildings and bridge. Because the exact direction and intensity of light change with the season, walk around rather than assuming one fixed spot will always be best. Look for side light on the roof, reflected color in the river, and illuminated clouds behind the skyline.
Blue Hour and Night
Do not pack your camera immediately after sunset. During blue hour, the sky can retain enough color to balance the city’s artificial lights. A stable camera position becomes more important as shutter speeds lengthen. If you use a tripod, keep it compact and out of the pedestrian path.
Pro Tip: Make your wide riverbank photograph first, then wait several minutes without changing position. Small changes in cloud color, reflections, boat movement, and city lights can produce a noticeably stronger frame.
Utilizing Leading Lines to Create Dynamic Compositions
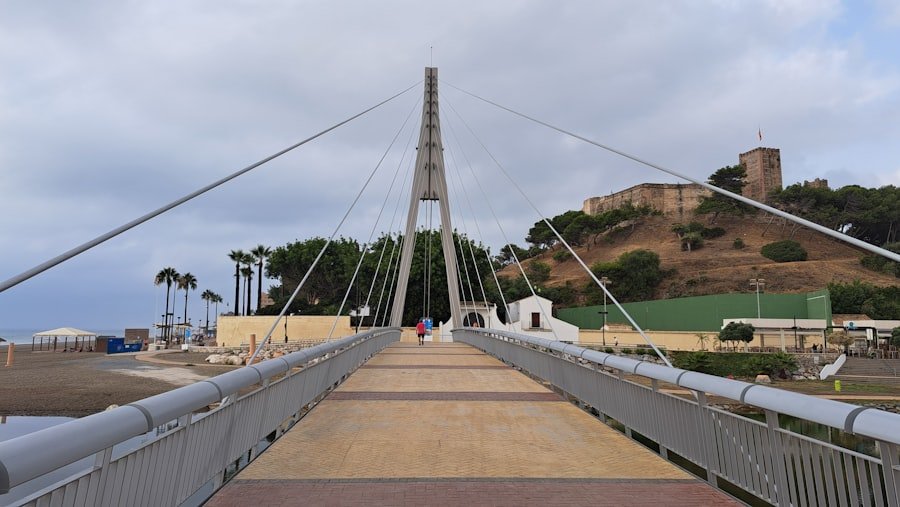
Leading lines guide the viewer’s eye toward an important part of a photograph. At Chapel Bridge, you do not need to search for artificial examples such as distant roads or fences. The scene already contains several useful lines.
The bridge roof can lead toward the Water Tower, the riverbank can pull the eye across the frame, and the walkway railings can create strong converging lines from inside the bridge. Reflections can produce a second set of shapes below the bridge.
Try placing the Water Tower where one or more of these lines naturally point. If the leading line exits the frame without directing attention toward anything important, shift your camera a little and try again. A small sideways movement is often enough to improve the structure of the composition.
Adobe’s guide to leading lines describes the technique as using natural or human-made lines to guide attention toward the subject. Chapel Bridge is particularly suited to this approach because its long covered structure creates obvious visual direction.
Incorporating the Surrounding Environment for Context
| Element | What It Adds | How to Use It |
|---|---|---|
| Water Tower | Immediate recognition and historical context | Move along the riverbank until the tower separates cleanly from nearby buildings. |
| Reuss River | Reflections, open space, and foreground | Include enough water to reflect light or create breathing room below the bridge. |
| Old Town | Color and a stronger sense of place | Use façades as background context without letting signs or bright objects dominate the bridge. |
| Historic Paintings | Detail and historical storytelling | Photograph individual panels and wider frames showing their position beneath the roof. |
The surrounding environment is especially important at Chapel Bridge because a tight photograph of wooden beams alone can lose the sense of place. Include enough of the Reuss, Water Tower, Old Town, sky, or pedestrians to explain where the viewer is.
That does not mean every photograph should contain everything. One frame might emphasize reflections. Another can focus on the tower. A third can show the covered walkway and historical paintings. Together, these photographs tell a more complete story than one repeated postcard composition.
Using Different Lenses to Capture Unique Details
Focal length changes angle of view and magnification. A shorter focal length includes more of the scene, while a longer focal length narrows the view and magnifies a smaller section. Perspective itself is primarily controlled by where you place the camera, so do not rely on zooming as a substitute for moving.
Smartphone
Start with the main 1× camera. It usually gives a more natural-looking bridge than the extreme ultra-wide setting. Switch to ultra-wide only when you genuinely cannot step back far enough. If your phone has a good optical telephoto camera, use it from farther down the riverbank to isolate the Water Tower and bridge.
Wide-Angle Lens
A wide lens is useful when you want the Reuss, bridge, Water Tower, sky, and Old Town in a single frame. It is also helpful inside or very close to the bridge. Be careful at the edges of the frame because very wide views can stretch nearby objects and make the bridge feel smaller than expected.
Normal and Short-Telephoto Lens
A normal or short-telephoto focal length is useful from farther along the river. Moving back and then using a longer focal length can make the bridge, tower, and background appear more tightly layered. This is often more effective than standing close and simply cropping afterward.
For technical background, Nikon explains that focal length controls angle of view and magnification, while Canon explains that moving the camera closer or farther changes perspective.
The most useful “zoom” at Chapel Bridge is often your feet. Change your camera position first, then choose the focal length that frames the composition you found.
Experimenting with Different Angles and Heights
Camera height can change the relationship between the bridge, river, Water Tower, and background. Eye level is the safest starting point, but it should not be the only option you try.
A slightly lower camera can give more importance to reflections and foreground water. A higher position can reduce foreground clutter and make the bridge’s shape easier to read. When photographing from inside the bridge, centering the camera between repeating beams can create a more symmetrical image.
Perspective also changes as you move sideways. A few steps can separate the Water Tower from a roofline, prevent a lamp or sign from appearing to grow out of the bridge, or create a cleaner gap between important elements.
Build a Simple Shot Sequence
- Make one wide establishing photograph from the riverbank.
- Move left and right until the Water Tower has a clean background.
- Make a tighter bridge-and-tower composition.
- Photograph a reflection if the water surface is suitable.
- Walk onto the bridge for beams, paintings, and pedestrian scenes.
- Return to the riverbank when the light changes.
This sequence prevents you from leaving Lucerne with ten nearly identical frames.
Considering the Weather and Its Impact on the Photo
Clear skies are not automatically the best conditions for Chapel Bridge. Weather changes the mood of the river, buildings, reflections, and surrounding sky.
Overcast Conditions
Cloud cover produces softer light and can help preserve details in both dark wooden areas and lighter façades. It is useful for photographing the paintings beneath the roof because the contrast between bright openings and shaded interior areas may be easier to manage.
Rain and Wet Surfaces
Rain can create reflections and richer-looking colors on wet pavement and roofs. Protect the front element from drops and check it often, especially when photographing toward lights. A small microfiber cloth is more useful than carrying excessive equipment.
Bright Midday Sun
Midday can create high contrast between sunlit buildings and shadow under the covered bridge. Instead of abandoning the location, expose carefully for highlights, try a tighter composition, photograph shaded details, or wait for a cloud to soften the scene.
Warning: Chapel Bridge is an active pedestrian crossing. If you use a tripod or stop for a long exposure, keep equipment out of the walking path, stay aware of other visitors, and follow any temporary signs or staff instructions.
Camera Settings for Chapel Bridge
There is no single correct exposure because conditions change throughout the day, but a few starting points make the process easier.
Daylight
For a wide scene where you want the bridge and background sharp, start around f/5.6 to f/8 on a camera with adjustable aperture. Use the lowest practical ISO and choose a shutter speed fast enough to avoid camera shake. Smartphone users can usually rely on the standard camera mode and tap the bridge or Water Tower to set focus and exposure.
Golden Hour
Watch the highlights in the sky. If the camera makes the bridge too dark while protecting the sky, photograph several exposures or use exposure bracketing when your camera supports it. This gives you more flexibility in editing without forcing every tone into a single capture.
Blue Hour and Night
If the camera is on a stable tripod, keep ISO relatively low and allow a longer shutter speed. If you are shooting handheld, image stabilization and a wider aperture can help. Check every few frames at high magnification because a photograph that looks sharp on a small screen may still contain camera movement.
Using Reflections Without Letting Them Take Over
The Reuss can add symmetry, color, or movement to the foreground. Before taking the photograph, decide whether the reflection is the main subject or simply supporting the bridge.
For a strong reflection, give the water more room in the lower half of the frame. For a bridge-first composition, use only enough water to provide separation and color. A polarizing filter can change the appearance of reflections, so rotate it while looking through the camera rather than assuming maximum polarization will produce the best result.
Post-Processing Techniques to Enhance the Final Image
Post-processing should strengthen what you captured rather than hide weak composition. Start with exposure and white balance, then correct distracting brightness differences between the sky, river, and bridge.
Moderate contrast can help the wooden structure stand out, while restrained shadow adjustment can reveal details beneath the roof. Be careful with saturation. Lucerne’s façades, blue-hour sky, and warm lights already provide plenty of color, and excessive saturation can make the scene look artificial.
Perspective correction can help when vertical buildings lean because the camera was tilted upward. Crop only after correcting perspective so you know how much usable space remains around the bridge.
For night photographs, reduce noise carefully while preserving texture in the wood, roof, and buildings. Sharpening should also be moderate because strong sharpening can produce halos around lights and high-contrast roof edges.
As a separate exercise in noticing color, form, and texture in everyday subjects, you can also browse this existing article on Asian melon. It is not a source for Chapel Bridge photography, but observing simple shapes and surface details is useful practice for close-up compositions.
A Brief Photography-Friendly History of Chapel Bridge
The bridge is more than a scenic foreground for the Water Tower. According to Lucerne Tourism, Chapel Bridge formed part of the city’s historical fortifications and has a centuries-old history. Its triangular paintings add another layer of visual interest beneath the roof.
A major fire struck the bridge during the night of August 18, 1993. Lucerne Tourism reports that the bridge was rebuilt rapidly and reopened on April 14, 1994. When photographing the structure today, exterior views, surviving and restored artistic details, and the Water Tower together communicate more of that history than a distant skyline image alone.
Frequently Asked Questions
What is the Chapel Bridge viewpoint?
The term usually refers to places where you can view and photograph Chapel Bridge in Lucerne rather than one officially designated viewing platform. For a classic exterior composition, the banks of the Reuss River provide useful views of the bridge and Water Tower.
What is the best time to photograph Chapel Bridge?
Early morning is a strong choice when you want fewer people, while late afternoon and golden hour can provide warm, directional light. Blue hour is useful for combining remaining sky color with Lucerne’s city lights. Switzerland Tourism also recommends early morning or late evening for avoiding larger crowds.
What lens is best for Chapel Bridge photography?
A wide-to-normal lens is the most versatile starting point because it can include the bridge, Water Tower, Reuss, and Old Town. A short telephoto can be useful from farther down the river when you want a tighter layered composition. Smartphone users should begin with the main 1× camera before switching to ultra-wide.
Can I visit Chapel Bridge at night?
Yes. Switzerland Tourism lists the bridge as accessible free of charge at any time. Night and blue-hour visits can be especially useful for photographing reflections and city lights.
Are tripods allowed at the Chapel Bridge viewpoint?
The official visitor information cited in this guide does not publish a general tripod prohibition. However, Chapel Bridge is a busy pedestrian route, so keep any tripod compact, do not block the walkway, and follow temporary signs or instructions from local staff.
Can visitors enter the Water Tower?
The Water Tower is an important part of the Chapel Bridge scene, but Switzerland Tourism states that it is not generally open to the public. Treat it primarily as an exterior photographic subject.
Can I get good Chapel Bridge photos with a phone?
Yes. Start with the main camera rather than automatically using ultra-wide mode, move along the riverbank to improve the relationship between the bridge and Water Tower, keep the horizon level, and tap the brightest important part of the scene to check exposure before shooting.
Sources
- Lucerne Tourism: Chapel Bridge and Water Tower — bridge history, location, paintings, Water Tower, 1993 fire, and reconstruction.
- Switzerland Tourism: Chapel Bridge — visitor access, riverbank photo guidance, crowd timing, bridge length, and Water Tower access.
- Lucerne Tourism Map: Chapel Bridge — bridge location, opening information, historical context, and public access.
- Adobe: Golden Hour Photography — golden-hour light and timing principles.
- Nikon: Understanding Focal Length — angle of view, magnification, and lens focal-length fundamentals.
- Adobe: Leading Lines Photography — composition and using visual lines to guide attention.