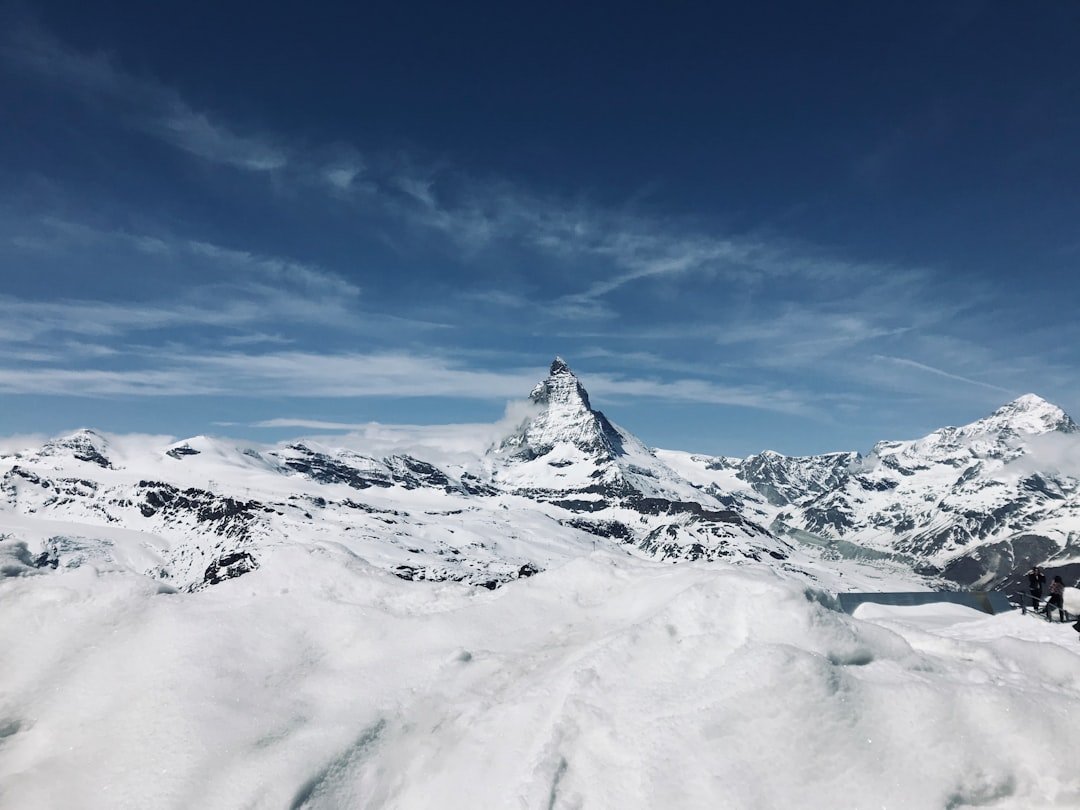
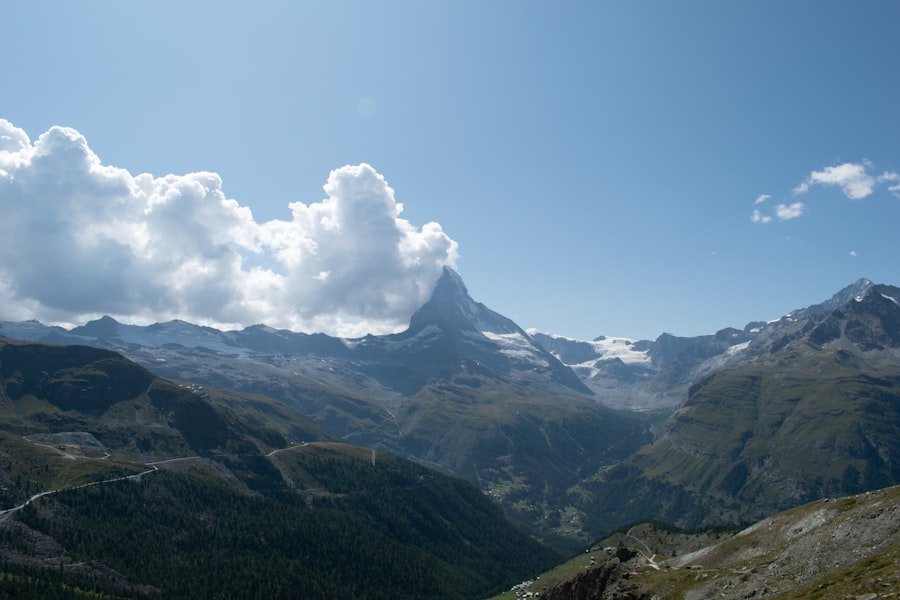
The Matterhorn is one of the most photographed mountains in the Alps because its 4,478-meter pyramid shape is instantly recognizable, changes dramatically with light and clouds, and can be framed from lakes, ridges, village streets, and high alpine viewpoints around Zermatt. Good Matterhorn photography is less about finding one “secret” spot and more about matching the right viewpoint, weather window, lens, and time of day.
Quick Answer
The best Matterhorn viewpoints for photography are Riffelsee for reflections, Gornergrat for wide panoramas, Stellisee for classic lake compositions, Kirchbrücke in Zermatt for an easy village shot, and higher viewpoints such as Matterhorn Glacier Paradise for dramatic alpine scale. Go at sunrise or sunset, check live weather first, and stay on marked paths.
Key Takeaways
- Riffelsee and Stellisee are the strongest choices for Matterhorn reflection photos when the water is calm.
- Gornergrat is ideal for broad panoramas, sunrise color, glacier context, and telephoto compression.
- A wide-angle lens, telephoto lens, tripod, polarizing filter, spare batteries, and weather protection cover most situations.
- Golden hour gives warm light, while clouds, mist, and blue hour can create more dramatic images than a plain clear sky.
- Check live forecasts, webcams, lift status, and trail conditions before heading out, and never leave marked paths just to improve a composition.
At a Glance
| Time Required | 1–2 hours for a village viewpoint; half a day for Gornergrat or lake viewpoints; a full day if combining multiple locations. |
| Difficulty | Easy to moderate, depending on viewpoint, season, train/lift access, and trail conditions. |
| Tools Needed | Camera or phone, tripod, wide-angle lens, telephoto lens, polarizing filter, spare batteries, microfiber cloth, and weatherproof layer. |
| Cost | Free from village viewpoints; paid mountain railway or lift tickets for higher viewpoints such as Gornergrat and glacier areas. |
Understanding the Matterhorn Before You Photograph It
The Matterhorn rises to 4,478 meters above Zermatt and sits on the Swiss-Italian border. Its first ascent took place on 14 July 1865, and the mountain remains a symbol of both alpine beauty and serious mountaineering history.
For photographers, the Matterhorn is special because it changes quickly. A clean blue-sky scene can become a moody cloud study within minutes. Snow, shadow, sunrise color, low mist, and reflected light can all change the shape and mood of the same composition.
Note: Do not judge the day only from your hotel window in Zermatt. Mountain clouds often move fast, and higher viewpoints may have different visibility than the village.
Choosing the Best Viewpoints for Capturing the Matterhorn
The best Matterhorn viewpoint depends on the photo you want. Reflections need still water. Panoramas need elevation. Village compositions need foreground buildings, bridges, or streets. The table below gives a practical starting point.
| Viewpoint | Best For | Best Light | Access Notes |
| Riffelsee | Classic Matterhorn reflection photos and simple foregrounds. | Sunrise or early morning before wind ripples the lake. | Reachable from the Gornergrat railway area when paths are open. |
| Gornergrat | Wide panoramas, glaciers, multiple 4,000-meter peaks, and telephoto layers. | Sunrise, sunset, and broken-cloud conditions. | The Gornergrat railway reaches the 3,089-meter ridge. |
| Stellisee | Lake reflection images with more space for foreground and sky. | Sunrise, calm mornings, and colorful clouds. | Check seasonal lift and trail access before planning a dawn shoot. |
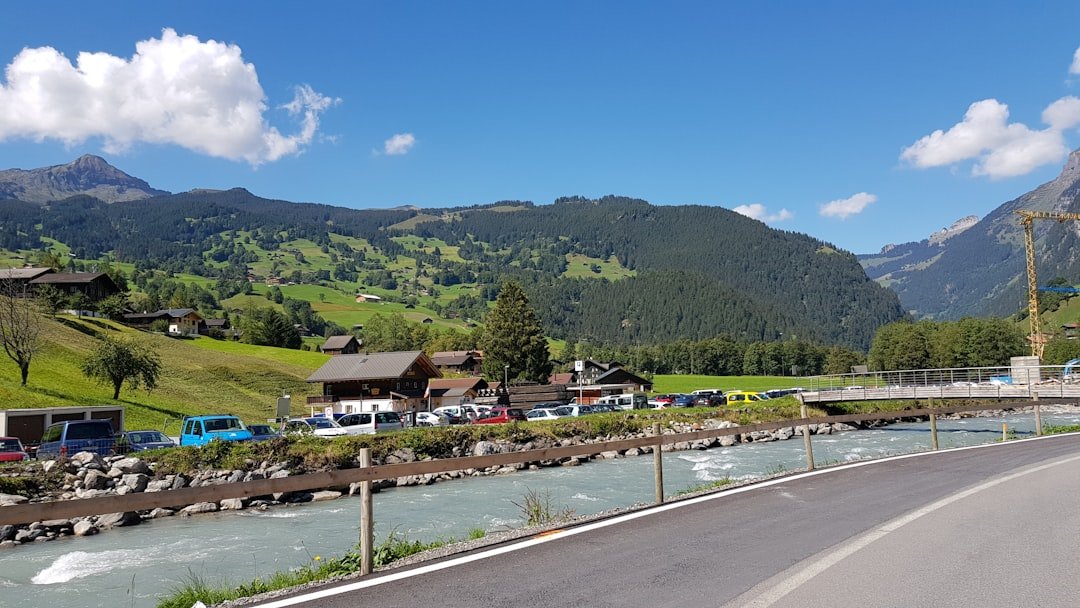
| Kirchbrücke in Zermatt | Easy village photos with the Matterhorn framed above the river and rooftops. | Morning light, blue hour, or fresh snow. | A convenient option if weather or time rules out higher viewpoints. |
| Matterhorn Glacier Paradise area | High-altitude atmosphere, snow, glaciers, and dramatic scale. | Clear mornings or cloud breaks. | Plan around lift schedules, wind, altitude, and visibility. |
Gornergrat is one of the most reliable choices for first-time visitors because it offers a high, open view of the Matterhorn and surrounding peaks. Riffelsee is the classic reflection location, especially when the lake surface is still. Zermatt’s official photo-point guide is also useful for easier village-level compositions when you do not want a long hike or early train journey.
Pro Tip: Arrive at reflection lakes before sunrise, set your tripod low, and wait. The best reflection often appears in a short calm window before hikers arrive or wind reaches the water.
Products Worth Considering

Camera mount tripod stand with zippered storage bag
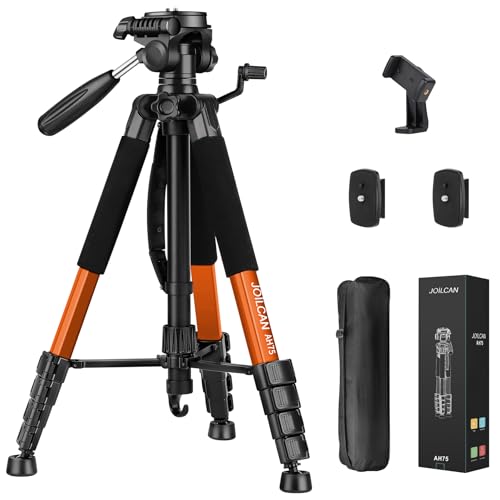
【Lightweight & Easy to Adjust】Upgraded trapezoidal flap lock tripod adjusted from 19.5" and 74" to meet different height needs for variety shooting environments and photography. 18" compact size and 3.15 lbs weight make tripod easy to carry with travel bag

【Adjustable Height Tripod】This camera tripod features a height adjustment range of 11.4-25.2 inches, easily meeting daily shooting needs both indoors and outdoors. With a weight of just 1.59 lbs/0.72kg, it's lightweight and easy to carry, making it perfect for on-the-go use
Equipment and Gear for Photographing the Matterhorn
You can photograph the Matterhorn with a phone, but a camera kit gives you more control in fast-changing light. A DSLR or mirrorless camera with interchangeable lenses is ideal because it lets you switch between wide landscapes, tighter summit details, and compressed mountain layers.
- Wide-angle lens, 16–35mm: best for lakes, foreground rocks, flowers, trails, and large skies.
- Standard zoom, 24–70mm: useful for flexible travel compositions around Zermatt and Gornergrat.
- Telephoto lens, 70–200mm or longer: helpful for isolating the summit, compressing ridgelines, and photographing cloud movement.
- Tripod: essential for sunrise, sunset, blue hour, long exposures, and sharp reflection shots.
- Polarizing filter: useful for reducing glare on water and improving contrast in some skies, but rotate it carefully so the sky does not look uneven with wide-angle lenses.
- Remote shutter or 2-second timer: reduces camera shake on a tripod.
- Spare batteries: cold temperatures can drain batteries faster than expected.
- Weather protection: bring a rain cover, lens cloth, and dry bag or waterproof camera insert.
Products Worth Considering


600D NYLON MATERIAL: Tripod carrying case is made from 600D high-density nylon, ensuring sturdiness and durability. The outer lining provides a level of water resistance. The interior is lined with sponge padding for enhanced protection of the tripod.


Camera Settings for Sharp Matterhorn Photos
Exact settings depend on light and wind, but these starting points work well for common Matterhorn scenes.
| Scene | Starting Settings | Why It Works |
| Sunrise landscape | ISO 100–400, f/8–f/11, tripod, shutter as needed. | Keeps detail sharp from foreground to mountain. |
| Lake reflection | ISO 100, f/8, tripod, focus about one-third into the scene. | Balances sharpness in the mountain and reflection. |
| Telephoto mountain layers | ISO 100–400, f/5.6–f/8, 1/250 sec or faster. | Reduces blur from wind and hand movement. |
| Blue hour or night | Tripod, manual focus, ISO 400–1600, wide aperture if photographing stars. | Captures low light while keeping the camera stable. |
For phone photography, lock focus and exposure on the Matterhorn, reduce exposure slightly if snow or bright clouds are blowing out, and use a small tripod or stable surface for sunrise and blue-hour shots.
Products Worth Considering

【Professional Light Stand & Tripod Combo】Durable aluminum photography light stand + tripod stand, optimized for studio lighting setups and outdoor shoots on uneven terrain.


✅WIDE APPLICATION: The top with 1/4'' male thread , bottom with 1/4'' female thread hole and come with a hot shoe mount, This tripod ball head set can be used for cameras, or other devices that with standard 1/4" thread hole. such as: camera, projector, flash light, light stand, tripod etc.
Timing and Weather Considerations for the Best Shots
Light is the biggest factor in Matterhorn photography. The golden hour after sunrise and before sunset often gives the mountain warm color and long shadows. Blue hour can be excellent from Zermatt village viewpoints because the town lights add atmosphere while the mountain shape remains visible.
| Condition | Photography Opportunity |
| Golden Hour | Warm light on the peak, strong shape, and softer contrast. |
| Blue Hour | Cool color, village lights, and a clean mountain silhouette. |
| Broken Clouds | Dramatic shadows, moving light, and more original images than a plain sky. |
| Overcast Conditions | Good for moody details, black-and-white edits, forests, flowers, and village scenes. |
| Windless Morning | Best chance for sharp reflections at Riffelsee, Stellisee, and other lakes. |
Warning: Mountain weather can change quickly. Before leaving for a viewpoint, check the Zermatt weather forecast, live webcams, lift information, and path status. Turn back if visibility, storms, ice, or wind make the route unsafe.
Summer and early autumn are often convenient for hiking access, but winter can create excellent snow-covered compositions from accessible village and railway viewpoints. Instead of choosing a season only by calendar, plan around open transport, safe paths, and the kind of image you want.
Composition and Framing Tips for Photographing the Matterhorn
A strong Matterhorn photo needs more than a centered mountain. Use the surrounding landscape to guide the viewer into the frame.
- Use leading lines: paths, streams, fences, bridges, and ridges can pull the eye toward the peak.
- Add foreground interest: rocks, flowers, snow texture, lake edges, or old village buildings add depth.
- Try off-center framing: placing the Matterhorn on a third often feels more natural than putting it directly in the middle.
- Watch the edges: remove distracting people, poles, signs, or chopped-off foreground elements when possible.
- Use scale: a hiker, hut, train, or village roofline can show the mountain’s size.
- Experiment with vertical frames: the Matterhorn’s steep pyramid shape often works beautifully in portrait orientation.
A clean Matterhorn photo usually has three layers: a simple foreground, a clear line leading toward the mountain, and enough sky or space for the peak to breathe.
Dealing with Challenges: Crowds and Lighting Conditions
Popular Matterhorn viewpoints can be busy, especially in clear weather and during peak travel periods. The easiest way to avoid crowded frames is to arrive early, stay later than the tour groups, or choose a village viewpoint when mountain transport is crowded.
If people are in the frame, you still have options. Use a longer lens to crop tighter, wait for small gaps, include people intentionally for scale, or shoot multiple frames from a tripod and blend them later if that fits your editing style.
Harsh midday sun is another challenge. Instead of forcing a classic postcard shot, look for details: snow patterns, clouds wrapping around the summit, hikers on ridgelines, reflections in small pools, or black-and-white compositions with strong contrast.
Pro Tip: If the Matterhorn is hidden by cloud, do not pack up immediately. Set a telephoto composition, keep your exposure ready, and wait for short breaks around the summit.
Post-Processing and Editing Tips for Matterhorn Photography
Good editing should bring your Matterhorn photo closer to what the scene felt like, not turn it into an unnatural postcard. Start with basic corrections: straighten the horizon, fix lens distortion, balance exposure, and recover highlight detail in snow or clouds.
- Adjust contrast selectively: add contrast to rock, snow, and cloud texture without crushing shadows.
- Protect snow highlights: reduce highlights and whites if bright snow loses detail.
- Use graduated masks: darken a bright sky or lift a dark foreground while keeping the mountain natural.
- Control color temperature: keep sunrise warmth, but avoid making snow look orange or gray.
- Sharpen carefully: apply enough sharpening for mountain detail, but avoid halos along the ridge line.
- Remove distractions honestly: dust spots and tiny edge distractions are fine to clean; avoid misleading edits if the image is used for documentary or travel-planning purposes.
Respecting the Environment: Leave No Trace Principles for Photographers
The most popular Matterhorn photography spots are also fragile alpine environments. A better angle is never worth damaging plants, stepping off marked paths, disturbing wildlife, or blocking narrow trails for other visitors.
Follow the Leave No Trace principles: plan ahead, stay on durable surfaces, pack out all trash, leave natural objects where they are, respect wildlife, and be considerate of other people. Around lake viewpoints such as Riffelsee, stay on established paths and avoid trampling shoreline vegetation just to improve a reflection angle.
Note: Drone rules, private-property boundaries, wildlife restrictions, and temporary closures can change. Check local signs and official guidance before flying a drone or setting up outside public viewpoints.
Frequently Asked Questions
What is a Matterhorn viewpoint?
A Matterhorn viewpoint is any location where you can clearly see and photograph the Matterhorn. Popular viewpoints include Riffelsee, Gornergrat, Stellisee, Kirchbrücke in Zermatt, and several official photo points around the village and mountain transport routes.
Where are the best Matterhorn viewpoints for photography?
Riffelsee is best for the classic reflection, Gornergrat is best for panoramas, Stellisee is excellent for lake compositions, Kirchbrücke is a convenient village viewpoint, and Matterhorn Glacier Paradise is useful for high-altitude scenes with snow and glacier context.
What camera gear should I bring for Matterhorn photography?
Bring a wide-angle lens for landscapes, a telephoto lens for mountain details, a tripod for low light and reflections, a polarizing filter for glare control, spare batteries, memory cards, and weather protection. A phone can also work well if you stabilize it and control exposure manually.
What is the best time of day to photograph the Matterhorn?
Sunrise is often the best time for warm light and calm lake reflections. Sunset can also be beautiful, especially from elevated viewpoints. Blue hour works well in Zermatt village when lights add atmosphere below the mountain.
Is summer the best season for Matterhorn photography?
Summer and early autumn are convenient for hiking access and lake reflections, but winter can produce striking snow scenes. The best season depends on your goal, transport access, trail conditions, and weather. Always check live forecasts and webcams before leaving.
Are there restrictions on photographing the Matterhorn?
Photography from public viewpoints is generally fine, but you must respect private property, posted signs, trail closures, wildlife areas, and drone rules. Stay on marked paths, especially near fragile lake and alpine vegetation.
Sources
- Zermatt Tourism: Matterhorn — confirms Matterhorn height, first ascent date, and general mountain context.
- Gornergrat Bahn — supports Gornergrat as a major Matterhorn viewpoint and panorama location.
- Zermatt Tourism: Riffelsee — supports Riffelsee as a Matterhorn reflection viewpoint.
- Zermatt Tourism: Photo Points — supports official Zermatt photo locations for Matterhorn views.
- Zermatt Tourism: Weather — supports checking current weather and webcams before planning viewpoint trips.
- Leave No Trace: 7 Principles — supports responsible outdoor photography and low-impact visitor behavior.