Gorner Gorge near Zermatt gives you a very different photography experience from the broad mountain panoramas Switzerland is famous for. Instead of one open viewpoint, you move through a narrow gorge on wooden walkways, photographing rushing water, dark rock walls, textures, reflections, and changing shafts of light. A little planning makes a major difference because the gorge is shaded, confined, and seasonally open.
Quick Answer
Gorner Gorge is best photographed as a narrow, dramatic canyon rather than a single panoramic viewpoint. Bring a wide or standard zoom, expose carefully for bright water and dark rock, and use a tripod only where it does not block the walkway. For 2026, plan around the official seasonal opening hours rather than sunrise.
Key Takeaways
- Think in terms of rock, water, curves, textures, and layers rather than expecting one panoramic Gorner Gorge viewpoint.
- A wide or standard zoom is more flexible than relying on one fixed focal length, while a longer lens can isolate rock and water details.
- Use slow shutter speeds for smooth water or fast shutter speeds to freeze droplets. Neither approach is universally correct.
- The official Zermatt listing specifically recommends about 3 p.m. to 4 p.m. from around mid-October for striking turquoise water under special light conditions.
- Protect your gear from moisture, stay on designated walkways, and never block narrow passages with a tripod.
At a Glance
| Time Required | Allow roughly 45–90 minutes if you want time to stop and photograph, plus the approach. Zermatt Tourism says the gorge is about a 15-minute walk from the southern end of the village. |
| Difficulty | Generally manageable for ordinary visitors, but narrow walkways, steps, water, and damp surfaces require care. |
| Tools Needed | Camera or smartphone, wide/standard lens, lens cloth, and weather protection. Optional: polarizer, ND filter, and compact tripod where its use is safe and unobtrusive. |
| Cost | For 2026, Zermatt Tourism lists CHF 5.50 for adults, CHF 3.00 for children ages 6–15, and free admission for children under 6. Check the official page before visiting because prices can change. |
Plan Your Gorner Gorge Photography Visit
Gorner Gorge is a natural ravine near Zermatt where the waters of the Gornervispe have cut progressively deeper since the last ice age. Zermatt Tourism says tourist access was created in 1886 and 1887 and identifies the greenish serpentinite rock as about 220 million years old. The official attraction is reached by wooden walkways running between steep rock walls, so your photography positions are more restricted than they would be at an open mountain overlook.
For 2026, Zermatt Tourism lists Gorner Gorge as open from May 23 through September 30 from 09:15 to 17:45, followed by October 1 through October 31 from 10:15 to 17:00. These dates and hours matter for photographers because the ticketed gorge cannot simply be entered at sunrise or after closing.
Note: Opening dates, hours, admission prices, and temporary access conditions can change. Check the official Zermatt Tourism listing on the day of your visit rather than relying only on an older travel guide.
If photography is your priority, avoid rushing through. Let faster groups pass when space allows, then work from positions where you can stop without obstructing the walkway. Study how the water, railing, rock contours, and patches of vegetation interact before choosing your framing.
Choosing the Right Equipment for Gorner Gorge Photography
You do not need a professional DSLR or mirrorless camera to make strong images at Gorner Gorge. A modern camera or smartphone can work well, but interchangeable-lens cameras give you more control when dealing with the gorge’s contrast, moving water, and confined viewpoints.
A wide-angle lens is useful because you may be physically close to the rock walls with little room to step backward. On a full-frame camera, something around 16–35mm is a practical range, but it should be treated as a useful option rather than a rule. A standard zoom such as 24–70mm can be even more flexible when you want to move between wide scenes and tighter details. APS-C and Micro Four Thirds users can choose lenses that provide a comparable field of view.
Do not overlook longer focal lengths. A short telephoto can isolate patterns in wet rock, sections of rushing water, leaves, or shafts of light without filling the frame with railings and other distractions.
A sturdy tripod can help when you want to use slow shutter speeds, particularly for deliberately blurred water. Canon notes that tripods are useful in landscape photography because they reduce camera movement when slow shutter speeds are required. However, the Gorner Gorge walkway can be confined, so a tripod is only useful when there is enough room to use it without creating a hazard or blocking other visitors.
A neutral density filter is optional but valuable when ambient light is too bright for the slow shutter speed you want. Adobe’s ND-filter guidance explains that reducing the light entering the lens allows longer exposures in daylight, which is especially useful when intentionally smoothing moving water.
A circular polarizing filter can also be useful. Rotate it while looking through the viewfinder or rear screen and watch how reflections change on wet rock and water. Do not automatically turn it to maximum strength. The most natural-looking position may be somewhere in between.
Other useful items include a microfiber lens cloth, a rain cover or dry bag, spare battery, and a secure camera strap. Spray and moisture can put droplets on a front element quickly, and a single unnoticed droplet can ruin several otherwise good frames.
Pro Tip: Pack lighter than you would for an open landscape shoot. One wide-to-standard zoom, a lens cloth, and one useful filter are often more practical on a narrow gorge walkway than repeatedly changing lenses or setting down a large camera bag.
Timing and Lighting for Gorner Gorge Photography
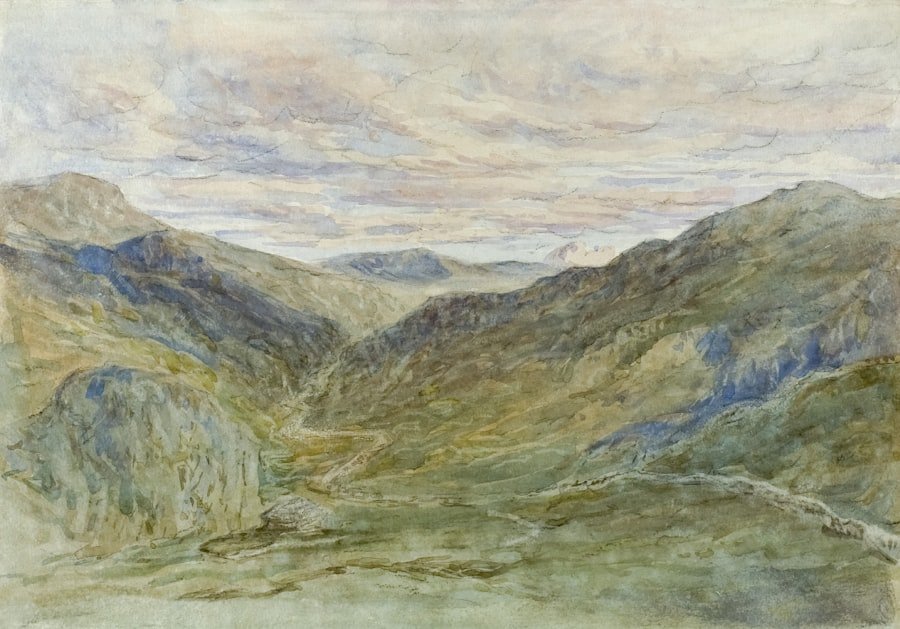
Lighting inside a gorge behaves differently from lighting across an open mountain landscape. High rock walls can leave large areas in shade while small sections of water or rock receive direct sunlight. That difference can create beautiful contrast, but it can also exceed your camera’s dynamic range.
For that reason, the generic rule to visit every landscape at sunrise or sunset is not particularly useful here. The official opening hours limit when you can photograph from inside the attraction, and the walls of the gorge determine when direct light actually reaches the water.
The most useful location-specific timing tip comes directly from Zermatt Tourism. From about mid-October, the official site recommends visiting between roughly 3 p.m. and 4 p.m., when special light conditions can make the water appear brilliant turquoise. If that effect is one of your goals, this narrow seasonal window is much more relevant than generic golden-hour advice.
For Gorner Gorge, the best light is not simply the earliest or latest light of the day. The position of the sun relative to the narrow rock walls matters more.
Overcast weather can also work extremely well. Clouds reduce the difference between bright highlights and deep shadows, making it easier to retain texture in rock and water. The softer light can also make saturated green, gray, and turquoise tones easier to control.
On sunny days, check your histogram or highlight warning rather than trusting the rear screen alone. Bright foam in the water can clip before the darker rock looks properly exposed. If necessary, reduce exposure slightly and recover the shadow areas during editing.
Camera Settings for Rock, Water, and Low Light
There is no single correct exposure for Gorner Gorge. Your settings should depend on whether you want to emphasize rock detail, freeze the water, or intentionally show movement.
| Goal | Starting Point | What to Watch |
|---|---|---|
| Sharp rock and general scenes | ISO 100–400, f/5.6–f/11, shutter speed adjusted to the light | Keep the shutter fast enough to avoid camera shake when handheld. |
| Smooth, flowing water | ISO 100, around f/8–f/11, roughly 1/4 to 2 seconds as a starting range | Use support and add an ND filter if the scene is too bright for the desired exposure. |
| Frozen droplets and rapids | Start around 1/500 second and increase shutter speed if needed | Raise ISO when necessary rather than underexposing heavily. |
| Handheld low-light scene | Open the aperture, use stabilization if available, and raise ISO enough to maintain a safe shutter speed | Check fine rock detail at high magnification for motion blur. |
These numbers are starting points, not fixed recipes. Water speed, focal length, stabilization, available light, and your preferred look will all change the ideal exposure.
If the contrast between water and rock is extreme, exposure bracketing can be useful for a mostly static composition. Take several frames at different exposures without moving the camera, then blend them carefully during editing if one frame cannot retain both highlights and shadows. Avoid aggressive HDR processing that makes the rocks look artificial.
Composition and Framing Techniques for Gorner Gorge Photography
| Technique | How to Use It at Gorner Gorge |
|---|---|
| Rule of Thirds | Place an important rock edge, bright patch of water, or opening in the gorge away from the center when that creates a stronger balance. |
| Leading Lines | Use the direction of the water, walkway, railings, or rock contours to guide the viewer deeper into the frame. |
| Frame within a Frame | Use dark rock edges, vegetation, or a bend in the gorge to surround a brighter subject. |
| Foreground Interest | Include textured rock, leaves, or part of the water close to the camera to create depth. |
| Use of Light | Look for small illuminated areas against darker surroundings rather than trying to make every part of the gorge equally bright. |
Leading lines are especially useful because the gorge naturally contains curves and directional movement. The water itself may pull the viewer through a frame, while rock edges can create a tunnel-like effect.
Do not apply the rule of thirds automatically. A symmetrical composition can work well when the rock walls converge, while a centered water channel can create a strong sense of depth. Composition rules are starting points, not requirements.
Look for foreground elements, but be careful with ultra-wide lenses. Objects close to the camera can become disproportionately large while distant details appear very small. Check the corners for unwanted railing, signs, people, or distorted objects before pressing the shutter.
Vertical compositions also deserve attention. The gorge walls naturally lead upward, and portrait orientation can emphasize their height while keeping the frame focused on water and rock instead of unrelated surroundings.
Capturing the Waterfalls and Rapids at Gorner Gorge
The moving water is one of the most useful creative subjects in the gorge because changing shutter speed can produce completely different photographs from the same position.
For a smooth, flowing look, place the camera securely, lower the ISO, and experiment with slower shutter speeds. Start around 1/4 second and gradually lengthen the exposure. There is no need to make every waterfall look completely milky. A little texture often communicates more power and direction than an extremely long exposure.
If the exposure becomes too bright before the water reaches the amount of blur you want, an ND filter can reduce incoming light. This is particularly useful when shooting during brighter parts of the day.
For a more energetic result, do the opposite. Select a fast shutter speed, such as 1/500 second or faster as a starting point, and examine whether individual droplets and splashes are sharp. Increase the ISO if necessary to maintain that shutter speed.
Try photographing both versions. The slow exposure conveys continuous flow, while the fast exposure reveals details your eyes may not notice in real time.
Pro Tip: Check the brightest foam in the water after every major exposure change. White water can lose detail quickly even when the darker rock still appears underexposed.
Tips for Photographing Flora and Fauna at Gorner Gorge
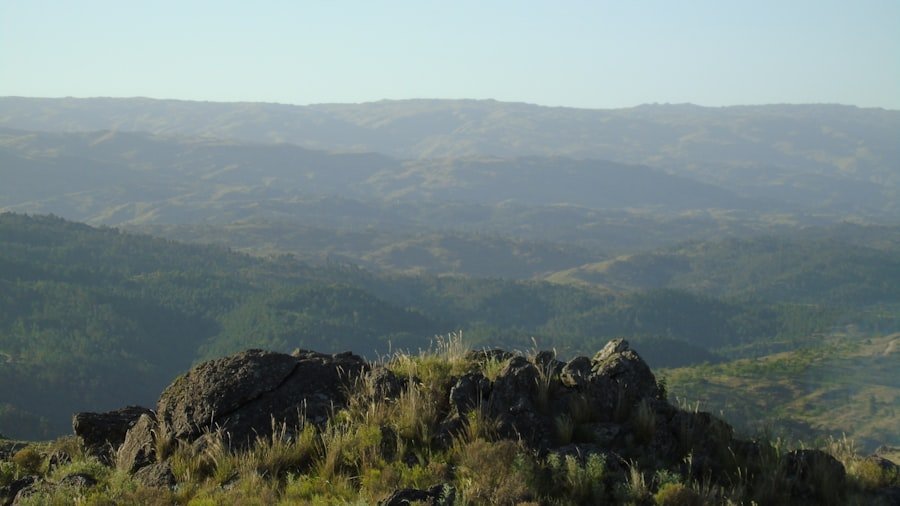
Plants can provide welcome color and scale against the dark rock, especially when you isolate leaves, moss, flowers, or small textures rather than trying to include everything in one frame. A dedicated macro lens is useful for very small details, but it is not essential. Many standard zooms and modern phones can focus closely enough for attractive detail photographs.
Use a wider aperture when you want to separate a small plant from a distracting background. For scenes where you want the rock and surrounding environment to remain recognizable, stop down slightly and include more depth of field.
Wildlife should be treated as an occasional opportunity rather than a guaranteed Gorner Gorge subject. Nearby official Zermatt trail information describes larches, Swiss pines, squirrels, and other natural features around the Furi area, but sightings vary.
If an animal appears, keep your distance and avoid changing its behavior for a photograph. A longer lens lets you fill more of the frame without moving closer. Never leave a marked route or climb over barriers to improve your angle.
Smartphone Photography at Gorner Gorge
A smartphone can handle much of the gorge surprisingly well if you work with its strengths. Start with the main camera rather than automatically selecting the widest lens, because the main sensor often delivers better image quality in shade.
Tap the bright water on screen and reduce exposure slightly if highlights are blowing out. Modern phones may automatically combine multiple exposures, which can help with the large brightness difference between white water and dark rock.
Use the ultra-wide camera when the walkway leaves no room to step backward, but keep important subjects away from the extreme corners where distortion can become distracting. For small details, move closer physically rather than relying heavily on digital zoom.
For moving water, use your phone’s long-exposure or motion mode if it offers one. Hold the device against a solid railing only where doing so is safe and permitted, or use a compact support without blocking the walkway.
Editing and Enhancing Gorner Gorge Photos
Post-processing can help recover the atmosphere that was difficult to capture in one exposure, but the goal should be to improve the photograph rather than transform the gorge into something unrecognizable.
Start with global exposure and white balance. Gorge scenes can fool automatic white balance because large shaded areas may appear very cool. Adjust the temperature only enough to make neutral rock and water look believable.
Reduce highlights if the water is too bright, then lift shadows carefully to reveal rock texture. Avoid opening every dark area completely. Deep shadows are part of the visual character of a narrow gorge and can provide useful depth.
Moderate contrast, texture, or clarity adjustments can strengthen rock detail, but excessive clarity often creates halos and an unnaturally crunchy appearance around water and high-contrast edges.
Use local masks when possible. A small adjustment to the water or one illuminated wall is usually more convincing than applying the same strong edit to the entire photograph.
If you used a polarizer or photographed intense turquoise water, be conservative with saturation. The goal is to preserve believable color rather than pushing the water into an artificial blue-green tone.
Respecting the Environment and Staying Safe at Gorner Gorge
Photography should never require leaving designated access routes or leaning into unsafe positions. Stay on the provided walkways, obey barriers and posted instructions, and keep bags, tripod legs, and straps from creating hazards for other visitors.
Warning: Rock, wooden surfaces, and areas near rushing water can demand extra care, especially when wet. Do not climb barriers, enter the water, or step off designated routes for a photograph. If you use a tripod, set it up only where other visitors can pass safely.
The nearby official Furi trail guidance from Zermatt Tourism advises visitors to prepare for changing mountain weather, stay on marked paths, respect plants and animals, and observe warning signs near watercourses. Those principles are equally sensible when carrying camera equipment around the gorge area.
Keep food wrappers, tissues, lens-cleaning materials, and other waste with you. Photograph plants where they grow rather than picking or repositioning them. If wildlife appears, give it space and use a longer focal length instead of approaching.
Finally, remember that watching a camera screen can reduce your awareness of your surroundings. Finish moving before reviewing photographs or changing detailed settings, particularly on steps and narrow sections.
Nearby Photography Opportunities
Gorner Gorge and Gornergrat are different attractions, and the distinction is useful for photographers. Gorner Gorge specializes in close, enclosed scenes of rock and rushing water. Gornergrat provides the broad alpine panoramas that the original article incorrectly associated with the gorge itself.
The Gornergrat Railway climbs from Zermatt into the high mountains, where the official railway site highlights views of the Matterhorn, Gorner Glacier, and numerous 4,000-meter peaks. If you want both intimate gorge photographs and classic Swiss mountain panoramas, the two experiences complement one another rather than duplicate each other.
The Furi area also offers additional trails and elevated views around the gorge. If you continue beyond the main attraction, carry suitable footwear and weather protection rather than treating the entire outing as a short urban photo walk.
Frequently Asked Questions
What is the Gorner Gorge viewpoint?
Gorner Gorge is better understood as a walk-through ravine than a single panoramic viewpoint. Wooden walkways take visitors between steep rock walls beside rushing water, creating a series of photography positions. If you want a broad Matterhorn panorama, nearby Gornergrat is a more appropriate destination.
What are the best camera settings for Gorner Gorge?
For general scenes, start around ISO 100–400 and f/5.6–f/11, then choose a shutter speed that avoids camera shake. For blurred water, try roughly 1/4 to 2 seconds with secure support. To freeze splashes, start near 1/500 second and increase the shutter speed if necessary.
When is the best time to photograph Gorner Gorge?
The best time depends on the light reaching the narrow gorge rather than conventional sunrise or sunset rules. Zermatt Tourism specifically recommends approximately 3 p.m. to 4 p.m. from about mid-October, when special light conditions can make the water appear brilliant turquoise.
Do I need a tripod at Gorner Gorge?
No. A tripod is useful for deliberate long exposures, but modern stabilization and higher ISO settings can handle many handheld photographs. Because portions of the walkway are confined, use a tripod only where it will not block or endanger other visitors.
Can I photograph Gorner Gorge with a smartphone?
Yes. Use the main camera for the best quality in shade, reduce exposure if bright water is losing detail, and switch to the ultra-wide camera when space is too tight to step backward. A phone’s long-exposure or motion mode can also create smoother-looking water.
How much does Gorner Gorge cost in 2026?
For 2026, Zermatt Tourism lists admission at CHF 5.50 for adults and CHF 3.00 for children ages 6–15, while children under 6 enter free. Check the official listing before your visit because prices and access conditions may change.
What safety precautions should photographers follow at Gorner Gorge?
Stay on designated walkways, obey barriers and warning signs, keep camera equipment secure, and avoid blocking narrow passages with a tripod. Take extra care on wet surfaces and around rushing water, and stop walking before looking closely at your camera screen.
What nearby attractions are good for photography?
Gornergrat is the strongest nearby contrast to the gorge because it offers broad mountain views, including the Matterhorn and Gorner Glacier. The Furi area and its trails also provide additional rock, forest, bridge, and mountain subjects around the gorge.
Sources
- Zermatt Tourism: Gorner Gorge — official location description, geology, approach, 2026 opening hours, prices, and mid-October lighting tip.
- Zermatt Tourism: Suspension Bridge Trail Furi — nearby terrain, equipment, environmental, and mountain-safety guidance.
- Gornergrat Bahn — official information about Gornergrat and its alpine views.
- Adobe: ND Filter Photography — ND-filter use and longer exposures for moving water.
- Canon Europe: Landscape Photography and Tripod Use — camera stability and slow-shutter landscape photography.