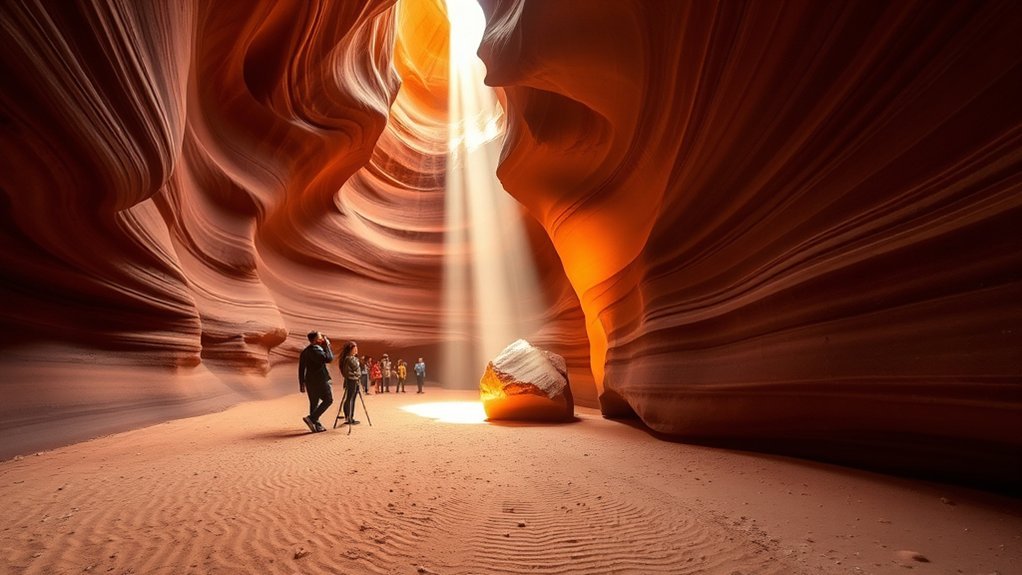
Photographing Antelope Canyon requires careful timing, precise camera control, and a clear understanding of strict Navajo Nation park regulations. Carved by flash floods and wind into flowing Navajo sandstone, these world-famous slot canyons near Page, Arizona, present extreme dynamic range, shifting ambient light, and dense crowds. Because dedicated photography tours and tripods were officially eliminated in Upper and Lower Antelope Canyon to improve visitor flow and safety, capturing exceptional imagery today depends on mastering handheld low-light shooting techniques, selecting the right focal lengths before entry, and arriving during prime lighting windows.
Quick Answer
To photograph Antelope Canyon, mount a versatile wide-angle zoom (16–35mm or 24–70mm) before entering, as lens changes and tripods are strictly prohibited. Shoot in RAW using Aperture Priority (f/4 to f/8) with Auto-ISO capped at 3200 to keep shutter speeds above 1/60s. For iconic Upper Antelope light beams, visit between 11:00 AM and 1:30 PM from May through September.
Key Takeaways
- Tripods and Bags Are Banned: Standard tours through Upper and Lower Antelope strictly prohibit tripods, monopods, gimbals, selfie sticks, and backpacks.
- Never Change Lenses Inside: Airborne quartz dust constantly drifts through the slot; swapping lenses inside the canyon will coat your camera sensor.
- Master Handheld Bracketing: Use in-body image stabilization (IBIS), shutter speeds of 1/60s or faster, and continuous 3-frame auto-exposure bracketing (AEB) to capture the canyon’s extreme dynamic range.
- Navajo Guides Are Mandatory: Both canyons are sacred sites within the Navajo Nation; all visitors must enter with an authorized, licensed Navajo guide.
At a Glance
| Time Required | 1.5 to 2 hours (approx. 45–60 minutes inside the slot canyon) |
| Difficulty | Moderate (Upper is flat; Lower requires steep metal stairs/ladders) |
| Tools Needed | DSLR or mirrorless camera, 16–35mm or 24–70mm lens, lens blower, neck/wrist strap |
| Cost | $55–$140+ per person (includes mandatory Navajo Parks & Recreation permit fee) |
Why Choose a Guided Tour of Antelope Canyon
Antelope Canyon is situated entirely on Navajo Nation land within the LeChee Chapter. Under Navajo Nation Parks & Recreation regulations, visiting either Upper or Lower Antelope Canyon without a licensed Navajo guide is strictly illegal. While dedicated, slow-paced “photographer-only” tours were phased out in late 2019 to reduce corridor congestion, today’s standard guided tours offer immense value for photographers who know how to work efficiently within a moving group.
Navajo guides possess intimate, daily knowledge of how sunlight interacts with the canyon walls at every hour of the year. Your guide can point out famous natural rock formations—such as the “Chief,” the “Lady in the Wind,” and the “Monument”—while showing you exact angles where reflected ambient light creates vibrant purple, gold, and magenta gradients across the sandstone. Moving through the canyon with an expert ensures you remain safe, respect cultural boundaries, and position yourself ahead of visual bottlenecks.
When to Visit: Best Times for Light Beams and Soft Glow
Sunlight behavior inside slot canyons changes dramatically between seasons and hours of the day. Selecting your tour departure time depends entirely on whether your priority is capturing sharp, vertical midday light shafts or rich, ambient sandstone reflections.
“The famous light shafts occur only when the summer sun reaches an elevation angle greater than 60 degrees above the horizon, allowing direct rays to penetrate the narrow overhead slit.”
- Prime Light Beam Season (May through September): Direct sunbeams occur almost exclusively between 11:00 AM and 1:30 PM (often called “prime time”). During this window, high-angle sun penetrates the canyon ceiling, illuminating airborne dust particles in vivid shafts of light. Midday tours book out months in advance and carry premium ticket prices.
- Shoulder Season and Ambient Glow (October through April): During fall, winter, and early spring, the sun sits lower along the southern horizon. While light beams are absent, indirect sunlight bounces repeatedly between the narrow sandstone walls, producing saturated red, orange, and purple hues with much lower contrast and fewer harsh clipped highlights.
- Early Morning & Late Afternoon: Tours departing before 10:00 AM or after 2:30 PM feature cooler blue sky reflections mixed with warm sandstone bounce light, ideal for abstract architectural framing and intimate detail compositions.
Note on Time Zones: The city of Page, Arizona, remains on Mountain Standard Time (MST, UTC-7) year-round and does not observe Daylight Saving Time. The surrounding Navajo Nation observes Daylight Saving Time (MDT, UTC-6) from March to November. However, virtually all tour companies in Page operate on Page local time (MST). Always confirm your tour operator’s check-in time zone to avoid missing your slot.
Understanding the Types: Upper vs. Lower Antelope Canyon
Upper Antelope Canyon (known in Navajo as Tsé bighánílíní, meaning “the place where water runs through rocks”) and Lower Antelope Canyon (Hazdistazí, or “spiral rock arches”) are distinct sections carved by the same wash system. Choosing between them determines your physical experience, photographic style, and lens choice.
Light and Timing
Upper Antelope is shaped like an inverted “A” (narrow at the top opening and wider at the canyon floor). This structure blocks ambient sky light while focusing direct noon sun into sharp, theatrical light shafts that hit the sandy ground. In contrast, Lower Antelope is shaped like a “V” (wide at the top and extremely narrow at the walking floor). This funnel shape allows substantial natural daylight to filter downward, creating prolonged, soft, and colorful ambient gradients throughout the morning and afternoon.
Access and Terrain
The physical route in Upper Antelope is completely level, flat, and sandy from entry to exit. Visitors enter and exit through ground-level portals, making it accessible for travelers with limited mobility. Lower Antelope requires descending a series of five steep metal staircases (over 130 steps) attached to the canyon walls, followed by navigating narrow, winding corridors and occasional small ladders before climbing out at ground level.
| Feature | Upper Antelope (Tsé bighánílíní) | Lower Antelope (Hazdistazí) |
|---|---|---|
| Canyon Geometry | Inverted “A” (Wide floor, narrow roof) | “V” Shape (Narrow floor, open roof) |
| Light Beams | Iconic, intense vertical beams (May–Sept) | Fewer direct shafts; rich, diffused glow |
| Walking Terrain | Flat, sandy floor; zero stairs | Steep staircases, narrow ladders, tight turns |
| Corridor Length | Shorter (~100 meters / 330 feet) | Longer (~400 meters / 1,300 feet) |
| Best Photography Focus | High-contrast beams, falling sand, dust shafts | Flowing curves, sweeping lines, abstract patterns |
Photography Challenges
In Upper Antelope, the primary technical obstacle is extreme dynamic range: metering for direct sunlight hitting sand without crushing shadow details on dark wall contours. In Lower Antelope, spatial constraint is the dominant challenge. Corridors can narrow to shoulder-width, requiring upward-angled perspectives and tight framing to eliminate fellow tour members from your compositions.
Booking Your Tour: Reservations, Permits, and Regulations
Demand for Antelope Canyon is intense year-round. Prime midday summer slots often sell out 4 to 6 months in advance. Secure your reservation online directly through an authorized Navajo tour company. All tour fees include or add the mandatory Navajo Nation Parks & Recreation entry fee.
Warning — Strict Gear & Bag Restrictions: Tour operators enforce strict baggage rules. Standard backpacks, camera bags, hydration packs, purses, tripods, monopods, selfie sticks, and gimbals are strictly prohibited inside the canyons. You may carry only your camera (on a strap around your neck or wrist) and a clear, see-through plastic water bottle.
If you require tripod access for specialized commercial or landscape work, look into alternative slot canyons on the Navajo reservation that permit private photography tours, such as Antelope Canyon X, Secret Antelope Canyon (Horseshoe Bend Slot Canyon), or Cardiac Canyon.
What to Bring: Essential Camera Gear and Accessories
Because you must shoot handheld and cannot bring a gear bag into Upper or Lower Antelope, your setup must be fully configured before leaving the staging area.
- Camera Body: A full-frame or APS-C camera with strong high-ISO performance and In-Body Image Stabilization (IBIS).
- Lens Choice (Single Lens Only): Attach a fast wide-to-normal zoom such as a 16–35mm f/2.8 or 24–70mm f/2.8 (or an 18–50mm equivalent on crop sensors). An ultra-wide 16mm focal length allows you to frame dramatic vertical sweeps from the canyon floor to the open sky.
- Protective Filter: Mount a high-quality UV or clear protective filter on your lens element to shield the glass from abrasive, airborne quartz particles.
- Camera Strap: A secure neck or cross-body sling strap is essential, as setting equipment on the sandy canyon floor is prohibited.
- Hand Bulb Blower: Keep a compact manual rocket blower in your pocket to puff away surface dust from your front lens element without smudging the glass.
Pro Tip — The Single-Lens Rule: Never change lenses while inside the canyon. The interior air contains microscopic, powdery sandstone dust stirred up by hundreds of walking visitors. Exposing your camera sensor inside the slot will result in heavy dust spots on every subsequent frame.
Camera Settings for Challenging Canyon Light
Slot canyon photography involves high scene contrast, low ambient light levels at floor level, and fast-moving tour groups. Configure your camera to balance sharpness, depth of field, and clean shadow recovery.
Exposing for Highlights
Blown-out highlights in slot canyon sandstone lose all color data, turning into unsightly pure white patches that cannot be salvaged in post-processing. Use Matrix / Evaluative Metering and set your exposure compensation dial to -0.3 EV or -0.7 EV to protect highlight saturation along sunlit upper curves.
Always inspect your camera’s live RGB histogram or highlight alert (“blinkies”). Keep the histogram’s right edge tucked safely inside the boundary without clipping the red or yellow channels.
Managing Deep Shadows
Slot canyon crevices fall into deep shadow quickly. To capture full shadow detail without introducing severe sensor noise, configure your camera as follows:
| Setting | Recommended Value | Practical Purpose |
|---|---|---|
| Image Format | Uncompressed 14-bit RAW | Maximizes dynamic range for shadow recovery and color calibration |
| Shooting Mode | Aperture Priority (A/Av) or Manual | Maintains depth of field while the camera balances exposure |
| Aperture | f/4.0 to f/8.0 | Delivers edge-to-edge sharpness across close canyon walls |
| ISO Sensitivity | Auto-ISO (Base: 100, Max: 3200) | Keeps shutter speeds safe for handheld capture without excessive noise |
| Minimum Shutter Speed | 1/60s to 1/125s | Prevents micro-motion blur caused by handheld camera shake |
| White Balance | Daylight (5500K) or Shade (7000K) | Prevents Auto White Balance from cooling down natural warm reds |
Stabilization and Sharpness Without a Tripod
Achieving tack-sharp images without a tripod relies on solid handheld technique. Enable your camera’s In-Body Image Stabilization (IBIS) and your lens’s Optical Image Stabilization (OIS). Tuck both elbows firmly against your rib cage, spread your feet shoulder-width apart, and exhale gently as you smoothly depress the shutter button.
To master extreme contrast scenes, configure Auto Exposure Bracketing (AEB) for a continuous 3-shot burst (-1.5 EV, 0 EV, +1.5 EV) in high-speed drive mode. Modern HDR merging tools in Lightroom or Capture One can align and blend these rapid handheld exposures cleanly.
Composition Tips: Making the Most of Lines, Textures, and Color
Antelope Canyon’s water-carved sandstone creates natural leading lines, spirals, and organic geometric shapes. Move beyond simple tourist snapshots by using these compositional techniques:
- Look Straight Up: Tilt your camera 70 to 90 degrees upward to capture the dramatic contrast between glowing, fiery sandstone edges and narrow ribbons of deep cobalt-blue sky. Framing upward also completely excludes crowd heads and walking paths from your frame.
- Follow Sandstone Striations: Position curved sedimentary layers starting from the bottom corners of your frame to lead the viewer’s eye into the center of the composition.
- Isolate Abstract Details: Zoom to 50mm or 70mm and compose tight frames focusing on flute marks, scalloped wall hollows, and subtle bounce-light transitions between warm orange and cool violet.
Working With Light Beams and Moving Crowds
Antelope Canyon tours accommodate hundreds of visitors simultaneously. Successfully photographing light shafts in high-traffic conditions requires speed, anticipation, and courteous spatial awareness.
Timing for Peak Beams
Direct light beams in Upper Antelope appear suddenly as the sun crosses specific open fractures in the ceiling. A single shaft typically lasts between 10 and 25 minutes before shifting across the wall and vanishing. When your guide alerts the group that a light shaft is active, position yourself quickly at the designated viewing boundary.
Composing With Moving People
Rather than fighting group movement, use visitors intentionally. A single silhouette standing near a glowing chamber wall provides dramatic scale, emphasizing the towering height of the 120-foot sandstone slots. If you want pristine, empty landscape compositions, frame upward toward high wall arches, or wait as the trailing member of your tour group to photograph empty corridors immediately behind you.
Camera Settings for Light Shafts and Drifting Sand
To render light beams clearly, fine sand dust must be suspended in the air. Tour guides frequently toss a handful of loose floor sand into the beam path to illuminate the shaft. Use these specific camera settings to capture this phenomenon:
- Shutter Speed: Set 1/125s to 1/250s to freeze the falling sand particles cleanly without creating a muddy haze.
- Aperture: Stop down to f/5.6 or f/8.0 to maintain crisp beam edges.
- Metering: Use Spot Metering directly on the illuminated sand column, or dial exposure compensation to -0.7 EV to keep the glowing core from blowing out.
Slot Canyon Safety: Weather and Flash Flood Precautions
Slot canyons are natural drainage conduits formed entirely by rapid water erosion. Flash floods represent an immediate and life-threatening hazard. Storm systems occurring 20 to 30 miles away can funnel millions of gallons of water into the narrow wash within minutes, even under clear blue skies directly above the canyon.
Warning — Flash Flood Hazard: In 1997, a sudden flash flood in Lower Antelope Canyon claimed the lives of 11 visitors. Today, the Navajo Nation and tour concessionaires maintain strict safety protocols with early warning weather monitoring. If your guide issues an evacuation command, immediately follow safety ladders to the rim exits and abandon photography.
During the Southwest monsoon season (typically mid-July through September), tours are routinely delayed or cancelled on short notice due to regional flash flood watches issued by the National Weather Service Flagstaff Office. Always maintain flexibility in your travel schedule during summer months.
Respectful and Safe Photography Practices on Navajo Land
Antelope Canyon is not merely a geological attraction; it is considered sacred by the Navajo people, representing a sanctuary of spiritual reflection and reverence for Mother Earth (*Nahasdzáán*). Practicing ethical photography honors both the land and its traditional custodians:
- Follow Navajo Guide Instructions: Never climb sandstone walls, step outside marked visitor pathways, or touch delicate petrified sand formations. Skin oils degrade the porous rock surface over time.
- Obtain Commercial Permits: Any photography intended for commercial licensing, advertising, stock sales, or monetization requires an official commercial filming and photography permit issued by the Navajo Nation Film Office and Navajo Parks & Recreation.
- Leave No Trace: Pack out all personal items, stay hydrated in desert temperatures, and leave the canyon exactly as you entered it.
Post-Processing Tips to Preserve the Canyon’s Natural Look
Slot canyon RAW files often appear surprisingly flat straight out of the camera due to low contrast in bounced light. The goal in post-processing is to restore the natural brilliance and tonal depth observed by the human eye without creating artificial, neon oversaturation.
- Calibrate White Balance Carefully: Adjust the temperature slider between 5500K and 6500K to restore natural warm orange and red tones without turning deep purple shadows into muddy brown.
- Restrain Global Saturation: Avoid heavy global saturation boosts. Instead, use localized HSL adjustments: increase the Luminance of orange and yellow tones slightly, and add subtle Saturation to red and magenta channels.
- Apply Targeted Contrast & Dehaze: Use linear contrast curves and apply gentle Dehaze (+5 to +12) specifically to light beam shafts to make beams pop while preserving shadow textures on adjacent walls.
Frequently Asked Questions
Are drones allowed for aerial photography over Antelope Canyon?
No. The Navajo Nation strictly prohibits the operation of recreational drones anywhere within Navajo Tribal Parks, including Antelope Canyon, Lake Powell Navajo Tribal Park, and Monument Valley. Violators face equipment confiscation and tribal legal penalties.
Can tripods be brought or rented at the canyon entrance?
No. Tripods, monopods, selfie sticks, and gimbals are strictly banned on all standard public tours in both Upper and Lower Antelope Canyon. Tripods are not available for rent at the entrance, and visitors carrying them will not be permitted to enter the canyon.
Is flash or artificial lighting permitted inside the canyon?
No. On-camera flash, speedlights, continuous video LED panels, and external diffusers are strictly prohibited. Artificial lighting flattens the natural geological shadows and disrupts the experience for other tour members.
Do all Antelope Canyon tours include licensed Navajo guide instruction?
Yes. Under Navajo Nation law, 100% of visitors entering Antelope Canyon must be accompanied by an authorized, licensed Navajo guide. Guides assist guests with camera settings, point out prominent rock formations, and ensure group safety throughout the tour.
What are the rules for commercial photography or filming permits?
Commercial photography, video shoots, product placement, and stock photography require an advance permit application submitted to Navajo Nation Parks & Recreation and the Navajo Nation Broadcast Services / Film Office, along with location fees and proof of liability insurance.
Conclusion
Photographing Antelope Canyon is an extraordinary exercise in visual discipline and rapid technical adaptation. By working within current park guidelines, mastering handheld stabilization techniques, and understanding how solar angles shape the sandstone’s interior glow, you can capture breathtaking, authentic images of this sacred natural wonder while treating the land and its Navajo stewards with the respect they deserve.
Sources
- Navajo Nation Parks & Recreation — Official tribal park rules, permits, entry fees, and licensed tour operator requirements.
- National Weather Service (Flagstaff, AZ WFO) — Regional monsoon warnings, convective storm forecasts, and slot canyon flash flood safety advisories.
- United States Geological Survey (USGS) — Geological documentation on Colorado Plateau sandstone erosion, slot canyon hydrologic mechanics, and fluvial geomorphology.