The Männlichen to Kleine Scheidegg Panorama Trail is one of the most photogenic short hikes in Switzerland’s Jungfrau Region. The official route is about 4.5 kilometers and takes roughly 1 hour 20 minutes in the Männlichen-to-Kleine-Scheidegg direction, before photography stops. Along the way, you get repeated views toward the Eiger, Mönch and Jungfrau, plus alpine meadows, mountain railways and broad valley scenery.
You can reach Männlichen by gondola from Grindelwald Terminal or by aerial cableway from Wengen. The hike finishes at Kleine Scheidegg, where mountain railway connections continue toward Grindelwald, Wengen, Lauterbrunnen and the Jungfraujoch area. Although the trail is considered a leisurely alpine hike in suitable conditions, it is not barrier-free, and weather can change quickly at elevation.
Quick Answer
For the best photos on the Männlichen to Kleine Scheidegg hike, start at Männlichen, add the optional Royal Walk viewpoint if conditions are clear, then follow the 4.5 km Panorama Trail toward Kleine Scheidegg. Photograph the Eiger, Mönch and Jungfrau along the route, and use the Männlichen viewing area for Lauterbrunnen Valley views.
Key Takeaways
- The official Panorama Trail is about 4.5 km and takes roughly 1 hour 20 minutes from Männlichen to Kleine Scheidegg before long photo stops.
- The Eiger, Mönch and Jungfrau provide the main mountain backdrop throughout much of the hike.
- For a confirmed Lauterbrunnen Valley view, use the viewing area near the Männlichen Mountain Guest House before starting the main trail.
- Morning and later-day light can improve mountain photography, but always plan around cableway and railway operating hours.
- Check trail status and the mountain-weather forecast before leaving, even when the valley weather looks good.
At a Glance
| Time Required | About 1 hour 20 minutes of normal walking from Männlichen to Kleine Scheidegg; allow 2–3 hours if you stop often for photography. |
| Difficulty | Easy to leisurely in suitable summer conditions, but it is still an alpine hiking trail and is not barrier-free. |
| Tools Needed | Walking shoes with good grip, layers, water, sun/rain protection, camera or phone, spare battery and lens cloth. A polarizer or lightweight tripod is optional. |
| Cost | Transport costs vary by starting point, ticket and travel pass. Check current Männlichen and Jungfrau railway fares before travel. |
Männlichen to Kleine Scheidegg Route Basics
The official Männlichen Panorama Trail runs south from Männlichen along the eastern side of the Tschuggen before continuing toward Honegg, Rotstöckli and Kleine Scheidegg. The operator currently lists the trail at 4.5 km, with an estimated walking time of 1 hour 20 minutes from Männlichen to Kleine Scheidegg and about 2 hours in the opposite direction.
That makes Männlichen to Kleine Scheidegg the more convenient direction for most visitors. The route is normally listed for the mid-June to October hiking season, but snow, rain, maintenance or other mountain conditions can affect availability. Check the official trail status before travelling rather than relying only on a calendar date.
To reach the trailhead, you can travel to Männlichen from Grindelwald Terminal by gondola or from Wengen by aerial cableway. At the other end, Kleine Scheidegg is a railway junction. The official Kleine Scheidegg information describes connections via the Bernese Oberland Railway and Wengernalp rack railway.
Note: Männlichen’s cableway stations and a viewing platform have accessible facilities, but the hiking trails themselves are not barrier-free. The operator specifically states that trails on and around Männlichen are not suitable for wheelchair use.
Warning: Treat this as an alpine outing even though the walking is relatively easy. Check trail status and the mountain forecast, carry layers and rain protection, and do not stay on exposed terrain to get a photograph if thunderstorms or other dangerous weather are approaching.
The Best Photo Spots Along the Hike
The attraction of this hike is not one single viewpoint. The landscape keeps changing as you move from Männlichen toward Kleine Scheidegg, so it is worth leaving enough time to stop without rushing for your return train.
1. Männlichen Viewing Area and Lauterbrunnen Valley
Before joining the Panorama Trail, spend a few minutes around the Männlichen Mountain Guest House. The official Männlichen accessibility information confirms a viewing platform beside the guest house with views across the Jungfrau Region and Lauterbrunnen Valley.
This is a stronger Lauterbrunnen photography location than relying on an unmarked viewpoint farther along the trail. A wide-angle composition can include the valley and surrounding mountain walls, while a longer focal length helps isolate villages, cliffs or layers of distant terrain.
2. Optional Royal Walk Viewpoint
If the weather is clear and you have extra time, consider the Royal Walk to the Männlichen summit before beginning the Panorama Trail. The official route is approximately 1 km each way, with about 25 minutes required for the climb from Männlichen and around 15 minutes for the return.
The higher viewpoint gives you more room to compose the Eiger, Mönch and Jungfrau together and is particularly useful when low cloud is not blocking the major peaks.
3. The Panorama Trail Below Tschuggen
Once you leave Männlichen, the path runs through open alpine terrain along the eastern side of the Tschuggen. This is where the hike begins to feel like a continuous natural viewpoint. Mountain faces dominate one side of the scene while meadows, paths and occasional hikers provide foreground scale.
Instead of photographing every view from standing eye level, try stepping to the safe edge of the path where appropriate and looking for curves in the trail, rocks, flowers or hikers that lead the viewer’s eye into the mountains.
4. Honegg and Rotstöckli Sections
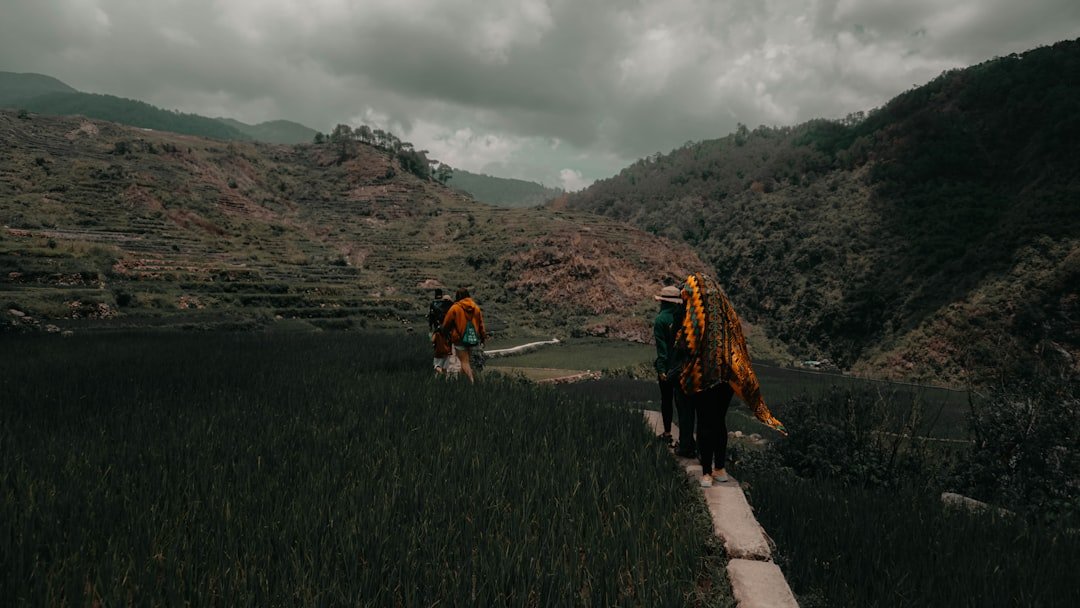
The official route continues through the Honegg and Rotstöckli area on its way to Kleine Scheidegg. These open sections are useful for photographing the relationship between the trail and the larger mountain landscape. A person wearing a bright jacket can add scale without overwhelming the scene.
5. The Approach to Kleine Scheidegg
As Kleine Scheidegg comes closer, the Eiger becomes an increasingly strong subject. Railway infrastructure, mountain buildings and the hiking path provide a useful contrast with the huge rock face above. This is also a good area for tighter compositions if the sky is flat or the wider panorama feels cluttered.
Pro Tip: Do not spend all of your time chasing the widest possible panorama. Capture a mix of wide landscapes, medium compositions, trail details, flowers, railway scenes and people for a more complete photographic story.
Capturing the Magnificent Views of the Eiger, Mönch, and Jungfrau

The Eiger, Mönch and Jungfrau form the defining mountain backdrop of the route. You do not need specialized equipment to photograph them well, but changing your focal length can produce very different images.
A wide-angle lens or a phone’s standard wide camera is useful when you want to show the mountains together with the meadow and trail. A normal zoom gives a more natural perspective, while a short telephoto can isolate individual ridges, snowfields or the Eiger’s North Face without filling the frame with empty sky.
For landscapes with foreground detail, start around f/8 on a conventional camera and focus far enough into the scene to keep both foreground and distant terrain acceptably sharp. ISO 100 or the camera’s base ISO is a sensible starting point in bright daylight, but shutter speed should change with the available light rather than being locked to one value.
If you include hikers, flowers moving in the wind or handheld telephoto images, use a faster shutter speed than you would for a static landscape. Image stabilization helps, but it cannot freeze a person or flower that is moving.
The strongest mountain photograph is not always the frame with the most scenery. A simple foreground, a clear subject and separation between layers can be more effective than trying to include every peak at once.
Getting the Best Photos of the Lauterbrunnen Valley
Lauterbrunnen Valley is known for its steep mountain walls, green valley floor, villages and waterfalls. For this particular hike, the most clearly documented place to photograph the valley is around the Männlichen viewing platform near the Mountain Guest House before you commit to the Panorama Trail.
Morning haze, midday contrast and later directional light can make the same valley look very different. If the sky is bright while the valley is dark, expose carefully to protect highlight detail and consider taking bracketed exposures for later blending.
| Photography Situation | Useful Starting Point |
|---|---|
| General mountain landscape | Base ISO, around f/8, then choose the shutter speed required for a correct exposure. |
| Handheld hikers or moving flowers | Use a faster shutter such as 1/250 second or faster when movement requires it; raise ISO if necessary. |
| Waterfall motion | Use a tripod and slower exposure if you want smooth water. An ND filter may be needed in bright daylight. |
| High-contrast valley and sky | Protect bright highlights and consider exposure bracketing if your camera cannot hold both extremes in one frame. |
| Camera body | No particular model is required. A Nikon D850 can work well, but so can another interchangeable-lens camera or a modern phone. |
| Number of photos | There is no ideal target. Whether you take 20 or 150 frames, vary composition and focal length rather than repeating the same view. |
A circular polarizing filter can reduce some reflections and deepen parts of a blue sky, but rotate it carefully. On a very wide lens, polarization can become uneven across the sky and create an unnatural dark patch.
The Charm of Alpine Flowers and Wildlife
Summer brings color to the meadows around Männlichen, and depending on the exact date and location you may encounter alpine flowers such as gentians, alpine roses and other small mountain species. These details are useful when the major peaks are hidden by clouds because they give you subjects closer to the trail.
For flower photographs, get low without stepping off the safe path into fragile vegetation. A wide aperture can isolate one bloom, while a smaller aperture works when you want both flowers and mountains to remain recognizable.
Wildlife sightings are possible in the wider Männlichen area, but they should never be treated as guaranteed photo opportunities. Männlichen’s official Chamois Trail information documents chamois on the steep slopes between the Männlichen plateau and Wengen. Marmots and alpine birds may also be encountered in the wider Alps, but your chances on this specific Panorama Trail vary from day to day.
If you see wildlife, photograph from a respectful distance. Do not chase, feed or surround an animal for a closer picture. The same principle applies to flowers: photograph them where they grow rather than picking or moving them for a composition.
The Enchanting Grindelwald Valley

Männlichen sits between the Grindelwald and Lauterbrunnen sides of the region, giving photographers access to very different valley perspectives. The Grindelwald side combines alpine slopes, settled areas and dramatic mountain walls, which can create strong layers in a single frame.
Paths and mountain infrastructure can work as leading lines instead of distractions. A trail bending through the foreground, for example, can guide attention toward a peak far more effectively than an empty meadow.
Pro Tip: Use paths, fence lines, streams or the edge of a meadow as leading lines, but check the corners of the frame before shooting. Small distractions near an edge are often more noticeable later than they are on the trail.
Season also changes the visual character of the valley. The normal Panorama Trail season falls mainly in summer and early autumn, so you may see fresh green meadows and wildflowers earlier in the season and warmer grass or autumn tones later. Snow can still affect higher mountain terrain outside the core summer period, which is one reason trail status matters more than the date alone.
Tips for Photographing Changing Light and Weather
Light in the Alps can change quickly as clouds move across steep terrain. That is useful photographically because brief sunlight can illuminate one ridge or meadow while surrounding areas remain in shadow. It also means you should keep your camera accessible instead of packing it deeply inside your bag after every shot.
For planning, check the MeteoSwiss forecast as well as local trail and transport information. MeteoSwiss provides forecasts, precipitation information, wind data and other weather information useful for mountain outings.
Clear mornings often make mountain identification easier, while broken cloud can produce more dramatic photographs. Later light may add texture to ridges when the sun strikes them at an angle. However, true sunrise or sunset may occur outside normal cableway or railway operating hours, so do not assume you can simply arrive at golden hour. Check the day’s timetable before building a photography plan around first or last light.
Warning: Dramatic storm clouds are not worth unnecessary exposure to lightning, strong wind or poor visibility. MeteoSwiss notes that thunderstorms are particularly common during Switzerland’s warm season. If dangerous weather develops, prioritize shelter and safe transport rather than waiting for the light to improve.
When brightness changes rapidly, aperture-priority mode can be convenient for landscapes because you control depth of field while the camera adjusts shutter speed. Watch that the shutter does not become too slow for handheld shooting. Exposure compensation is also useful when bright snowfields or dark rock cause the camera meter to overcorrect.
Camera Gear and Settings for the Hike
You do not need a heavy camera bag for this route. Because the scenery is broad and the hike is short, a compact setup often makes it easier to stop, shoot and continue walking.
- Wide or standard zoom: Useful for the trail, meadows and three-peak panoramas.
- Short telephoto: Helpful for isolating the Eiger North Face, distant hikers, railway scenes and mountain details.
- Spare battery: Cold temperatures, video and frequent screen use can drain batteries faster than expected.
- Lens cloth: Useful after mist, light rain or fingerprints.
- Circular polarizer: Optional for controlling reflections and some haze, but use it carefully with wide-angle skies.
- Light tripod: Optional rather than essential. It becomes most useful for slower waterfall exposures or carefully bracketed landscapes.
- Rain protection: A small camera cover or waterproof bag protects equipment when weather changes.
If you are using a phone, clean the lens before important shots, avoid excessive digital zoom and use the main camera whenever possible for the highest image quality. Tap on the brightest important area to check exposure, then lower brightness slightly if snow or bright cloud is losing detail.
Drone Photography: Check the Rules Before Flying
A drone may seem ideal for an alpine panorama, but you should never assume that a scenic location is automatically legal to fly. Switzerland’s Federal Office of Civil Aviation drone rules require pilots to follow the rules for their aircraft and operating category, respect geographical flight restrictions, keep the required visual line of sight, give way to manned aircraft and respect other people’s privacy.
Restrictions can depend on the exact location rather than the name of the hiking route. Check the official Swiss drone information and current geographical restrictions before each flight. If you cannot confirm that the flight is permitted, keep the drone grounded and use a normal camera instead.
Preserving the Memories of the Männlichen to Kleine Scheidegg Hike
The Männlichen to Kleine Scheidegg hike combines a manageable walking distance with an unusually large number of photographic subjects. You can begin with the Lauterbrunnen Valley and optional Männlichen summit viewpoint, continue through open alpine meadows beneath the major Jungfrau Region peaks, and finish with the Eiger rising above Kleine Scheidegg.
The most useful approach is to photograph the route as a sequence rather than hunting for one perfect frame. Take a wide establishing image, then look for details such as flowers, hikers, railway lines, mountain textures and changing light. Those smaller photographs often do more to preserve the feeling of the day than another nearly identical panorama.
Leave enough time to enjoy the hike without allowing photography to distract you from weather, footing or transport schedules. The trail may be straightforward in good conditions, but you are still travelling through an alpine environment where preparation matters.
If you also enjoy food and culture content, the site has a separate article on the world of Asian melons. It is unrelated to the Männlichen hike, so treat it as optional further reading rather than part of your route planning.
Frequently Asked Questions
What is the Männlichen to Kleine Scheidegg hike?
It is the Panorama Trail linking Männlichen with Kleine Scheidegg in Switzerland’s Jungfrau Region. The official Männlichen route page lists it at about 4.5 km and roughly 1 hour 20 minutes in the Männlichen-to-Kleine-Scheidegg direction before extended stops.
What are the best photo spots on the Männlichen to Kleine Scheidegg hike?
Start with the viewing area near the Männlichen Mountain Guest House for Lauterbrunnen Valley views. If you have extra time, add the Royal Walk summit viewpoint. Along the Panorama Trail, use the open sections below Tschuggen and around Honegg and Rotstöckli for mountain compositions, then photograph the Eiger as you approach Kleine Scheidegg.
What is the best time of year to hike from Männlichen to Kleine Scheidegg?
The official Panorama Trail page lists the normal hiking period as mid-June through October. Exact opening conditions can vary with snow, weather and maintenance, so check current trail status shortly before your trip.
Which direction is best, Männlichen to Kleine Scheidegg or the reverse?
Männlichen to Kleine Scheidegg is the easier choice for most visitors. The operator estimates about 1 hour 20 minutes in this direction compared with roughly 2 hours from Kleine Scheidegg back to Männlichen.
How do I get to Männlichen and leave Kleine Scheidegg?
You can reach Männlichen by gondola from Grindelwald Terminal or aerial cableway from Wengen. Kleine Scheidegg is served by mountain railway connections, including the Wengernalp rack railway, rather than a Kleine Scheidegg cable car.
Is the Männlichen to Kleine Scheidegg hike suitable for beginners and children?
In suitable summer conditions, the Panorama Trail is generally a leisurely alpine hike and can work well for many families and beginners who are comfortable walking on mountain paths. Conditions, fitness and footwear still matter, and the official operator states that hiking trails around Männlichen are not barrier-free.
Are there restaurants and restrooms along the route?
Facilities are available around Männlichen and Kleine Scheidegg, including mountain restaurants. Do not assume that every part of the 4.5 km trail has services, so carry your own water and any snacks you need between the endpoints.
Can I fly a drone on the Männlichen to Kleine Scheidegg hike?
Do not assume drone flight is automatically allowed. Swiss drone pilots must comply with Federal Office of Civil Aviation rules and current geographical flight restrictions, as well as visual-line-of-sight, privacy and other applicable requirements. Check the official restrictions for your exact launch location before flying.
Sources
- Männlichen: Panorama Trail — official route, distance, direction, walking time and normal hiking season.
- Männlichen: Barrier-Free Travel — cableway access, viewing platform information and hiking-trail accessibility limitations.
- Männlichen: Royal Walk — optional summit viewpoint, distance and walking-time information.
- Jungfrau Railways: Kleine Scheidegg — railway access and Kleine Scheidegg transport information.
- MeteoSwiss — official Swiss weather forecasts, precipitation, wind and mountain-weather planning information.
- Swiss Federal Office of Civil Aviation: Drone Flight Rules — drone operating rules, flight restrictions, visual-line-of-sight and privacy requirements.