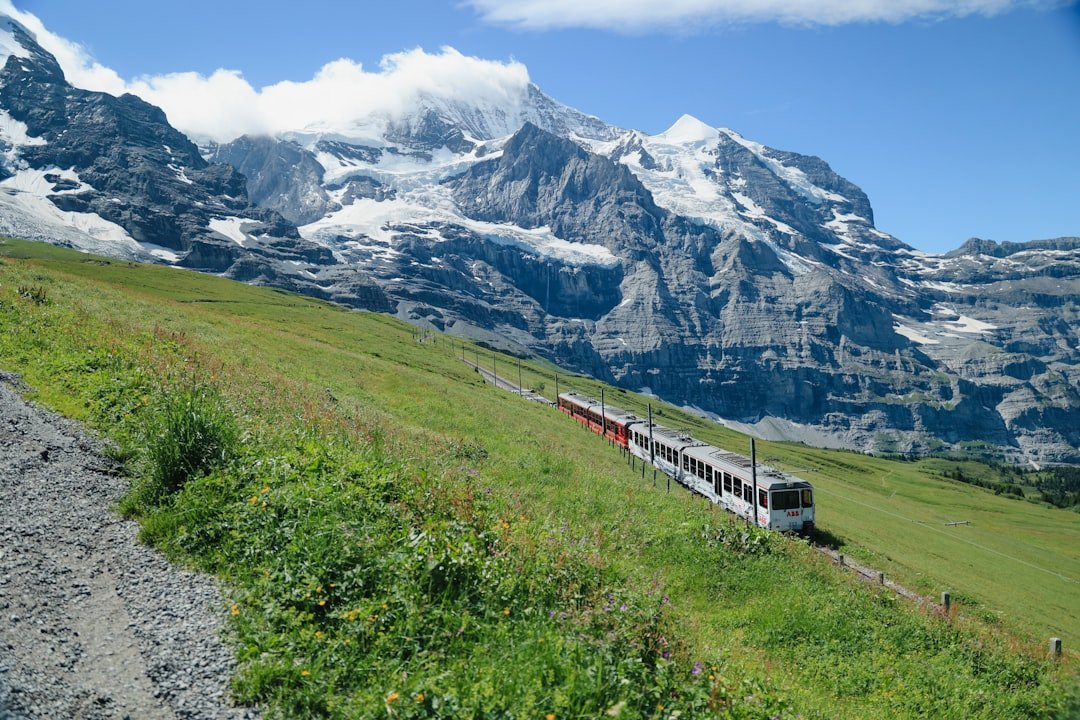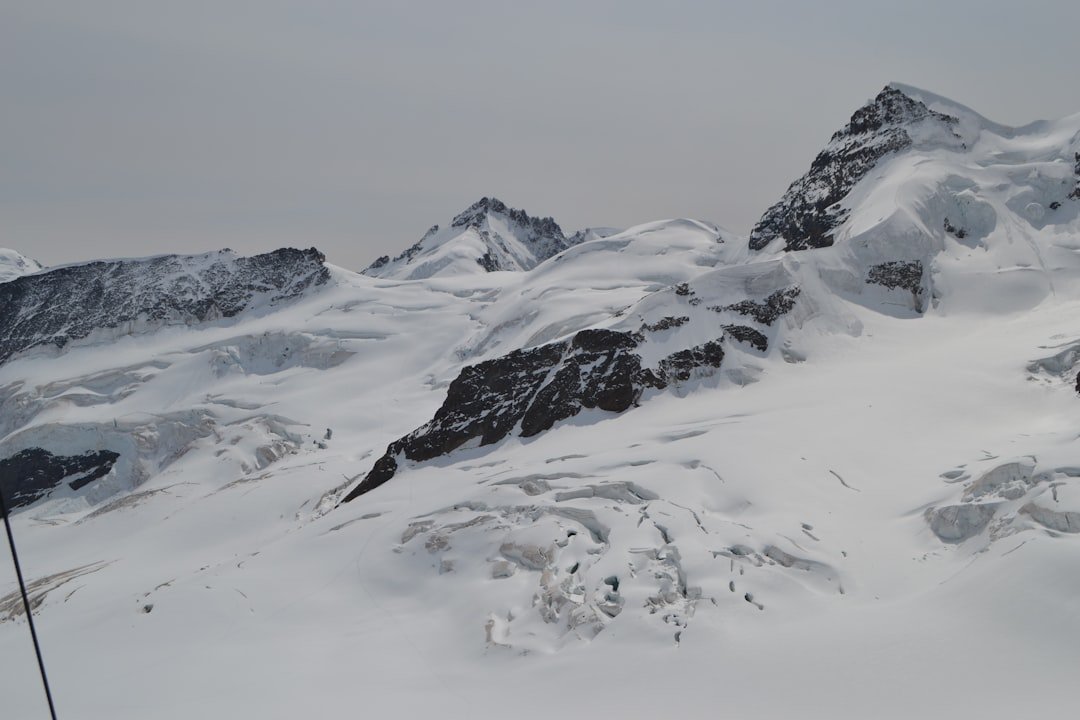
Jungfraujoch is a high-alpine saddle between the Jungfrau and Mönch in Switzerland’s Bernese Alps. Its railway station sits at 3,454 metres above sea level, while the Sphinx observation terrace rises to about 3,571 metres. From the visitor complex, you can photograph snow-covered peaks, the Aletsch Glacier, reflective ice tunnels, and rapidly changing mountain weather.
Quick Answer
For better Jungfraujoch photos, take an early public connection, check the live webcam, expose for bright snow with your histogram, and photograph the Sphinx terrace, glacier plateau, Aletsch Glacier, and Ice Palace. Carry spare batteries, protect your gear from condensation, and plan for cold, glare, crowds, and high altitude.
Key Takeaways
- Use the first practical train connection for fewer people and more time, but do not assume the viewpoint is open at sunrise.
- Expose for the snow by checking your histogram and highlight warning rather than trusting the screen alone.
- Carry a wide-angle lens for the landscape, a short telephoto for glacier details, spare batteries, sunglasses, and weather protection.
- Photograph the Eismeer window, Sphinx terrace, glacier plateau, Aletsch Glacier, and Ice Palace as separate visual stories.
- Move slowly at altitude, stay hydrated, wear closed shoes, and descend or seek help if you develop symptoms of altitude illness.
At a Glance
| Time Required | Allow at least 3.5–4.5 hours for a return visit from Grindelwald Terminal, including time at Jungfraujoch. Add more time if photography is your main goal. |
| Difficulty | Beginner to intermediate photography; physically easy for many healthy visitors, but cold, glare, wind, crowds, and altitude increase the challenge. |
| Tools Needed | Camera or smartphone, wide-angle lens, optional telephoto lens, lens hood, spare batteries, memory cards, microfiber cloth, and optional circular polarizer. |
| Cost | There is no separate personal-photography fee. Your main costs are transportation and any optional equipment or seat reservation. |
Understand the Jungfraujoch Viewpoint
Jungfraujoch is not a mountain summit. It is the saddle between the Jungfrau and Mönch, near the upper end of the Aletsch Glacier. The Jungfraujoch railway station is Europe’s highest railway station at 3,454 metres above sea level.
An elevator takes visitors higher to the Sphinx complex. Its outdoor tourist terrace is approximately 3,571 metres above sea level and offers a broad view across the Aletsch Glacier and the surrounding high Alps. Keeping these elevations separate makes captions and travel descriptions more accurate.
The region belongs to the Swiss Alps Jungfrau-Aletsch UNESCO World Heritage Site. UNESCO identifies the Aletsch Glacier as the largest and longest glacier in Europe. The glacier, serrated peaks, rocky ridges, and changing cloud layers provide subjects for wide landscapes, telephoto studies, panoramas, and abstract photographs.
Jungfraujoch is also an important scientific site. The High Altitude Research Station Jungfraujoch supports atmospheric, environmental, meteorological, and other high-alpine research. The Sphinx building contains research areas as well as the public observation terrace.
Note: Lower valleys around Grindelwald, Wengen, and Lauterbrunnen can be green and flower-filled in summer. The high Jungfraujoch visitor area remains a world of snow, ice, rock, and glacier scenery throughout the year.
Best Times for Jungfraujoch Photography
The best practical time is usually the earliest public connection you can reasonably take. Early arrivals often provide more room at the viewpoints, cleaner snow surfaces, and a better chance to work before the busiest tour groups arrive. Light may also be more directional than it is around midday.
Do not automatically plan for sunrise or sunset. Jungfraujoch is reached by mountain railway, and public operating hours may not overlap with sunrise or sunset. This is especially important during summer, when sunset occurs well after the final return services. Check the official timetable for your date before building a golden-hour plan.
A late-afternoon visit can still produce attractive side light, longer shadows, and fewer visitors, but you must leave enough time for the last train. Never delay your return to wait for a cloud or a beam of light.
Pro Tip: Check the official Jungfraujoch webcams, weather page, and operating information shortly before departure. Valley sunshine does not guarantee clear conditions at the Sphinx terrace.
Summer Photography
From June through September, the region generally offers longer daylight and more opportunities to combine alpine greenery at lower elevations with snow and ice at Jungfraujoch. Summer can also bring strong midday contrast, reflective snow, haze, fast-forming clouds, and busy visitor areas.
An early connection is valuable during the busiest part of the season. Jungfrau Railways currently lists seat reservations as mandatory from May 1 through October 31, 2026, so confirm the latest requirement when booking.
Winter Photography
Winter provides extensive snow cover, low sun angles, wind-shaped surfaces, and strong blue-and-white color contrast. Daylight is shorter, and cold can reduce battery performance quickly. Keep a charged spare battery in an inside pocket and avoid changing lenses while snow is blowing.
Cloudy and Changing Weather
Clear weather is not the only useful condition. Clouds can separate the ridges into layers, mist can simplify a busy landscape, and brief openings may spotlight part of the glacier. Watch how the light changes instead of packing the camera away as soon as a cloud arrives.
Equipment Essentials for Jungfraujoch
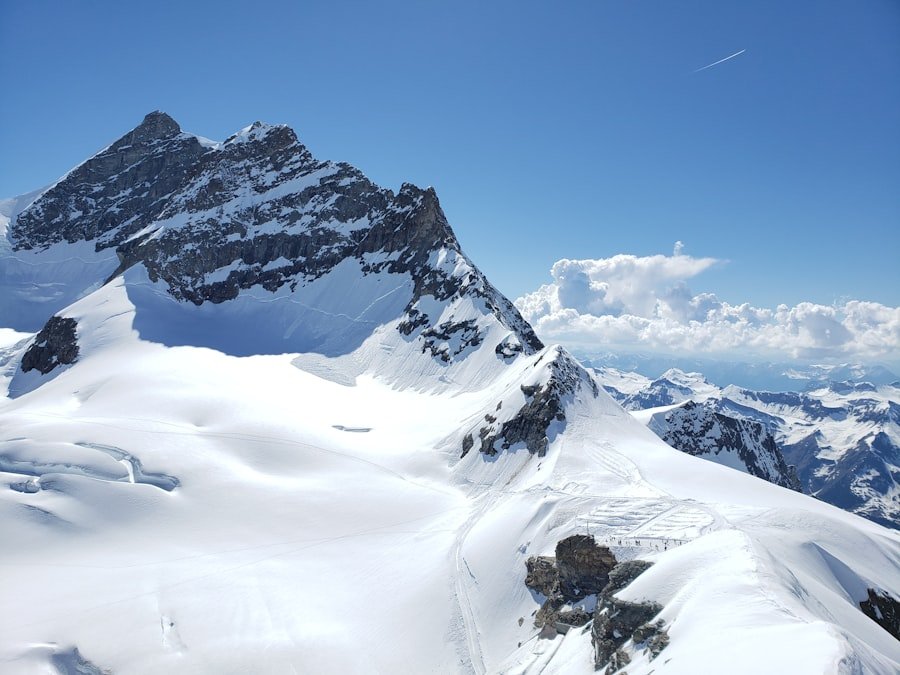
You do not need a professional camera to photograph Jungfraujoch well. A mirrorless camera, DSLR, compact camera, or recent smartphone can all produce strong results when you control exposure and composition.
- Wide-angle lens: A focal range around 16–35mm on a full-frame camera is useful for the Sphinx panorama, glacier plateau, and large foreground-to-background compositions.
- Standard zoom: A 24–70mm-equivalent lens is flexible when you want both landscapes and travel photographs without changing lenses.
- Telephoto lens: A range such as 70–200mm helps isolate glacier crevasses, distant ridges, cloud patterns, and small figures in the landscape.
- Lens hood: Use it to reduce stray light and to give the front element some protection from blowing snow.
- Spare batteries: Carry at least one fully charged spare and keep it warm in an inner pocket.
- Memory cards: Bring enough space for RAW files, panoramas, and exposure brackets.
- Microfiber cloth: Snowflakes, mist, fingerprints, and condensation can quickly soften an image.
- Camera strap: Use a secure neck or wrist strap on exposed terraces and near railings.
Should You Bring a Tripod?
A compact tripod can help with panoramas, exposure bracketing, and carefully composed landscapes. However, large tripods are awkward in crowded corridors, on narrow viewing areas, and inside the Ice Palace. Wind can also cause vibration even when the camera appears stable.
Use image stabilization, a secure stance, and a practical shutter speed before opening a tripod. Ask staff before placing one in an indoor attraction or busy passage, and never block an emergency route or visitor walkway.
Polarizing and Neutral-Density Filters
A circular polarizer can reduce some reflections, deepen blue skies, and improve separation between clouds and distant ridges. Rotate it while watching the live view because the effect can become uneven across an ultra-wide sky. A polarizer also removes light, so take it off when photographing the darker Ice Palace.
A neutral-density filter is not required simply because the snow is bright. Your aperture, shutter speed, and ISO can control ordinary exposure. Use an ND filter only when you intentionally want a slower shutter speed for moving clouds or another creative effect.
The most useful equipment is the gear you can operate quickly while wearing gloves, moving through crowds, and responding to fast-changing light.
Protect Your Camera From Cold and Condensation
Repeated movement between cold outdoor decks and warmer indoor areas can create condensation on or inside your equipment. Before entering a warm space for an extended period, place the cold camera in a closed camera bag or seal it in a plastic bag. Let it warm gradually before opening the bag.
Avoid breathing directly onto the viewfinder or front element in freezing conditions. Moisture from your breath can fog and then freeze on the glass.
Camera Settings for Snow and Mountain Views
There is no single correct setting because light, wind, clouds, and subject movement change throughout the day. The following values are starting points, not fixed rules.
| Scene | Starting Point | What to Check |
|---|---|---|
| Bright landscape | Aperture priority, f/8 to f/11, ISO 100, RAW | Watch the histogram and protect important snow highlights. |
| Handheld view in wind | f/5.6 to f/8, ISO 100–400, shutter speed around 1/250 second or faster | Increase ISO if wind or camera movement is softening details. |
| People in the landscape | 1/250 to 1/500 second, Auto ISO if needed | Focus on the person’s face or upper body and check that the snow is not clipped. |
| Ice Palace | Wide aperture, image stabilization, ISO 800–3200, about 1/60 second or faster | Review for hand movement, moving visitors, and blown reflections. |
| High-contrast glacier scene | RAW plus a short exposure bracket | Keep aperture and focus consistent across the bracket. |
Expose Snow Without Making It Gray
A camera meter may underexpose a frame dominated by bright snow, making the surface look dull gray. Start with the camera’s suggested exposure, inspect the histogram, and then add positive exposure compensation when needed. A value between about +0.3 and +1 EV is a common starting range, but the correct adjustment depends on the scene.
Enable your camera’s highlight warning if available. Small blinking areas on direct sun reflections may be acceptable, but large clipped areas across textured snow or clouds mean important detail has been lost.
Warning: Do not darken every frame merely to eliminate all highlight warnings. That can create noisy shadows and dull snow. Protect meaningful texture, capture RAW files, and judge the complete histogram rather than one tiny reflection.
When to Bracket Exposures
Exposure bracketing is useful when bright snow, dark rock, and backlit clouds exceed the range your camera can record in one frame. Capture several images at different exposures without changing focus or aperture. You can later select the strongest single frame or blend the bracket carefully.
Avoid aggressive HDR when people, flags, or fast clouds move between frames. Movement can create ghosted edges that require extra correction.
Composition and Framing
Jungfraujoch is visually impressive, but a large view does not automatically produce a strong photograph. Decide what the photograph is about before pressing the shutter: the glacier’s scale, a sharp ridge, a person facing the landscape, layers of clouds, or a pattern in the ice.
| Technique | Best Use | How to Apply It |
|---|---|---|
| Rule of thirds | Asymmetrical mountain and glacier views | Place a major ridge, person, or horizon near a third line rather than automatically centering it. |
| Leading lines | Glacier flow, railings, paths, shadows, and snow ridges | Use the line to guide the eye toward a peak, person, or distant opening in the clouds. |
| Centered composition | Symmetrical tunnels, Ice Palace scenes, and dominant peaks | Center deliberately and keep vertical or horizontal features level. |
| Fill the frame | Ice textures, crevasses, sculptures, and rock details | Use a longer focal length or move closer only within approved visitor areas. |
Create a Sense of Scale
A glacier can look surprisingly flat when nothing in the frame reveals its size. Include a person, railing, building, or recognizable ridge to provide scale. Keep the person small when the landscape is the main subject.
Add Foreground Without Adding Clutter
Snow ridges, ice edges, rock, and safe sections of railing can form a useful foreground. Check every corner of the frame for cut-off signs, random elbows, bright jackets, or heavy dark shapes that compete with the glacier.
Use Leading Lines Carefully
Natural features such as glacier curves, crevasse patterns, trails, snowdrifts, and shadow lines can guide the viewer toward a focal point. Make sure the line leads somewhere meaningful rather than out of the frame.
Dealing With Harsh Light and Glare
High-altitude sunlight can be intense, and snow reflects light toward both your camera and your eyes. Midday scenes may contain brilliant highlights, deep rock shadows, and a pale sky in the same frame.
- Use a lens hood to reduce stray light.
- Shade the front element with your hand only when your hand remains safely outside the frame.
- Check the histogram after moving from shade into direct sun.
- Use exposure compensation instead of relying on automatic brightness.
- Bracket a static, high-contrast scene when one exposure cannot hold both snow and shadow detail.
- Clean the lens regularly because small water spots become obvious when shooting toward bright light.
Black-and-white processing can work well when color is weak but the scene has strong ridges, shadows, cloud layers, or ice textures. It should be a creative decision, not a substitute for controlling exposure.
Capturing the Jungfraujoch Landscape
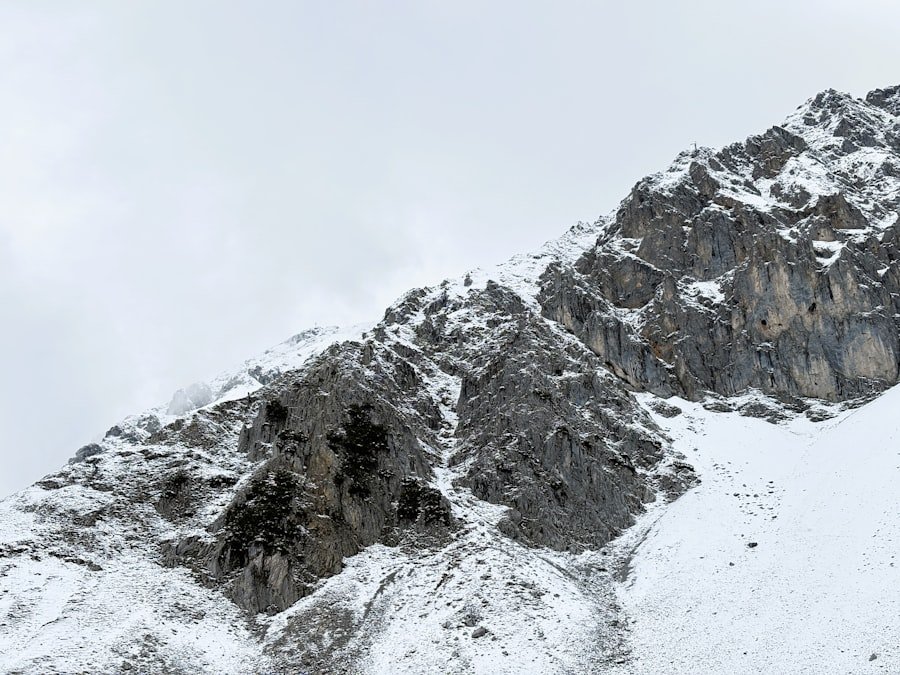
The landscape offers both broad panoramas and small details. Capture a wide establishing frame first, then look for tighter photographs of glacier curves, cloud shadows, layered ridges, wind-carved snow, and people interacting with the view.
A complete Jungfraujoch photo story should show where you are, how large the landscape feels, and which small details made the place memorable.
A Practical Photography Route
- Eismeer station: The train may make a short stop at the viewing windows on the ascent. Be ready before the doors open because the stop is brief. Photograph the ice through the glass, keep the lens close to the window without touching it, and shade reflections with your hand or coat.
- Sphinx observation terrace: Start with a wide view, then use a telephoto lens to isolate ridges, glacier patterns, and clouds. Secure loose items because the terrace can be windy.
- Glacier plateau: Use people, flags, or marked structures to communicate scale. Keep the horizon level and watch for footprints that either support or distract from your composition.
- Aletsch Glacier view: Photograph the glacier as a sweeping leading line, then zoom in for compressed layers and surface details.
- Ice Palace: Switch to a faster lens or higher ISO, look for blue tonal variation, and photograph reflections, tunnels, and sculptures without blocking other visitors.
Wait for Small Changes
Clouds moving across a ridge can change the photograph within seconds. After taking the obvious frame, stay in place and watch the light. A shadow may reveal glacier texture, a person may enter the ideal position, or mist may briefly separate one peak from another.
Build a Panorama
For a panorama, hold the camera vertically to gain more height and overlap each frame by roughly one-third. Lock exposure and white balance so the brightness and color do not shift between frames. Rotate from one stable position and leave extra space around the edges for cropping after the merge.
Photographing the Aletsch Glacier and Ice Palace
The Aletsch Glacier is the dominant natural feature visible from Jungfraujoch. A wide-angle lens shows its path through the mountains, while a telephoto lens can isolate compressed ridges, crevasses, seracs, and changes in surface texture.
Use diagonal glacier lines to pull the viewer through the frame. Include part of a nearby ridge or observation structure when you need scale, but avoid placing a heavy foreground object across the glacier’s natural flow.
Warning: Remain inside marked visitor areas. A glacier can contain hidden crevasses, unstable snow bridges, and rapidly changing surface conditions. Do not step beyond barriers or follow footprints away from an approved route for a photograph.
Ice Palace Photography
The Ice Palace was carved within the Jungfraufirn and contains smooth passages and ice sculptures. The surfaces can be extremely slippery, while bright reflections and darker recesses create uneven exposure.
- Use image stabilization and a secure two-handed grip.
- Start with a shutter speed near 1/60 second and increase it when people are moving.
- Raise ISO before accepting a shutter speed that causes camera shake.
- Focus on a high-contrast edge rather than a clear, featureless patch of ice.
- Try a slightly cooler white balance, but preserve natural skin tones when people are present.
- Avoid flash when it produces a hard white reflection on nearby ice.
- Ask staff before setting up a tripod and never obstruct the route.
Centered compositions work well in symmetrical corridors. For sculpture details, move closer within the visitor route or use a longer focal length to remove distracting signs and people from the edges.
Smartphone Photography Tips
A recent smartphone can handle the broad landscapes well, especially when light is strong. Clean every lens before shooting because fingerprints cause flare and reduce contrast.
- Use the main camera for the best image quality.
- Use the ultra-wide camera only when it improves the composition; avoid including empty floor or sky simply to make the scene look larger.
- Tap the brightest important snow area and lower exposure slightly if highlight detail disappears.
- Use the phone’s grid to keep railings and horizons level.
- Capture a short panorama at the Sphinx terrace, but move slowly to prevent stitching errors.
- Use night mode carefully inside the Ice Palace and hold the phone still until the exposure finishes.
- Keep the phone warm because cold can shorten battery life and may cause an unexpected shutdown.
High-Altitude Safety and Photography Etiquette
The quick journey to 3,454 metres gives your body limited time to adjust. According to Jungfrau Railways’ medical guidance, acute altitude sickness can develop above 2,500 metres.
Warning: Move slowly and pay attention to headache, nausea, dizziness, unusual weakness, poor coordination, or shortness of breath. Stop photographing, tell a companion or staff member, and descend promptly if altitude symptoms develop. People with relevant heart, lung, circulation, pregnancy, or other medical concerns should seek medical advice before the trip.
- Wear ultraviolet-protective sunglasses even in cloudy weather because reflected light can damage the eyes.
- Apply sunscreen to exposed skin.
- Wear warm layers, gloves, a hat, and closed shoes with good grip in every season.
- Drink water regularly and avoid excessive alcohol before or during the excursion.
- Walk instead of running between viewpoints.
- Keep straps, tripod legs, and bags out of walkways.
- Do not lean over barriers or extend a selfie stick into another visitor’s space.
- Ask permission before making a close, identifiable portrait of another visitor.
Drone Photography
Jungfrau Railways states that drone flights are generally not permitted on its mountains. Authorized collaborations require prior approval. In addition, Swiss drone operators must check the Federal Office of Civil Aviation restriction map and current airspace information before every flight.
Do not arrive with a drone expecting to launch from the visitor complex, glacier plateau, railway property, or another crowded area.
Editing and Enhancing Your Photos
Post-processing should reveal the structure and atmosphere that were present rather than turning the scene into an unnatural blue-and-white graphic.
- Correct lens and horizon issues: Apply the correct lens profile, remove obvious chromatic aberration, and level the horizon.
- Set white balance: Use neutral snow or a known gray surface as a starting point. Keep some cool color in shaded ice without making the entire photograph blue.
- Recover highlights carefully: Reduce highlights enough to reveal texture, but do not flatten every bright reflection.
- Open shadows selectively: Recover useful ridge or clothing detail while preserving depth.
- Add moderate contrast: Use the tone curve, contrast, clarity, or texture controls with restraint. Excessive clarity can make snow look dirty or brittle.
- Control haze: A small amount of dehaze may clarify distant ridges, but too much creates dark halos and unnatural color.
- Refine color: Reduce oversaturated cyan and blue areas before increasing global saturation.
- Sharpen at the end: Apply sharpening at the final output size and mask smooth skies or clean snow to avoid emphasizing noise.
Editing Exposure Brackets
Blend bracketed frames only when a single RAW file cannot retain the important highlights and shadows. Check moving clouds, flags, and people for ghosting. A natural-looking result should still contain believable bright snow, deep rock shadows, and a clear direction of light.
Crop With Purpose
Crop to remove partial people, signs, dark corners, or empty space that weakens the subject. Do not crop so tightly that the glacier or mountain loses its sense of scale. Keep a full-resolution version before making separate crops for websites or social media.
Before leaving for Jungfraujoch, charge every battery, clear your memory cards, clean the lenses, save the timetable offline, check the webcam, and pack sunglasses, closed shoes, gloves, and a microfiber cloth. This preparation gives you more time to respond to the landscape instead of solving avoidable equipment problems.
Sources
- Jungfrau Railways: Jungfraujoch – Top of Europe — railway-station elevation, visitor attractions, Sphinx viewpoint, glacier plateau, and Ice Palace.
- Jungfrau Railways Operating Information — current railway and attraction operating status.
- Jungfrau Railways FAQ — travel time, reservations, drone policy, clothing, ultraviolet exposure, and high-altitude medical guidance.
- UNESCO: Swiss Alps Jungfrau-Aletsch — World Heritage designation and Aletsch Glacier significance.
- High Altitude Research Stations Jungfraujoch and Gornergrat — geographical setting, research station, and Sphinx terrace elevation.
- Swiss Federal Office of Civil Aviation — official drone restriction map and pre-flight checks.
Frequently Asked Questions
What is the Jungfraujoch viewpoint?
Jungfraujoch is a high-alpine saddle between the Jungfrau and Mönch in Switzerland. Its railway station is at 3,454 metres, and an elevator carries visitors to the Sphinx observation terrace at about 3,571 metres. The viewing areas overlook the Aletsch Glacier and surrounding Alpine peaks.
What is the best time of day for Jungfraujoch photography?
The earliest practical public connection is often best for lower crowd levels and more working time. Late afternoon may provide attractive directional light, but you must follow the final train schedule. Sunrise and sunset access cannot be assumed because the public railway may not operate at those times.
What camera settings work best for bright snow?
Start with RAW capture, ISO 100, and an aperture around f/8 for a bright landscape. Check the histogram and highlight warning. Add positive exposure compensation when the snow looks gray, but stop before important textured highlights become clipped.
Which photography equipment should I bring?
Bring a camera or smartphone, a wide-angle or standard zoom, an optional telephoto lens, spare batteries, memory cards, a lens hood, a microfiber cloth, and a secure strap. A circular polarizer can help in some outdoor scenes. Bring a tripod only when you can carry and use it without blocking other visitors.
Can I use a tripod inside the Ice Palace?
Do not assume that a tripod can be opened in the Ice Palace. The route is smooth, narrow, and often busy. Use image stabilization, a wider aperture, and a higher ISO first. Ask staff before placing tripod legs on the visitor route.
Are drones allowed at Jungfraujoch?
Jungfrau Railways says drone flights are generally not permitted on its mountains. Approved collaborations require prior authorization. Operators must also check the current Swiss FOCA drone map and airspace notices, but compliance with aviation rules does not override the property operator’s restriction.
What altitude precautions should photographers take?
Move slowly, drink water, avoid excessive alcohol, and watch for headache, nausea, dizziness, weakness, poor coordination, or unusual shortness of breath. Tell staff and descend if symptoms develop. Wear ultraviolet-protective sunglasses, sunscreen, warm layers, gloves, and closed shoes with good grip.