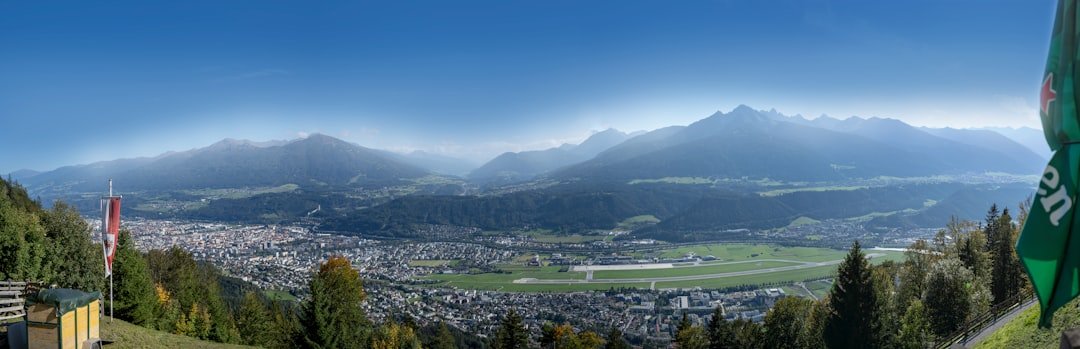
Mount Titlis is one of the most dramatic photography locations above Engelberg, with glacier scenery, jagged Alpine peaks, snow, cable cars, and elevated viewpoints packed into a relatively compact visit. The mountain reaches 3,238 meters, while the main TITLIS visitor areas are around 3,000 meters above sea level. Good photographs here depend as much on weather, access hours, and snow exposure as they do on the camera you carry.
Quick Answer
For the best Titlis photos, combine wide Alpine views with tighter shots of glaciers, cable cars, and mountain details. Protect snow highlights with your histogram, keep ISO low when light allows, use roughly f/8 to f/11 for landscapes, and check the TITLIS weather, lift schedule, and facility status before ascending.
Key Takeaways
- The strongest Titlis compositions often combine a clear foreground, a recognizable mountain feature, and layered Alpine peaks in the distance.
- Do not assume the summit is accessible at sunrise or sunset. Cable-car operating hours determine when most visitors can photograph from the upper mountain.
- Bright snow can fool camera meters, so check the histogram and highlights instead of relying only on the preview screen.
- Wide-angle lenses are useful for scale, while normal and telephoto lenses are better for isolating ridges, glaciers, cable cars, and distant peaks.
- Weather, wind, UV exposure, attraction closures, and drone restrictions should be checked before every photography visit.
At a Glance
| Time Required | Allow several hours for the cable-car journey, weather changes, multiple viewpoints, and photography stops. |
| Difficulty | Easy to moderate within open visitor areas; snow, stairs, wind, altitude, and slippery surfaces can make movement harder. |
| Tools Needed | Camera or phone, spare battery, lens cloth, sunglasses, weather protection, and optionally a wide-angle lens, telephoto lens, tripod, and polarizing filter. |
| Cost | A mountain-transport ticket is required for normal summit access; optional attractions may cost extra. Check current TITLIS ticket and timetable information before travel. |
Understanding the Titlis Viewpoint
Mount Titlis reaches 3,238 meters above sea level, but visitors arriving by cable car photograph from facilities and viewpoints slightly below the mountain’s true summit. The TITLIS cableways normally carry visitors from Engelberg toward the upper mountain in about 30 minutes, while the Titlis Cliff Walk is positioned at 3,041 meters.
The mountain is reached primarily from Engelberg in the canton of Obwalden, while the wider Titlis area lies along the Bern-Obwalden cantonal boundary. That distinction matters less to photographers than understanding that the experience includes several elevations, each producing a different type of image.
The Titlis Cliff Walk sits at 3,041 meters above sea level and is officially promoted by TITLIS as Europe’s highest suspension bridge.
2026 access note: The TITLIS Rotair is closed from August 17 through December 11, 2026. During this period, TITLIS remains accessible via TITLIS Connect between Stand and the upper mountain. Because operating arrangements can change, check the official TITLIS timetable before your visit.
Choosing the Right Titlis Photography Viewpoint
Selecting the viewpoint is one of the most important decisions you will make at Titlis because the mountain offers much more than one panoramic platform. Instead of taking every photograph from the same railing, look for differences in foreground, elevation, direction of light, and scale.
Upper TITLIS Panorama Areas
The upper visitor area provides broad views across the Alps and is the easiest place to work with layered mountain ranges. A wide lens can capture the scale of the landscape, but a normal or short telephoto lens often produces stronger photographs by isolating a single ridge, glacier feature, or distant peak.
When the sky is clear, try placing a snow ridge or railing-free patch of foreground in the lower third of the frame and allowing the distant mountains to recede in layers. In cloudier weather, concentrate on smaller openings in the clouds rather than trying to fit the entire panorama into one frame.
Titlis Cliff Walk
The Titlis Cliff Walk gives photographers a strong leading line and an immediate sense of scale. Rather than photographing only the view, use the bridge itself as part of the composition. A person positioned farther along the bridge can provide scale, provided you respect other visitors’ privacy and do not block the walkway.
Wind, moving people, and the vibration of a suspension bridge can make long exposures difficult. Use a faster shutter speed when necessary and keep tripods compact and out of the pedestrian path.
Glacier and Ice Flyer Area
Glacier scenery works well for tighter compositions because crevasses, blue ice, snow texture, and shadows provide natural patterns. The Ice Flyer also offers unusual elevated perspectives over the glacier when it is operating.
Bright ice can create extreme contrast. Watch the brightest areas of the histogram and avoid clipping large sections of snow unless those highlights contain no important detail.
Trübsee and Lower Elevations
Trübsee and lower elevations create a different style of Titlis photograph. Here, you can combine water, vegetation, trails, buildings, and the mountain itself. Reflections on calm water can work especially well, while clouds wrapping around the upper mountain can add depth even when summit visibility is poor.
Engelberg
From Engelberg, Titlis can be framed with valley scenery, traditional buildings, trees, or seasonal foliage. Lower elevations are also useful when summit weather is unfavorable or when you want to photograph closer to sunrise or sunset without depending on the upper cable-car schedule.
Tips for Capturing the Beauty of Titlis
Good Titlis photography starts with timing, but timing should be based on both light and access. Early morning and late-day light can soften contrast and reveal texture, yet summit photographers must work within the cable-car timetable.
Current Engelberg-TITLIS operations normally begin at 8:30 a.m., with the final ascent earlier than the final descent. That means sunrise photography from the summit is generally not available to ordinary day visitors, and summer sunset occurs long after the mountain transport closes. Check the current timetable rather than planning a summit shoot around generic “golden hour” advice.
Pro Tip: If the summit light is harsh, stop chasing a giant panorama. Use a longer focal length to photograph cloud layers, cable cars, ice textures, ridgelines, or people against the landscape. Smaller scenes often work better than a washed-out midday panorama.
Clouds are not automatically bad for photography. Thin cloud can soften contrast, while broken clouds can create beams of light and moving shadows across the mountains. Mist may hide distant peaks but reveal foreground textures that disappear on a perfectly clear day.
Changing weather should be treated as a creative opportunity only while conditions remain safe. Check the official TITLIS weather information and live facility status before ascending, and be prepared for attractions or exposed areas to close temporarily.
Best Time of Year for Titlis Photography
| Season | Photography Strengths | Main Challenges |
| Spring | Snow remains high on the mountain while lower elevations begin turning green. | Mixed weather, wet surfaces, and strong contrast between snow and darker terrain. |
| Summer | Green lower slopes, accessible walking areas, lake scenes, and long daylight. | Midday light can be harsh, and sunset usually occurs after summit transport closes. |
| Autumn | Clearer-looking air on some days, changing valley colors, and strong contrast between lower foliage and high snow. | Shorter days and increasingly variable mountain conditions. |
| Winter | Extensive snow cover, minimalist compositions, ski activity, and strong mountain atmosphere. | Cold batteries, blowing snow, bright reflections, ice, and reduced comfort while handling equipment. |
Northern Lights should not be treated as a normal winter attraction at Titlis. Auroras are rare in Switzerland and become visible only when sufficiently strong solar activity pushes the auroral display to unusually low latitudes. They can occasionally be photographed from the Alps, but a winter trip should never be planned around expecting them.
Understanding Lighting and Weather Conditions
| Condition | What It Does | Photography Response |
| Clear sun | Excellent visibility but strong snow highlights and deep shadows. | Watch the histogram, bracket high-contrast scenes, and look for side-lit textures. |
| Thin cloud | Softens contrast while retaining mountain detail. | Good for balanced panoramas and portraits in the landscape. |
| Broken cloud | Creates moving patches of light and shadow. | Wait for light to strike the main ridge or foreground subject. |
| Fog or mist | Reduces distant visibility but simplifies the scene. | Photograph closer subjects, silhouettes, cable cars, and disappearing ridgelines. |
| Snowfall or strong wind | Reduces visibility and can affect exposed attractions. | Prioritize safety, protect equipment, and remain inside open visitor areas. |
High-altitude sunlight deserves extra attention. According to MeteoSwiss, UV intensity increases by roughly 10 to 12 percent for every 1,000 meters of altitude because less radiation is absorbed by the thinner atmosphere. Snow can add further glare, so sunglasses and sun protection are practical equipment even when the air feels cold.
Warning: Do not cross barriers, approach crevasses, or leave marked visitor areas to improve a composition. Glacier terrain can be hazardous even when snow appears smooth and solid. Follow TITLIS staff instructions and the status of open facilities.
Equipment and Camera Settings
A DSLR, mirrorless camera, compact camera, or modern smartphone can all produce strong Titlis images. More important than the camera body is choosing settings that protect bright snow while keeping enough shutter speed for wind, handheld shooting, or moving cable cars.
Lens Choice
- Ultra-wide or wide-angle: useful for dramatic foregrounds, bridges, and expansive mountain scenes.
- Standard zoom: often the most versatile option because it can handle both landscapes and people without excessive distortion.
- Telephoto: useful for compressed layers of peaks, glacier textures, distant ridges, cable cars, and small patches of dramatic light.
Do not assume wider is always better. A scene with too much empty sky and featureless snow can feel smaller rather than grander. Zooming in often reveals stronger relationships between the mountains.
ISO
Start near your camera’s base ISO, often ISO 100, when there is enough light and shutter speed. Increase ISO when wind, movement, or handheld shooting requires a faster shutter. A sharp ISO 400 photograph is usually more useful than a blurred ISO 100 photograph.
Aperture
For broad landscapes, f/8 to f/11 is a dependable starting range on many lenses. Use a wider aperture when photographing people, cable cars, or isolated details, and stop down farther only when you genuinely need extra depth of field or a particular creative effect.
Shutter Speed
Shutter speed should follow the scene. A tripod may allow slower exposures from a stable platform, but people, cable cars, flags, blowing snow, and suspension bridges can still move. Increase shutter speed whenever subject movement matters.
Expose Snow Carefully
Snow can confuse a camera’s automatic meter because the camera may try to render a very bright scene closer to middle gray. Use the histogram and highlight warning rather than judging exposure only from the rear screen. If the snow looks dull and the histogram leaves plenty of room on the bright side, carefully increase exposure while protecting important highlights.
For high-contrast scenes, exposure bracketing can provide several frames from which you can select the best exposure or blend a natural-looking result later.
Polarizing Filter
A circular polarizer can reduce glare and deepen some colors, particularly around water and reflective surfaces. Rotate it while looking through the viewfinder or screen rather than automatically using maximum polarization. With very wide lenses, strong polarization can produce an uneven dark band across a clear blue sky.
Tripod
A lightweight tripod is helpful for careful compositions, bracketing, and lower-light work, but use it only where it does not obstruct other visitors. On the Cliff Walk or other crowded and moving structures, handheld shooting may be safer and more practical.
Protecting Your Camera in Snow, Cold, and Wind
Mountain photography can be harder on equipment than the temperature alone suggests. Carry at least one spare battery because cold conditions can reduce useful battery performance. Keep the spare protected inside your clothing or another relatively warm part of your bag.
A microfiber cloth or lens cloth is useful for snowflakes, mist, and condensation. Avoid repeatedly wiping a lens with gloves or clothing because grit can scratch the glass.
If a very cold camera is brought directly into a warm, humid indoor area, condensation may form. Keeping the camera inside a closed bag while it warms gradually can reduce sudden moisture on the equipment.
Wind is another practical problem. Keep straps secure, avoid changing lenses unnecessarily in blowing snow, and do not place loose equipment on railings or exposed surfaces.
Composition and Framing
Strong composition at Titlis comes from giving the viewer a clear path through the photograph. The rule of thirds can help, but it should be treated as a starting point rather than a requirement.
Use Leading Lines
Bridges, snow ridges, paths, railings, lake edges, and cable-car lines can guide the eye toward a mountain or person. The Cliff Walk is particularly effective because the bridge naturally leads into the surrounding peaks.
Add Scale
Mountains often look smaller in photographs than they feel in person. A person, cable car, building, or recognizable structure can communicate scale. Place the subject far enough into the scene that the mountain remains dominant.
Build Foreground, Middle Ground, and Background
A simple three-layer composition can make a wide-angle image feel deeper. Snow texture or rock can form the foreground, a ridge or structure can occupy the middle ground, and distant mountain layers can form the background.
Look for Compression
A telephoto lens can visually bring distant ridges closer together. This works especially well when several layers of mountains fade gradually into haze or when sunlight illuminates only one ridge.
Use Negative Space
Fog, white snow, and pale sky can create minimalist photographs. Instead of filling every part of the frame, place a cable car, hiker, bridge, or dark ridge against a large clean area.
A Simple Titlis Shot List
- A wide panorama with a strong foreground element.
- A telephoto frame of layered Alpine peaks.
- The Cliff Walk used as a leading line.
- A person or cable car for scale.
- Glacier texture or blue ice detail.
- Clouds wrapping around a ridge.
- A reflection or mountain view around Trübsee when conditions allow.
- A vertical composition suitable for phone screens and social media.
- A clean horizontal frame with room for text if you create travel content.
- A detail photograph of snow, ice, rock, cables, or mountain infrastructure.
Drone and Photography Rules at Titlis
Normal handheld photography from open visitor areas is straightforward for most tourists, but commercial productions may involve separate property, operational, or permission requirements. If you are organizing a professional production, contact TITLIS Cableways before arriving rather than assuming ordinary visitor access covers the shoot.
Drone photography is governed by Swiss aviation rules. The Swiss Federal Office of Civil Aviation states that open-category drone flights are generally limited to 120 meters above ground level, must remain within visual line of sight, and may not fly over assemblies of people. Required separation from uninvolved people depends on the drone and operating subcategory.
Drone operators must also check geographical restrictions before each flight. FOCA’s geographical flight restrictions guidance directs pilots to the current drone map and relevant airspace information. Camera-equipped drones generally require operator registration even when the aircraft weighs less than 250 grams.
Note: Do not rely on an old blog post or saved screenshot of a drone map. Swiss geographical restrictions can change, so check the official map immediately before the planned flight.
Post-Processing Techniques
Post-processing should recover what the camera captured rather than turn every Titlis photograph into an exaggerated HDR image. Snow and glaciers make restraint especially important because heavy contrast, clarity, or saturation can quickly make the scene look unnatural.
Recover Highlights and Shadows Carefully
Start by checking whether bright snow contains recoverable detail. Lower highlights if needed, then lift shadows only enough to reveal useful information. Trying to make every dark rock as bright as the snow usually destroys the sense of depth.
Correct White Balance
Snow can appear blue in shade and warmer in direct sun. Some color variation is natural, so do not automatically force every patch of snow to pure white. Use a neutral area as a reference and adjust until the scene still feels believable.
Control Haze
A small amount of dehaze or local contrast can clarify distant mountain layers, but excessive use creates halos and makes distant peaks unnaturally dark. Atmospheric haze can actually help create depth.
Use Local Adjustments
Instead of applying strong global contrast, selectively brighten a foreground, darken an overly bright sky, or add subtle texture to a ridge. Local adjustments help direct the viewer’s attention while preserving the natural range of the scene.
Sharpen at the End
Apply sharpening after major tonal adjustments, and judge it at an appropriate zoom level. Snow, rock, and ice contain fine textures that can look harsh if oversharpened.
For a separate example of working with bright and colorful subjects outside landscape photography, you can also see this article about exploring the delightful world of Asian melon.
Conclusion and Final Thoughts
Photographing Titlis successfully is less about owning expensive equipment and more about responding to the mountain in front of you. Choose viewpoints deliberately, protect snow highlights, use both wide and telephoto perspectives, watch the weather, and work within the day’s transport and facility schedule.
The same location can look completely different when clouds move across the ridges, fresh snow changes the foreground, or sunlight reaches only one distant peak. Stay flexible instead of trying to reproduce a single predetermined photograph. Most importantly, keep photography secondary to mountain safety and remain within open visitor areas.
Frequently Asked Questions
What is the Titlis viewpoint?
“Titlis viewpoint” generally refers to the high visitor areas around TITLIS above Engelberg rather than one single platform. Visitors can photograph panoramic Alpine scenery, glacier features, the Cliff Walk, cable cars, and nearby mountain infrastructure from several open areas.
Where is the Titlis viewpoint located?
The main tourist access is from Engelberg in the canton of Obwalden, Switzerland. Mount Titlis itself reaches 3,238 meters, while major visitor viewpoints and attractions are around the 3,000-meter level.
What camera settings work well for Titlis photography?
For landscapes, start near base ISO when light allows and try roughly f/8 to f/11 for broad depth of field. Choose shutter speed according to wind and subject movement. Because snow is very bright, check the histogram and highlight warnings rather than depending only on automatic exposure.
Is a wide-angle lens best for Titlis?
A wide-angle lens is excellent for big foreground-to-background landscapes, but it is not always the strongest choice. A standard zoom or telephoto lens can isolate glacier textures, cable cars, ridgelines, and layered peaks while avoiding large areas of empty sky or snow.
Can I photograph sunrise or sunset from the Titlis summit?
Do not assume so. Ordinary visitor access depends on cable-car operating hours. Current services normally begin after sunrise and close before summer sunset, although late-day winter light may sometimes overlap with operating hours. Always check the official timetable for your exact date.
Are there photography or drone restrictions at Titlis?
Handheld tourist photography in open visitor areas is generally straightforward, but professional productions should confirm requirements with TITLIS Cableways. Drone operations must follow Swiss FOCA rules, including applicable registration, altitude, visual-line-of-sight, people-separation, and geographical-flight-restriction requirements.
What is the best season for Titlis photography?
There is no single best season. Winter provides extensive snow, summer adds greener lower landscapes, spring can combine snow with emerging valley color, and autumn can create strong seasonal contrast. Choose the season according to the type of image you want rather than expecting identical conditions year-round.
Can you photograph the Northern Lights from Titlis?
It is possible only on rare occasions when unusually strong solar activity makes auroras visible at Swiss latitudes. Northern Lights are not a normal Titlis winter attraction, and standard summit transport also does not operate through the night, so visitors should not plan a normal Titlis trip around aurora photography.
Sources
- TITLIS Cableways – Timetable — current operating hours, transport route, maintenance periods, and 2026 TITLIS Connect access.
- TITLIS – Cliff Walk — official elevation and suspension-bridge information.
- TITLIS – Rotair — history and specifications of the revolving aerial cableway.
- MeteoSwiss – UV Index — altitude-related UV guidance.
- Swiss Federal Office of Civil Aviation – Drone Flight Rules — national drone operating requirements.
- Swiss Federal Office of Civil Aviation – Geographical Flight Restrictions — official guidance for checking drone restriction areas before flying.