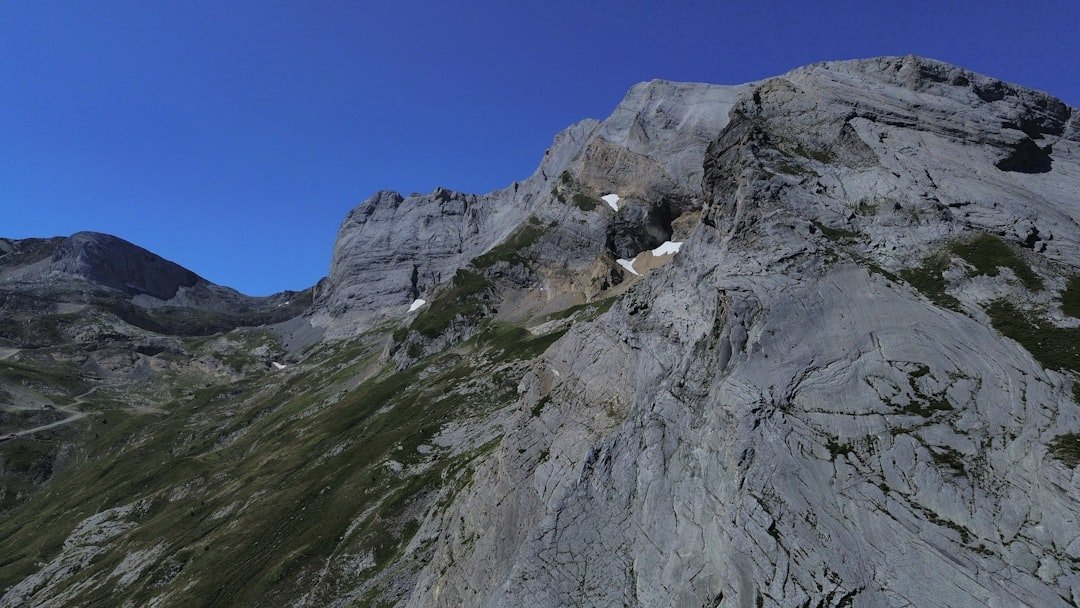
Saxer Luecke, usually written locally as Saxerlücke, is one of the most photogenic points in the Alpstein mountains of eastern Switzerland. The appeal is not just the dramatic notch itself. A well-planned hike can combine exposed limestone ridges, views toward the Kreuzberge, alpine meadows, Fälensee, Sämtisersee, mountain inns, and constantly changing light. For photographers, the key is choosing the right route and knowing where it is safe to stop before thinking about the camera.
Quick Answer
The best Saxer Luecke photo spots include the ridge between Hoher Kasten and Staubern, the dramatic Saxerlücke and Kreuzberge viewpoint, Fälensee near Bollenwees, and Sämtisersee on the descent toward Brülisau. Allow extra hiking time for photography, check mountain conditions first, and never leave the marked trail for a better angle.
Key Takeaways
- There is no single fixed-length “Saxer Luecke hike.” Your distance and time depend on where you start and finish.
- A verified benchmark is the official Geological Trail from Hoher Kasten through Staubern and Saxerlücke to Brülisau, listed at 16.21 km and about 5 hours 30 minutes before photography stops.
- The ridge is a mountain-hiking route and is partly exposed, so safe footing matters more than getting a dramatic camera angle.
- Fälensee, Sämtisersee, Staubern, the Kreuzberge formations, and Saxerlücke itself provide stronger verified photo opportunities than generic or unverified “hidden gems.”
- Wildkirchli is near Ebenalp and is a separate excursion, not a normal stop on the Hoher Kasten–Staubern–Saxerlücke route.
- Check weather, trail conditions, and cable-car schedules immediately before your hike, especially if you are planning around sunrise or sunset.
At a Glance
| Time Required | About 5 hours 30 minutes for the official 16.21 km Geological Trail, plus extra time for photography. Shorter cable-assisted approaches are possible. |
| Difficulty | Moderate mountain hiking on the official route, with partly exposed ridge sections. |
| Tools Needed | Supportive hiking shoes, weather layers, water, food, phone or map, charged battery, camera, and optional lightweight tripod. |
| Cost | Variable. Cable-assisted approaches require paid tickets, and fares can change. Check the official Hoher Kasten or Staubern cableway pages before travelling. |
Choose Your Saxer Luecke Route Before You Shoot
Saxerlücke can be approached from different directions, which is why a single distance or hiking time can be misleading. One of the best documented options is the official Geological Trail from Appenzellerland Tourismus. It follows Hoher Kasten, Staubern, Saxerlücke, Bollenwees, Sämtisersee, Plattenbödeli, Pfannenstiel, and Brülisau.
The official route is listed as 16.21 km with 652 m of ascent, 1,521 m of descent, and about 5 hours 30 minutes of walking. Photographers should budget more time because even a few ten-minute stops can add substantially to a full mountain day.
If you want to reduce the amount of hiking before reaching the ridge, Staubern is another cable-assisted access point. The Staubern cableway rises from Frümsen to the ridge and puts you farther along the same mountain system crossed by the Geological Trail. Your exact walking distance will depend on whether you turn around, continue to Bollenwees, or descend by another route.
Warning: The official Hoher Kasten panorama route is described as partly exposed. Do not step toward cliff edges, unstable slopes, or unmarked viewpoints for a photograph. Put the camera away whenever you need both hands or your full attention for safe footing.
The Most Scenic Views
The strongest photographs usually come from a series of distinct locations rather than one single viewpoint. Starting high on Hoher Kasten gives you a broad panorama before the trail follows the ridge toward Staubern. The official Geological Panorama Trail highlights views over the Rhine Valley, Alpstein, Appenzellerland, the Kreuzberge rock formations, Fälensee, and Sämtisersee.
Hoher Kasten describes the panorama route as offering views of more than 300 peaks, which helps explain why the ridge can look completely different as weather, haze, and light change.
Hoher Kasten and the Ridge Toward Staubern
The high starting point is useful for wide landscape photographs. Look for curves in the trail, successive mountain layers, and contrasts between the grassy ridge and pale limestone. A wide-angle lens can emphasize the foreground, while a short telephoto can compress distant ridges into stronger layers.
Staubern
Staubern provides another high panoramic position and is especially practical for photographers using the cableway from Frümsen. Instead of treating it only as a transport stop, spend a few minutes looking for compositions that use the ridge as a leading line toward the deeper Alpstein landscape.
Saxerlücke and the Kreuzberge
This is the signature section. The steep rock architecture around the Kreuzberge creates much stronger photographs when you include scale. A hiker placed safely on the marked route, for example, can show the size of the walls without requiring anyone to stand near an edge.
Fälensee and Bollenwees
After Saxerlücke, the route toward Bollenwees brings you to Fälensee. The long mountain lake is a useful place to slow down after the ridge and work with reflections, shoreline shapes, changing clouds, and the surrounding rock walls. The nearby mountain inn also gives hikers an established stopping point on longer routes.
Sämtisersee
Sämtisersee appears later on the official descent toward Brülisau. If conditions are calm, the water can introduce a quieter visual style after the sharper ridges around Saxerlücke.
Pro Tip: Do not shoot every panorama with the widest lens you own. A moderate or telephoto focal length can isolate individual limestone towers, hikers, mountain inns, or bands of light and often produces a stronger photograph than another ultra-wide view.
Capturing the Flora and Fauna
Seasonal alpine plants can add useful foreground detail to landscape photographs. Rather than leaving the trail to reach a flower, use a longer focal length, crouch only where the trail is wide and safe, or frame plants that are already beside the marked path.
Wildlife should be treated as an unexpected bonus rather than a guaranteed subject. Marmots, chamois, and ibex are familiar Swiss mountain animals, but that does not mean you will see them on a particular Saxerlücke hike. If an animal appears, give it space and use a telephoto lens instead of moving closer.
The Swiss Alpine Club’s responsible-hiking guidance recommends staying on existing paths, respecting restrictions, leaving flowers where they grow, and carrying rubbish out of the mountains.
Hidden Gems Along the Trail
The best lesser-noticed subjects are not secret off-trail locations. They are details that many hikers pass without photographing: changing rock shapes, mountain inns, reflections, narrow trail curves, and transitions between the broad panorama and the enclosed lake landscape.
| Route Spot | Why It Stands Out | Photo Idea |
|---|---|---|
| Staubern ridge | High panoramic position on the route toward Saxerlücke | Use the trail as a leading line through layered mountains. |
| Saxerlücke and Kreuzberge | Dramatic limestone walls and the route’s signature mountain geometry | Include a safely positioned hiker for scale. |
| Fälensee and Bollenwees | Lake, mountain walls, shoreline, and established mountain inn | Look for reflections, compressed mountain layers, and environmental details around the lake. |
Mountain inns can also make good storytelling subjects. Instead of photographing only the building, show its relationship to the surrounding landscape. A hut, trail sign, or seated hiker can make the scale and human use of the mountains easier to understand.
Tips for Getting the Perfect Shot
Strong Saxer Luecke photographs depend more on positioning and patience than expensive equipment. Start by looking for leading lines. Trails, ridge edges viewed from a safe distance, lake shores, and bands of rock can guide the viewer through the frame.
Change your height before changing your location. A slightly lower viewpoint can bring grass or flowers into the foreground, while a higher position on the marked trail may separate overlapping mountain layers. There is rarely a reason to leave the route simply to change perspective.
Use foreground elements selectively. A rock, plant, trail sign, or person can give the photograph depth, but too many elements can distract from the sharp limestone shapes that make Saxerlücke distinctive.
For people in the frame, ask them to remain on a stable part of the marked route. The photograph should communicate the scale of the landscape without creating or encouraging unnecessary risk.
Best Time of Day to Photograph
Early and late light can create long shadows and stronger texture on the limestone, but mountain photography at Saxerlücke should be planned around access and safety rather than light alone. Cable-car operating times vary by season, so a sunrise or late-evening idea may not fit the day’s transport schedule.
Before committing to a photography time, check the current Hoher Kasten cableway timetable or the Staubern operating information, depending on your route.
Midday light is harder, but it is not automatically useless. Clouds can create moving patches of light across the ridge, and a telephoto lens can isolate individual illuminated sections. Overcast weather can also work well for plants, people, mountain-inn details, and close views because contrast is softer.
Fog can simplify the landscape beautifully, but it also reduces navigation visibility. If cloud closes in, treat route-finding and safe movement as the priority. A dramatic image is never worth continuing into conditions that exceed your experience.
Note: Wildkirchli is not a standard stop on the Saxerlücke panorama route. Appenzellerland Tourism places the caves about a 20-minute walk from Ebenalp. Visit Wildkirchli as a separate Ebenalp excursion if you want to photograph it.
Gear and Equipment Recommendations
A lightweight setup is usually better than carrying a large photography bag all day. Mountain terrain makes every extra kilogram more noticeable, and bulky equipment can interfere with balance on narrow sections.
Camera and Lenses
A wide-angle lens is useful for ridge panoramas, especially when you want trail or meadow foregrounds. A standard zoom is often the most flexible single-lens choice. A telephoto lens is valuable for isolating limestone formations, distant hikers, mountain layers, and wildlife without approaching it.
Tripod
A tripod can help in low light, but choose a compact model and set it up only where the trail is wide enough that you will not obstruct other hikers. Do not extend tripod legs toward an exposed edge or across a narrow path.
Filters
A polarizing filter may help reduce glare on water or vegetation, although its effect across a very wide sky can become uneven. Neutral-density filters can be useful for longer exposures, but they are optional rather than essential for this hike.
Mountain Essentials
Photography equipment should come after hiking essentials. Bring supportive footwear, sufficient water, food, weather layers, sun protection, a charged phone, and a reliable navigation source. Protect the camera from rain rather than assuming clear conditions will continue all day.
Safety and Current Trail Conditions
The most important preparation step is checking conditions shortly before departure. Hoher Kasten maintains an official trail-conditions and hiking-safety page. Mountain conditions can change with snow, rain, wind, visibility, and seasonal installation of safety infrastructure.
Official guidance for the area recommends following marked trails, carrying enough drinking water, taking breaks, turning around or seeking shelter in bad weather, and recognising your own limits. These points matter even more when photography slows your pace.
- Keep your camera packed while crossing any section that requires your full concentration.
- Do not walk while looking through the viewfinder or at the rear screen.
- Stop only where other hikers can pass safely.
- Avoid shortcuts, even when they appear to lead to a better viewpoint.
- Give grazing livestock plenty of space and follow local signs.
- If rain, fog, snow, or wind makes the route uncomfortable, turn around rather than waiting for the photograph you planned.
Preserving the Environment while Photographing
The landscape is the reason this route is worth photographing, so protecting it is part of the job. Stay on existing paths, respect protected areas and local restrictions, leave plants untouched, and carry out everything you carry in.
Wildlife photography should never require chasing, feeding, surrounding, or blocking an animal. A longer lens lets you make a stronger image while maintaining distance.
Be equally considerate around mountain inns, livestock, gates, and other hikers. Close gates after passing through them and avoid placing bags or tripods where they block the trail.
For route planning beyond this photography guide, consult the official Hoher Kasten Geological Panorama Trail information before departure. It gives the route context that generic photography advice cannot provide.
Frequently Asked Questions
What is the Saxer Luecke hike?
Saxerlücke is a mountain pass and viewpoint in the Alpstein region of eastern Switzerland. Several hiking approaches reach it. One well-documented option is the Geological Trail from Hoher Kasten through Staubern and Saxerlücke to Bollenwees and Brülisau.
Where is the Saxer Luecke hike located?
Saxerlücke is in the Alpstein mountain region of eastern Switzerland. Common access points for hikes in this area include Brülisau on the Appenzell side and Frümsen for the Staubern cableway.
What are the best photo spots on the Saxer Luecke hike?
Strong verified photo locations include the ridge between Hoher Kasten and Staubern, Staubern itself, the Saxerlücke and Kreuzberge section, Fälensee near Bollenwees, and Sämtisersee on the descent toward Brülisau.
How long is the Saxer Luecke hike?
There is no single distance because several routes reach Saxerlücke. Appenzellerland Tourismus lists the full Hoher Kasten Geological Trail to Brülisau at 16.21 km with an estimated walking time of 5 hours 30 minutes. Photography stops can make your day significantly longer.
Is the Saxer Luecke hike suitable for beginners?
The official Geological Trail is rated moderate, but it is still a mountain hike and includes partly exposed ridge terrain. Beginners should be comfortable with mountain trails, use appropriate footwear, check conditions, and choose a shorter approach if the full route exceeds their experience or fitness.
What should I bring on the Saxer Luecke hike?
Bring supportive hiking shoes, sufficient water and food, weather layers, sun protection, a charged phone or navigation device, and any necessary personal supplies. For photography, add a camera, spare battery, lens cloth, weather protection, and an optional lightweight tripod.
Can I reach Saxer Luecke from Staubern?
Yes. Staubern lies on the ridge route toward Saxerlücke and can be reached by cableway from Frümsen. It is a useful cable-assisted option if you do not want to begin the longer route from Hoher Kasten. Check the current Staubern cableway operating schedule before travelling.
Is Wildkirchli on the Saxer Luecke hike?
Not on the standard Hoher Kasten–Staubern–Saxerlücke route. Wildkirchli is associated with Ebenalp, where Appenzellerland Tourism describes the caves as about a 20-minute walk from the cableway. Treat it as a separate excursion.
When is the best time to photograph Saxer Luecke?
Early and late light can emphasize the limestone and ridge shapes, while overcast conditions can be excellent for softer detail. Your safest photography window depends on weather, visibility, trail conditions, and the day’s cable-car schedule, so check all four before planning around a particular light period.
Sources
- Appenzellerland Tourismus: The Geological Trail — official route, waypoints, distance, elevation change, difficulty, and estimated hiking time.
- Hoher Kasten: Geological Panorama Trail — Saxerlücke ridge description, exposure, Kreuzberge, Fälensee, Sämtisersee, and panorama information.
- Hoher Kasten: Trail Conditions — mountain-hiking conditions, preparation, weather, water, trail, and livestock safety guidance.
- Hoher Kasten Cableway — current seasonal timetable and fare information for the Hoher Kasten approach.
- Staubern Cableway — operating information and fares for cable-assisted access from Frümsen.
- Swiss Alpine Club: Hike Responsibly — responsible trail use, wildlife, plants, and environmental protection.