Snowshoeing is one of the simplest ways to explore Switzerland’s snowy landscapes without learning to ski. Snowshoes spread your weight across a larger surface so you sink less deeply into soft snow, while modern bindings and traction help you move over winter terrain. The activity is approachable for many beginners, but your first route should match your fitness, experience, weather, snow conditions, and local safety advice.
Quick Answer
For your first snowshoeing trip in Switzerland, choose a short, easy, marked route, rent properly sized snowshoes, use poles with snow baskets, wear waterproof boots and layers, and check the weather, trail status, and avalanche information before leaving. Avoid avalanche-prone open terrain unless you have the right training, equipment, and experience.
Key Takeaways
- Start with an easy, clearly marked route that matches your fitness and the day’s snow conditions.
- Choose snowshoes for your total loaded weight, terrain, and snow rather than relying only on shoe length or width.
- Wear waterproof boots, breathable layers, gloves, a hat, and eye and sun protection.
- Check current weather, route status, and the Swiss avalanche bulletin before every winter outing.
- Marked routes are a good starting point for beginners, but they are not necessarily groomed and may close when conditions are unsafe.
At a Glance
| Time Required | About 1 to 3 hours is a sensible target for many first outings, depending on fitness, ascent, snow depth, and breaks. |
| Difficulty | Beginner-friendly when you choose an easy marked route with modest distance and ascent. |
| Tools Needed | Snowshoes, waterproof winter or hiking boots, adjustable poles with snow baskets, suitable clothing, navigation, phone, water, food, and basic emergency gear. |
| Cost | Varies by resort, equipment rental, transport, mountain lifts, and whether you join a guided tour. Check current local prices before travelling. |
Snowshoes have a long history in snowy regions and were developed in different forms by communities that needed to travel efficiently over deep snow. Modern recreational snowshoes use lightweight frames or molded decks, secure bindings, and traction beneath the foot. Their basic purpose remains the same: provide more flotation than an ordinary boot.
Snowshoes come in different sizes and designs because deep powder, packed snow, rolling terrain, and steeper slopes place different demands on flotation and traction.
Choosing the Right Snowshoeing Gear
The snowshoes themselves are the main piece of equipment, but there is no single size or style that works best for everyone. When choosing a pair, consider your body weight plus your winter clothing and loaded backpack, the snow conditions, the type of terrain, the binding system, and the amount of traction underneath.
When choosing snowshoes, consider total loaded weight, terrain, snow conditions, traction, fit, and intended use rather than assuming one model is automatically best for every beginner.
If this is your first outing, renting is often easier than buying. A rental shop can help match the snowshoe to your weight, boots, route, and current snow. This also lets you learn which binding style and shape you prefer before spending more on your own equipment.
Beginner Snowshoeing Gear Checklist
- Snowshoes: Sized for your loaded weight and suitable for the terrain.
- Adjustable trekking or ski poles: Use wide snow baskets so the poles do not sink deeply into soft snow.
- Waterproof boots: Ankle-high hiking or winter boots with a stable sole work well with most recreational bindings.
- Gaiters: Useful for keeping loose snow out of your boots and trouser legs.
- Backpack: Carry food, water or a warm drink, spare clothing, navigation, and emergency items.
- Phone and navigation: Carry a charged phone plus an offline map, paper map, GPS, or another reliable navigation method appropriate for the route.
- First-aid kit: Bring basic supplies for minor injuries.
- Headlamp: Winter daylight is short, and delays can happen.
- Sunglasses or goggles and sunscreen: Snow reflects strong sunlight even when the air feels cold.
Pro Tip: Rent your first pair of snowshoes and tell the rental staff where you plan to go. They can help you choose a suitable size and show you how to tighten, release, and check the bindings before you reach the trail.
Finding a Beginner-Friendly Snowshoe Trail in Switzerland
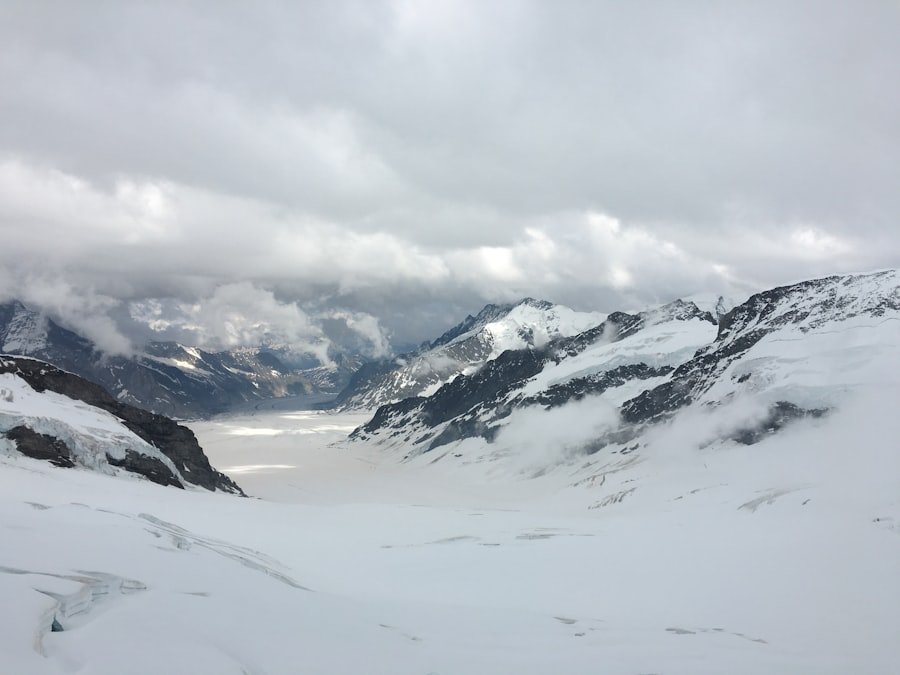
The right trail can make your first snowshoe outing enjoyable instead of exhausting. Switzerland has many marked snowshoe routes, and official route listings provide information such as distance, ascent, duration, difficulty, and local access.
Do not assume that a marked snowshoe route is the same as a groomed winter walking path. Snowshoe routes may be signposted while the snow surface remains natural. Fresh snow, wind, ice, poor visibility, or closures can make an otherwise easy route more demanding.
For a first trip, look for a route with an easy physical rating, modest elevation gain, clear signage, straightforward transport access, and a duration well within your normal fitness level. Check the official route page and local tourism or mountain-railway information again on the day of your trip.
Three Easy Swiss Snowshoe Routes to Research
| Route | Distance | Approx. Time | Ascent | Published Level |
|---|---|---|---|---|
| Plattis Snowshoe Trail, Flumserberg | 3 km | 1 h 20 min | 130 m | Easy; described as suitable for beginners |
| Andermatt Trail | 3 km | 1 h 35 min | 190 m | Easy |
| Sparenmoos Trail | 3 km | 1 h 30 min | 150 m | Easy |
Note: Distances and published difficulty ratings help with planning, but snow depth, wind, ice, visibility, temperature, and trail closures can change the real difficulty. Always check the current route status before departure.
Areas such as Zermatt, Engelberg, Andermatt, the Jungfrau region, Graubünden, and the Bernese Oberland all have winter walking or snowshoe options, but choose by the individual route rather than assuming an entire destination is suitable for beginners. SwitzerlandMobility and Switzerland Tourism are useful starting points for route research.
Safety Tips for Snowshoeing
| Safety Tips for Snowshoeing |
|---|
| 1. Check the weather forecast and official hazard information before leaving. |
| 2. Dress in adjustable layers and avoid becoming soaked with sweat. |
| 3. Carry enough water or a warm drink plus high-energy food. |
| 4. Carry reliable navigation and know how to use it. |
| 5. Tell someone your planned route and expected return time. |
| 6. Check the avalanche bulletin and avoid avalanche-prone terrain unless you have the proper training and equipment. |
| 7. Use poles for stability, particularly on uneven or sloping terrain. |
| 8. Learn to recognize cold-related problems such as hypothermia and frostbite. |
| 9. Stay hydrated, eat regularly, and turn around before fatigue affects your judgment. |
| 10. Respect wildlife, protected areas, closures, and official route instructions. |
Safety starts before you put on the snowshoes. Check the day’s forecast, current route status, and local warnings. In Switzerland, the WSL Institute for Snow and Avalanche Research SLF publishes avalanche and snow information used by winter recreationists, including snowshoe hikers.
Warning: Beginners should not treat snowshoes as permission to enter any snow-covered slope. If your route enters avalanche-prone terrain, avalanche assessment skills are essential. The Swiss Alpine Club identifies an avalanche transceiver, shovel, and probe as standard emergency equipment for avalanche-prone outings, but carrying them does not replace training in prevention, route choice, and rescue.
Marked routes are usually a better choice for a first outing. The Swiss Alpine Club notes that many winter resorts maintain marked snowshoe paths and can close them when a known risk makes the route unsuitable. However, you still need to check local conditions and stay alert.
Navigation is equally important. Even a clearly marked route can become difficult to follow in snowfall, fog, or wind. Carry a map, GPS, or another suitable navigation tool rather than depending on tracks left by earlier hikers. Tracks can lead somewhere you do not intend to go.
Tell someone your route and expected return time, and travel with another person when possible. In a Swiss mountain emergency, the Swiss Alpine Club lists REGA 1414 and the European emergency number 112.
Techniques for Snowshoeing
Walking on snowshoes is straightforward, but a few basic techniques make the first outing easier and more efficient.
Walking on Flat Ground
Use a natural stride but keep your feet slightly farther apart than you would in ordinary boots so the snowshoe frames do not hit each other. You normally do not need to lift each foot excessively high. A smooth forward stride usually saves more energy than repeatedly stomping through the snow.
Turning Around
Snowshoes make walking backward awkward. On roomy, flat terrain, turn in a series of small steps. If the space is tight, a wider step-turn can help, but practice it somewhere safe and level first.
Going Uphill
On a gentle climb, shorten your stride and plant your poles securely. Use the traction beneath the front of the snowshoe. Some models have heel lifts that reduce calf strain on sustained climbs. Steeper terrain requires better route judgment and should not be your first objective simply because you are wearing snowshoes.
Going Downhill
Keep your knees relaxed, maintain a controlled pace, and use your poles for balance. In soft snow, a slightly wider stance can improve stability. Avoid leaning so far backward that you lose control of your feet.
Crossing a Slope
A sideways slope can be more tiring than flat terrain. Keep each snowshoe as flat and secure as conditions allow and avoid forcing an unstable traverse. If the route feels beyond your comfort or skill level, turn back rather than trying to improvise across steeper terrain.
Pro Tip: Spend five or ten minutes near the trailhead practicing your bindings, turns, pole placement, uphill steps, and downhill control before committing to the full route.
What to Wear for Snowshoeing
Snowshoeing can generate much more body heat than standing around a ski resort, so the goal is to stay warm without becoming soaked with sweat. Layering makes it easier to adjust as your effort level and the weather change.
Base Layer
Wear a moisture-managing layer next to your skin. Wool or suitable synthetic fabrics can help move moisture away from the body. Avoid relying on a single heavy layer that becomes uncomfortable as soon as you warm up.
Insulating Layer
Add fleece, wool, or another insulating mid-layer. You should be able to remove or vent it when climbing and put it back on during longer breaks.
Weather-Protection Layer
Your outer layer should protect you from wind and falling or blowing snow. A breathable waterproof or highly weather-resistant shell is useful when conditions are wet or windy.
Boots, Hands, Head, and Eyes
Wear waterproof ankle-high boots that fit securely in your bindings. Gaiters can help stop snow entering from above. Bring gloves or mittens, a warm hat or headband, and a neck gaiter when conditions justify it. Sunglasses or goggles and sunscreen are also important because snow can reflect intense sunlight.
Carry a dry spare layer if the outing is long enough that becoming damp could leave you cold during a break or delay.
Exploring Swiss Culture and Cuisine on Snowshoes
Snowshoeing in Switzerland can be more than a workout. Many winter routes begin near mountain villages, alpine restaurants, cable-car stations, or other places where you can experience local architecture, food, and winter traditions before or after your walk.
Depending on the destination, a post-hike meal might include familiar Swiss dishes such as fondue or raclette. Do not make a restaurant stop part of your safety plan unless you have confirmed its winter opening hours. Mountain restaurants and lifts can operate seasonally or close because of weather.
Winter events also vary by region and date. If a festival, market, guided cultural walk, or special restaurant experience matters to your trip, confirm it with the destination’s official tourism office rather than assuming it runs throughout the snowshoe season.
Respect for the landscape is part of the experience as well. Stay on official routes where requested, obey wildlife-protection zones and closures, keep noise low around wildlife, and take your rubbish back with you.
Planning Your Snowshoeing Adventure in Switzerland
A successful first snowshoe trip depends less on choosing the most famous resort and more on selecting the right route for the day’s conditions. Zermatt, Engelberg, Andermatt, the Jungfrau region, and other winter destinations offer attractive possibilities, but check individual route information rather than assuming every trail is beginner-friendly.
1. Choose an Easy Route
Start with a short route rated easy, with modest ascent and clear access. Look at distance, elevation gain, expected duration, and whether local information identifies the route as suitable for beginners.
2. Check the Route Status
Route descriptions are not a promise that a trail is currently open. Snow depth, ice, avalanche conditions, storms, maintenance, wildlife closures, and lift operations can all affect access. Check the destination or route operator shortly before departure.
3. Check Weather and Avalanche Information
Review the local forecast and MeteoSwiss hazard information. If avalanche exposure is possible, consult the SLF avalanche bulletin and make sure the route is appropriate for your knowledge and equipment.
4. Arrange Equipment
Reserve rental equipment if needed, particularly on busy weekends or holidays. Confirm that the rental includes snowshoes and whether poles are separate. Bring your boots unless the rental location specifically provides compatible footwear.
5. Plan Transportation
Switzerland’s rail, bus, and mountain-transport connections make many winter destinations reachable without a car. Use the SBB timetable to check the complete journey, including the final connection and the time of the last practical return service.
6. Consider a Guided First Trip
If you are unsure about bindings, technique, winter navigation, avalanche awareness, or route selection, a guided outing can be a sensible introduction. A guide can teach basic movement and help you understand why one route is appropriate while another is not.
7. Leave Enough Daylight
Start early enough that small delays do not turn into a night-time problem. Deep fresh snow can make travel much slower than the published route time, especially when your group has to break trail.
Note: Published route times are planning estimates, not deadlines. New snow, breaks, navigation stops, photos, and changing conditions can all increase your actual time.
After your outing, a warm meal or simple snack can be part of the experience. If you want a homemade option, the site’s existing homemade cottage cheese recipe is one possible post-hike food idea.
Frequently Asked Questions
What is snowshoeing?
Snowshoeing is walking or hiking over snow while wearing footwear that spreads your weight across a larger surface. This reduces how deeply you sink compared with ordinary boots and helps you move across soft winter snow.
Is snowshoeing in Switzerland suitable for beginners?
Yes. Switzerland has many easy marked snowshoe routes that can suit first-time participants. Choose a route that matches your fitness, check its current status and weather, and avoid unfamiliar avalanche-prone terrain unless you have appropriate knowledge or a qualified guide.
What are the benefits of snowshoeing for beginners?
Snowshoeing provides an endurance workout while allowing you to explore winter landscapes at walking pace. It also develops familiarity with moving on uneven snow, using poles, managing winter clothing, and planning outdoor routes in cold conditions.
What equipment do beginners need for snowshoeing in Switzerland?
For a simple marked route, bring properly sized snowshoes, adjustable poles with snow baskets, waterproof boots, suitable layered clothing, gloves, a hat, sunglasses or goggles, sunscreen, water, food, navigation, a charged phone, first-aid supplies, and a headlamp. Avalanche-prone terrain requires additional safety equipment and the knowledge to use it.
Are guided snowshoeing tours available for beginners in Switzerland?
Yes. Beginner-oriented guided outings are available in a number of Swiss winter destinations. They can be especially useful if you want help with snowshoe fit, walking technique, navigation, winter safety, or choosing suitable terrain.
Are marked snowshoe trails in Switzerland groomed?
Not necessarily. A snowshoe trail may be marked or signposted while still having a natural, unprepared snow surface. Conditions can therefore change significantly after snowfall, wind, thawing, or icing. Check the individual route description and local status.
Do beginners need avalanche equipment for snowshoeing?
It depends on the terrain. A beginner staying on an appropriate open marked route may not need the same equipment as someone travelling through avalanche terrain. If you enter avalanche-prone terrain, a transceiver, shovel, and probe are standard emergency equipment, and you also need the training to assess terrain and use the equipment correctly.
What are some easy snowshoe trails for beginners in Switzerland?
Current official listings describe the Plattis Snowshoe Trail at Flumserberg, the Andermatt Trail, and the Sparenmoos Trail above Zweisimmen as easy routes. All are about 3 km long. Always confirm current snow, weather, access, and closure information before travelling.
Sources
- Swiss Alpine Club: Safety When Snowshoeing — planning, equipment, avalanche awareness, navigation, marked routes, group safety, and emergency information.
- WSL Institute for Snow and Avalanche Research SLF — current Swiss avalanche bulletin and snow situation.
- SwitzerlandMobility: Snowshoe Trekking — official route research, difficulty information, maps, and route details.
- Switzerland Tourism: Snowshoe and Winter Hiking — Swiss snowshoe destinations and route information.
- MeteoSwiss: Weather Hazards — official Swiss weather and natural-hazard information.
- SBB — public-transport timetables and journey planning for Swiss rail and bus connections.