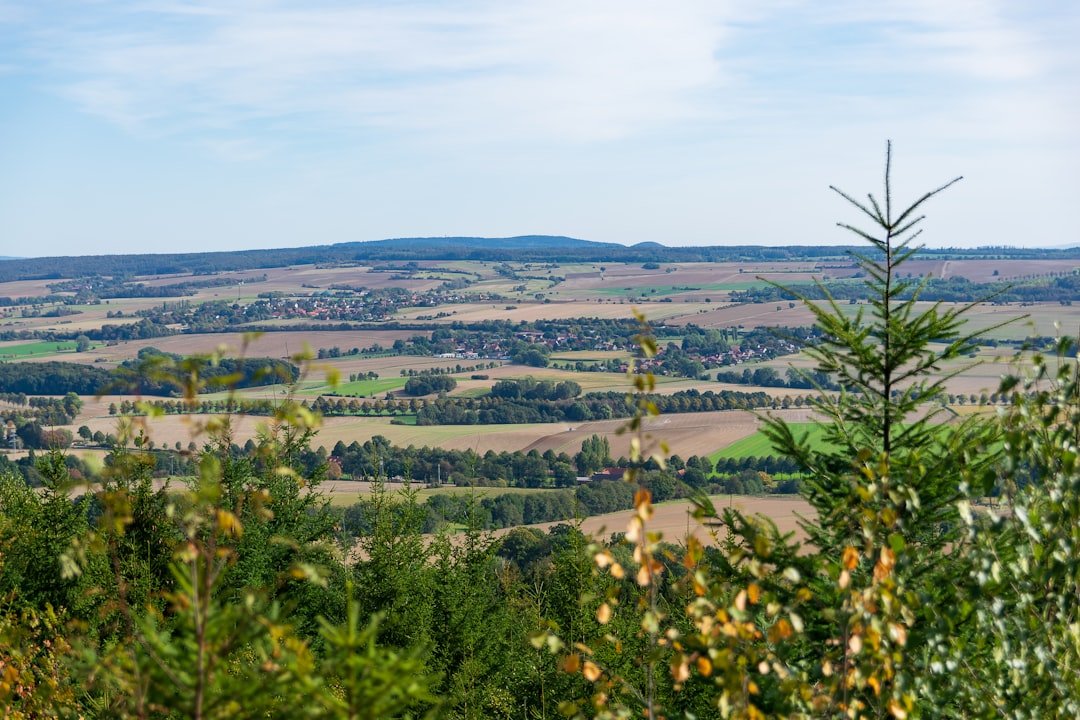
At 1,963 metres above sea level, Niederhorn rises above Beatenberg on the northern side of Lake Thun and gives photographers a wide view across the lake and the Bernese Alps. On a clear day, you can photograph prominent peaks including the Eiger, Mönch and Jungfrau, while changing clouds, alpine meadows, wildlife and seasonal snow give the same viewpoint a different character from one visit to the next. Switzerland Tourism’s Niederhorn information confirms the mountain’s panoramic setting and major viewpoints.
Quick Answer
For strong Niederhorn photos, plan your visit around the light and cable-car timetable, bring a wide-angle lens or phone for Lake Thun panoramas, consider a telephoto lens for distant peaks and wildlife, stabilize low-light shots, and check the weather before going. Stay on marked paths and check Swiss rules before flying a drone.
Key Takeaways
- Niederhorn gives you panoramic views of Lake Thun and the Bernese Alps, with strong subjects for wide landscapes, telephoto mountain images and panoramas.
- A phone or compact camera can work well. A wide-angle lens, optional telephoto lens, tripod, spare battery and polarizing filter give you more creative control.
- Sunrise and sunset may provide attractive light, but transport is the limiting factor. Always compare your planned shooting time with the current Niederhornbahn timetable.
- For 2026, Niederhornbahn lists special Friday and Saturday evening rides from July 3 through October 10, which can make sunset photography easier on those dates.
- Use foreground elements, leading lines, layers and careful horizon placement to give the large mountain landscape more depth.
- Ibex, chamois and marmots occur in the area, but sightings are never guaranteed. Photograph wildlife from a respectful distance and never approach an animal for a closer frame.
- Edit with restraint. Correct exposure and white balance first, then add contrast, color and sharpness only where they improve the photograph.
- Stay on marked routes, watch changing mountain weather and check Swiss aviation restrictions before using a drone.
At a Glance
| Time Required | About 2 to 4 hours around the summit for a relaxed photography visit; longer if you hike or join a wildlife outing. |
| Difficulty | Easy around the mountain station and established viewpoints; moderate or harder if you add longer alpine hikes. |
| Tools Needed | Camera or smartphone, spare battery, cleaning cloth and suitable outdoor clothing. Wide-angle lens, telephoto lens, tripod and polarizing filter are optional. |
| Cost | Your photography gear plus transportation. Ticket prices and discounts vary, so check current Niederhornbahn prices before visiting. |
Plan Your Niederhorn Photography Visit
Good Niederhorn photography starts before you reach the summit. Light, visibility, wind, cloud cover and transportation can matter as much as the camera you carry.
How to Reach Niederhorn
From Beatenberg, the cable car takes visitors toward Niederhorn. Travelers coming through Beatenbucht use the funicular to Beatenberg before continuing upward. Niederhornbahn’s official getting-there guide also lists public-transport connections from Thun and Interlaken.
- From Interlaken West: PostAuto line 101 can take you to Beatenberg Station, where you transfer to the cable car.
- From Thun: One option is STI bus line 21 to Beatenbucht, followed by the funicular and cable car.
- By boat: Lake Thun boats can also reach Beatenbucht, depending on the current boat timetable.
Niederhornbahn states that the journey from Beatenbucht to the Niederhorn mountain station is barrier-free, with an exception at the Vorsass middle station. Travelers who need step-free access should still confirm current conditions before departure.
Note: Do not plan a sunrise or sunset session from the light alone. First check the current Niederhornbahn timetable so you know when you can reach the summit and when you must come down.
Check Weather and Visibility
A perfectly timed trip can still produce limited views if the summit sits inside cloud. Before leaving, compare a reliable forecast with the Niederhorn webcam and current operating information. MeteoSwiss is Switzerland’s federal weather service and is useful for checking forecasts and warnings.
Cloudy conditions are not automatically bad for photography. Broken clouds may create shafts of light over Lake Thun, fog can separate mountain layers, and an overcast sky can produce soft light for flowers and close-up subjects. The important question is whether conditions are safe and whether the view suits the photographs you want to make.
Warning: Mountain weather, wind and trail conditions can change. Do not stay on an exposed ridge or leave a safe route simply because the light looks promising. In winter or when snow remains on trails, use footwear and equipment appropriate for the conditions.
Selecting the Right Gear for Niederhorn Photography
You do not need a professional camera to photograph Niederhorn. A recent smartphone or compact camera can produce excellent travel images in good light. A DSLR or mirrorless camera becomes useful when you want interchangeable lenses, RAW files, stronger low-light control or faster wildlife performance.
A wide-angle lens is useful for including Lake Thun, foreground meadows and a large section of the mountain panorama in one frame. On a full-frame camera, something around 16 to 35 mm is a flexible landscape range, but it is not a requirement. Avoid going so wide that the distant Alps become tiny and visually weak.
A telephoto lens can be just as valuable. It lets you isolate individual peaks, photograph distant details and create compressed layers of mountains. It is also the safer choice for wildlife because you can fill more of the frame without walking toward an animal.
A tripod is helpful for slower shutter speeds, bracketed exposures, panoramas and low-light scenes. On windy days, keep the tripod low, avoid extending the thinnest leg sections unless necessary, and make sure the camera strap is not flapping hard enough to shake the setup.
A circular polarizing filter can reduce some reflections from foliage and water and can deepen color under suitable lighting. However, rotate it while looking through the viewfinder or screen rather than automatically using maximum polarization. With an ultra-wide lens, a polarizer can sometimes make a blue sky look uneven. Nikon explains the reflection and saturation effects in its polarizing-filter photography guide.
Pack spare batteries and enough storage. Cold conditions can shorten practical battery life, so keep a spare battery protected inside your clothing or bag when temperatures are low. A microfiber cloth, lens hood and simple rain cover or waterproof bag are also useful. Weather-resistant camera bodies and lenses should still be used within the manufacturer’s stated limits.
Pro Tip: If you want to travel light, take one wide-to-normal zoom plus a small telephoto rather than carrying several overlapping lenses. The best kit is one you can safely carry while still enjoying the mountain.
Timing and Lighting for the Best Niederhorn Shots
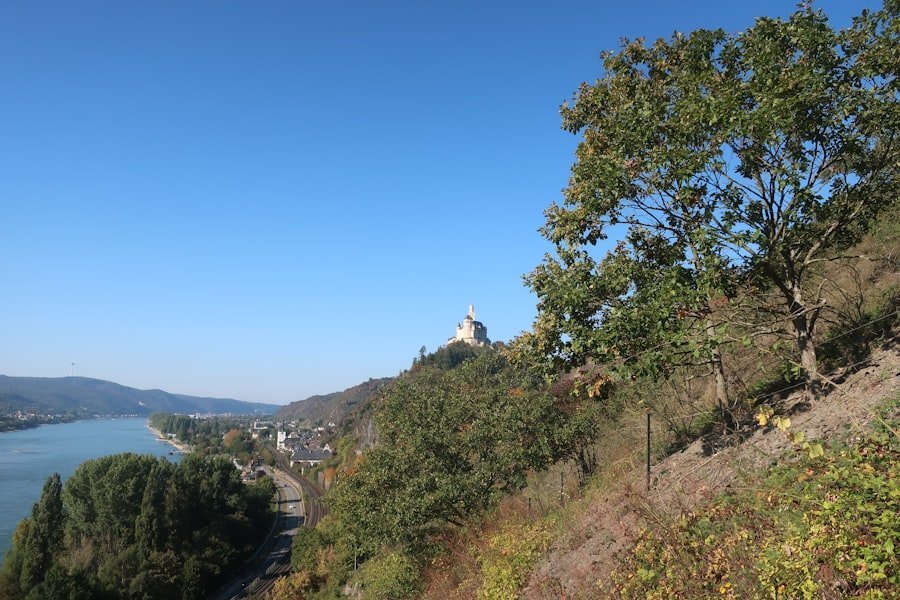
Light can dramatically change the appearance of Niederhorn. Early and late in the day, a lower sun angle can create longer shadows across slopes and reveal more texture than flat midday light. Sunrise and sunset can also produce warm color when the weather cooperates.
The challenge is access. Do not assume the cable car operates at every sunrise or remains open through every sunset.
For 2026, Niederhornbahn lists special evening rides every Friday and Saturday from July 3 through October 10, creating a practical opportunity to photograph late-day and sunset light on those dates.
Check the official evening-rides page before planning around that service because operating dates and schedules can change from year to year.
Sunrise Photography
Regular public transport may not put you on the summit before sunrise. Options can include staying overnight on the mountain or using a scheduled early activity when available.
In 2026, Niederhornbahn lists guided wildlife observation on Thursday mornings from July 9 through October 8. The program starts early and is designed around wildlife rather than a private landscape shoot, but it shows why photographers should look for official early-access opportunities instead of assuming normal cable-car service begins before dawn. See the current wildlife-observation information.
Midday and Overcast Light
Midday is not useless. Strong sunlight can work for graphic mountain shapes, deep-blue water and documentary travel images. If shadows become harsh, look for compositions based on patterns, silhouettes or distant peaks instead of forcing a soft golden-hour style.
Overcast conditions can be excellent for alpine flowers, forest details and close-ups because the light is more even. Moving cloud can also turn a simple panorama into a more dramatic photograph.
Seasonal Changes
Summer brings green slopes and alpine vegetation. Autumn can produce warmer vegetation tones and clearer-feeling layers on suitable days. Winter changes the scene completely, with snow creating strong contrast and simpler compositions. Flower timing varies with elevation, snowmelt and weather, so do not plan a specific bloom solely by calendar month.
Camera Settings for Niederhorn Landscapes and Wildlife
There is no single correct group of settings for Niederhorn, but a few starting points can help you work faster.
| Situation | Useful Starting Point | What to Watch |
|---|---|---|
| Bright landscape | Low ISO, around f/8 to f/11, shutter speed adjusted for correct exposure | Check highlights in bright clouds and snow. |
| Sunset or blue hour | Low ISO where practical, tripod if shutter speeds become slow | Avoid camera shake and clipped highlights. |
| Moving wildlife | Continuous autofocus and a fast enough shutter speed to stop the animal’s movement | Raise ISO when necessary rather than accepting motion blur. |
| High-contrast landscape | Expose carefully for highlights or capture bracketed frames | Clouds may be much brighter than shaded slopes. |
Use your histogram and highlight warning if your camera provides them. Snow, pale clouds and bright reflections from Lake Thun can be easier to judge with exposure tools than from the rear screen alone.
Use Exposure Bracketing When the Scene Exceeds One Exposure
If a bright sky and dark foreground cannot both be recorded cleanly in one frame, consider making several exposures from the same tripod position. These can later be blended manually or merged as HDR. Adobe documents the process in its Lightroom HDR Photo Merge guide.
Bracketing is a tool, not a requirement. If one RAW exposure holds enough highlight and shadow detail, a single frame is simpler and avoids movement problems in grass, clouds or people.
Composition and Framing Techniques for Niederhorn Photography
| Technique | How to Use It at Niederhorn |
|---|---|
| Rule of Thirds | Place a strong horizon, peak or foreground subject near a third rather than automatically centering everything. |
| Leading Lines | Use an established path, ridge, fence or shoreline shape to guide the eye into the mountain scene. |
| Frame within a Frame | Use nearby vegetation, rock formations or architectural openings to surround the distant view. |
| Foreground Interest | Include rocks, flowers or meadow textures to give a wide landscape a near, middle and far layer. |
| Balance and Symmetry | Balance a large mountain mass with Lake Thun, sky or another visual element instead of crowding one side of the frame. |
The rule of thirds is a useful starting point rather than a law. If the sky contains dramatic clouds, place the horizon lower and give the sky more space. If the sky is plain but the terrain is interesting, reduce the amount of sky.
Leading lines are especially useful in large alpine scenes because they help the viewer understand where to look. Marked trails and ridge shapes can lead the eye toward Lake Thun or distant mountains without requiring you to leave established routes.
Foreground elements also add scale. A nearby rock, patch of alpine flowers or section of meadow can make the distant peaks feel farther away and create more depth.
Try Telephoto Landscapes
Do not make every photograph wide. A telephoto lens can isolate layers of ridges, individual summits, small patches of light or settlements far below. These tighter frames often look very different from the classic panoramic viewpoint photograph.
Create a Panorama
If one wide frame makes the mountains look too small, shoot several overlapping images and stitch them later. Keep exposure and white balance consistent across the sequence. If possible, rotate the camera from a stable position and leave generous overlap between frames.
Pro Tip: Before taking the panorama, scan the complete sequence for hikers or moving animals. A subject that appears in several overlapping frames can make stitching more difficult.
Capturing the Wildlife and Flora at Niederhorn
Niederhorn is known not only for its landscape but also for alpine wildlife. Official Niederhorn information describes opportunities to see ibex, chamois, marmots and, at times, mountain birds. Wildlife is free-ranging, so no particular animal or photograph is guaranteed.
A telephoto lens lets you make a tighter image without moving closer. Give the animal room to feed, rest or travel. If an animal changes direction, stops feeding or appears alert because of you, increase your distance.
Patience usually produces more natural photographs than pursuit. Watch where an animal is already moving and wait from a safe location rather than repeatedly following it.
Alpine plants also make useful foreground and close-up subjects. Wider frames can show flowers in their environment, while a macro lens or close-focusing lens can reveal small patterns, textures, moisture and leaf details.
Pro Tip: For close-up flower photographs, move your camera position before touching the plant. A small change in angle can simplify the background without bending, picking or damaging vegetation.
Early Wildlife Photography
Niederhornbahn’s guided wildlife observation program is useful for visitors who want to learn where and how to observe local species responsibly. In 2026, the scheduled program runs on Thursday mornings from July 9 to October 8 and requires advance arrangements according to the operator’s current information.
A local wildlife guide can also help you understand animal behavior and recognize when keeping extra distance is necessary.
Tips for Editing and Enhancing Niederhorn Photos
Post-processing can help your photographs reflect what you saw without turning the scene into something artificial. Start with basic corrections before reaching for dramatic effects.
- Correct exposure: recover bright highlights where possible and open deep shadows only as much as needed.
- Set white balance: decide whether the photograph should retain warm sunrise or sunset color or look more neutral.
- Adjust contrast: use enough contrast to separate mountain layers without crushing shadow detail.
- Refine color: modest saturation or vibrance changes are usually more believable than extreme color.
- Apply local adjustments: brighten or darken selected areas when they help guide the viewer’s eye.
- Sharpen last: judge sharpening at an appropriate zoom level and avoid hard halos around mountain ridges.
White balance can correct an unwanted color cast or preserve the warmth of the original light. Adobe’s photography tools provide temperature and tint adjustments for this purpose.
HDR can help when a single file cannot hold both a bright sky and dark foreground. Combining several exposures can extend usable tonal detail, but aggressive HDR processing can create halos, gray shadows and unnatural colors. Keep the result consistent with the light you actually experienced.
Note: Atmospheric haze is part of a mountain landscape. Removing every trace of haze can make distant peaks look unnaturally close and can destroy the depth created by successive mountain layers.
Navigating the Niederhorn Viewpoint for the Best Vantage Points
The summit area and surrounding marked routes give you several ways to change your composition without damaging vegetation or exposing yourself to unnecessary risk. Start with the main viewpoint, then walk established paths and look back frequently. A scene that seems ordinary in one direction may become much stronger after a short change in angle.
Instead of searching for an unofficial “secret spot,” look for differences in height, foreground and direction along marked routes. A few metres of safe movement can change the relationship between Lake Thun, the ridgeline and distant peaks.
Topographic maps and hiking maps can help you understand nearby ridges and elevation changes before you leave. They are especially useful if you intend to combine photography with a longer hike.
Warning: Do not leave a marked path, cross a barrier or stand near an exposed edge merely to improve a composition. No photograph is worth a fall or damage to fragile alpine habitat.
A Simple First-Visit Shot List
- A wide establishing view that includes Lake Thun and the mountain range.
- A tighter telephoto frame of one or more distant peaks.
- A photograph with a foreground element such as meadow, rock or vegetation.
- A vertical composition for a different sense of scale.
- A panorama if the scene feels too broad for one normal frame.
- A detail photograph of alpine vegetation or textures.
- A wildlife image only if an animal appears naturally and can be photographed without approaching it.
- A changing-weather image using fog, cloud or shafts of light if conditions remain safe.
Respecting the Environment and Wildlife While Photographing at Niederhorn
Responsible photography matters in an alpine environment. Stay on established routes where required and avoid trampling vegetation simply to remove an object from the foreground or reach a different camera angle.
Give wildlife space and do not feed animals. Food can change normal behavior, while approaching an animal for a close photograph may cause stress or force it to move away from feeding or resting areas.
Carry all waste back with you. Small items such as snack wrappers, tissues, tape and damaged lens-cleaning materials are still litter.
Photographers using a tripod should also think about other visitors. Avoid blocking narrow trails or occupying a busy viewing position longer than necessary when others are waiting.
Drone Photography Requires Separate Planning
Ordinary handheld photography and drone photography should not be treated as the same activity. Switzerland’s Federal Office of Civil Aviation requires drone operators to follow the rules for their operating category, respect uninvolved people, maintain visual line of sight where applicable, respect privacy and check geographic flight restrictions before each flight.
Before bringing a drone to Niederhorn, review the current Swiss FOCA drone flight rules and geographical flight restrictions. Local restrictions or protected areas can change what is allowed at a particular location.
The absence of a general ban on ordinary visitor photography should never be interpreted as automatic permission to fly a drone, photograph people without regard for privacy, enter restricted land or ignore signs at a facility or event.
If you’re planning a visit to the Niederhorn viewpoint specifically for photography, coordinate your camera plan with current transport and weather information. Sunset can be especially rewarding when late service is available, and a tripod can improve stability once shutter speeds become slow. For destination-specific planning, the official Niederhorn evening-rides information is much more useful than unrelated general-interest material.
Frequently Asked Questions
What is the Niederhorn viewpoint?
Niederhorn is a mountain above Beatenberg on the northern side of Lake Thun in Switzerland’s Bernese Oberland. At roughly 1,963 metres, it provides broad views across Lake Thun and toward major peaks of the Bernese Alps, including the Eiger, Mönch and Jungfrau on clear days.
What photography gear should I bring to Niederhorn?
A smartphone, compact camera, DSLR or mirrorless camera can all work. For more flexibility, consider a wide-angle lens for broad landscapes, a telephoto lens for distant peaks and wildlife, a spare battery, cleaning cloth and tripod. A polarizing filter can also help control some reflections in suitable light.
What is the best time of day to photograph Niederhorn?
Early and late light can create attractive shadows and warm color, but the best practical time depends on the operating timetable. Check the Niederhornbahn schedule before planning around sunrise or sunset. In 2026, special evening rides are scheduled on Fridays and Saturdays from July 3 through October 10.
Can I reach Niederhorn before sunrise?
Do not assume regular cable-car service begins before sunrise. Depending on the date, photographers may need an overnight stay or an eligible scheduled early activity. Check the current Niederhornbahn timetable and available programs before making plans.
Are there photography restrictions at Niederhorn?
No destination-wide prohibition on ordinary visitor photography was identified in the official visitor information reviewed for this guide. However, you must follow posted signs, event or property rules, wildlife-protection requirements and normal privacy considerations. Drone photography has separate Swiss aviation rules and geographic restrictions.
What wildlife can I photograph around Niederhorn?
The area is known for alpine wildlife including ibex, chamois and marmots, with other mountain species also possible. Sightings are never guaranteed. Use a telephoto lens, keep a respectful distance and never chase or feed an animal for a photograph.
Can I take good Niederhorn photos with a smartphone?
Yes. A smartphone can work very well for panoramas, travel photographs and landscapes in good light. Keep the lens clean, avoid excessive digital zoom, tap to control focus and exposure, and use a stable support or night mode when the light becomes low.
What other subjects near the viewpoint are worth photographing?
Look beyond the main panorama. Alpine meadows, changing cloud, marked hiking routes, mountain layers, local vegetation, wildlife and views toward surrounding settlements can all produce different images. A telephoto lens is particularly useful for finding smaller compositions inside the wider landscape.
Sources
- Switzerland Tourism: Niederhorn — destination location, mountain views and general visitor context.
- Niederhornbahn: Getting There — transport connections and accessibility information.
- Niederhornbahn: Timetable — current operating times for planning photography visits.
- Niederhornbahn: Evening Rides — 2026 late-service dates relevant to sunset photography.
- Niederhornbahn: Observing Wildlife — local wildlife and current guided wildlife-observation information.
- Swiss Federal Office of Civil Aviation: Drone Flight Rules — current requirements for drone operation, safety and privacy.