The Gornergrat to Riffelalp hike is one of the most rewarding photography routes above Zermatt because the scenery changes from a rocky high-alpine ridge to Matterhorn-facing meadows and Swiss stone pine forest. The classic route follows Swiss Topwalk No. 23 in reverse, passing Riffelsee and Riffelberg before ending at Riffelalp. Along the way, you can photograph the Matterhorn, glaciers, mountain lakes, the Gornergrat Railway, alpine vegetation, and, with some luck, local wildlife.
Quick Answer
The best photo stops on the Gornergrat to Riffelalp descent are the Gornergrat viewing platform, the slopes above Rotenboden, Riffelsee for the Matterhorn reflection, the open meadows near Riffelberg, and the railway-and-Matterhorn views above Riffelalp. Follow the marked 6.1 km route and allow extra time for photography.
Key Takeaways
- Zermatt Tourism lists the Riffelalp-Riffelberg-Riffelsee-Gornergrat Swiss Topwalk as 6.1 km; walking it in reverse from Gornergrat takes about two hours before photography stops.
- Riffelsee is the signature Matterhorn reflection location, especially when the water is calm.
- The Gornergrat viewing platform, Riffelberg meadows, railway viewpoints, and Riffelalp forest provide very different compositions on one hike.
- A wide-angle or standard zoom handles most landscapes, while a telephoto lens is useful for compressed mountain views, trains, and wildlife.
- Check the current weather, trail status, and Gornergrat Railway timetable before leaving Zermatt.
- Stay on marked trails, keep away from railway tracks, and give wildlife plenty of space.
At a Glance
| Route | Gornergrat – Riffelsee – Riffelberg – Riffelalp, following Swiss Topwalk No. 23 in reverse |
| Distance | 6.1 km |
| Time Required | About 2 hours of walking downhill; allow roughly 3 to 4 hours if you stop frequently for photography |
| Elevation | About 3,089 m at Gornergrat to about 2,211 m at Riffelalp, with roughly 890 m of overall descent |
| Difficulty | Demanding mountain hiking trail; the downhill direction reduces climbing but still includes rocky high-altitude terrain and a long descent |
| Tools Needed | Sturdy footwear, weather layers, water, food, charged phone, camera; optional hiking poles, tripod, filters, and telephoto lens |
| Cost | The hiking trail itself is free; railway fares vary by ticket type and season |
Warning: Do not judge this route only by the fact that it is mostly downhill. It starts above 3,000 m and includes rocky mountain terrain and substantial descent. Check the official trail status and weather before leaving, wear suitable footwear, and do not step onto railway tracks or leave marked paths to obtain a photograph.
Best Photo Spots Along the Gornergrat to Riffelalp Trail
The strongest way to photograph this route is to treat it as a sequence rather than wait for one perfect viewpoint. The upper section emphasizes rock, glaciers, and huge mountain scale. Around Riffelsee and Riffelberg, the Matterhorn becomes the dominant subject. Near Riffelalp, trees, meadows, railway infrastructure, and wildlife add foreground interest.
1. Gornergrat Viewing Platform
Begin at the viewing platform before starting the descent. At approximately 3,089 m, Gornergrat gives you a broad panorama that includes the Matterhorn, the Monte Rosa massif, glaciers, and numerous peaks above 4,000 m. Gornergrat Bahn specifically recommends the platform as one of its major photography locations.
A wide-angle lens works well when you want to show the scale of the entire mountain panorama. A longer focal length is useful for isolating the Matterhorn, glacier details, or layers of distant peaks. Before walking away, also look for smaller compositions involving the railway, buildings, rocks, or people against the mountains.
For official route information, see Zermatt Tourism’s Swiss Topwalk No. 23.
2. The Rocky Descent Toward Rotenboden
As you leave Gornergrat, the landscape becomes much more open and stony than the lower sections of the hike. This is a useful place for photographs that communicate altitude and scale rather than focusing only on the Matterhorn.
Try placing the path, a hiker, or a rocky ridge in the foreground and letting the mountain range fill the background. A person wearing a bright jacket can provide a strong sense of scale without dominating the frame.
This upper section is also a good place to watch for ibex. If you see one, stay where you are rather than following it across the slope. Use a telephoto lens and allow the animal to move naturally.
3. Riffelsee Matterhorn Reflection
Riffelsee is the signature photography stop on the route. The lake is a short walk from Rotenboden station and is famous for reflecting the Matterhorn when its surface is still. Wind matters as much as light: even excellent golden-hour light may produce no clean reflection if the lake is rippled.
Do not stop at the first position where you see the water. Walk along the marked path and compare different foregrounds. Rocks, grasses, flowers, and the edge of the lake can all change the balance of the composition.
Pro Tip: If the classic Matterhorn reflection is your priority, arrive when winds are forecast to be light. Gornergrat Bahn notes that early morning and evening often produce calmer conditions. There is also a smaller lake beyond Riffelsee that can provide a quieter alternative composition.
For current information about the location, see the official Gornergrat Bahn Riffelsee guide.
4. Riffelberg Meadows
Below Riffelsee, the harsh rocky landscape gradually gives way to alpine meadows. Here you can build more layered photographs by combining flowers, grasses, grazing animals, railway infrastructure, and the Matterhorn.
Lowering the camera close to the ground can make foreground flowers or grasses appear more prominent. A standard zoom is particularly useful because you can quickly change from wide landscapes to tighter details without repeatedly changing lenses on an exposed trail.
In summer, Valais Blacknose sheep may also be present around the Riffelberg area. Photograph them without crowding or attempting to position them for a shot.
5. Gornergrat Railway and Matterhorn Views
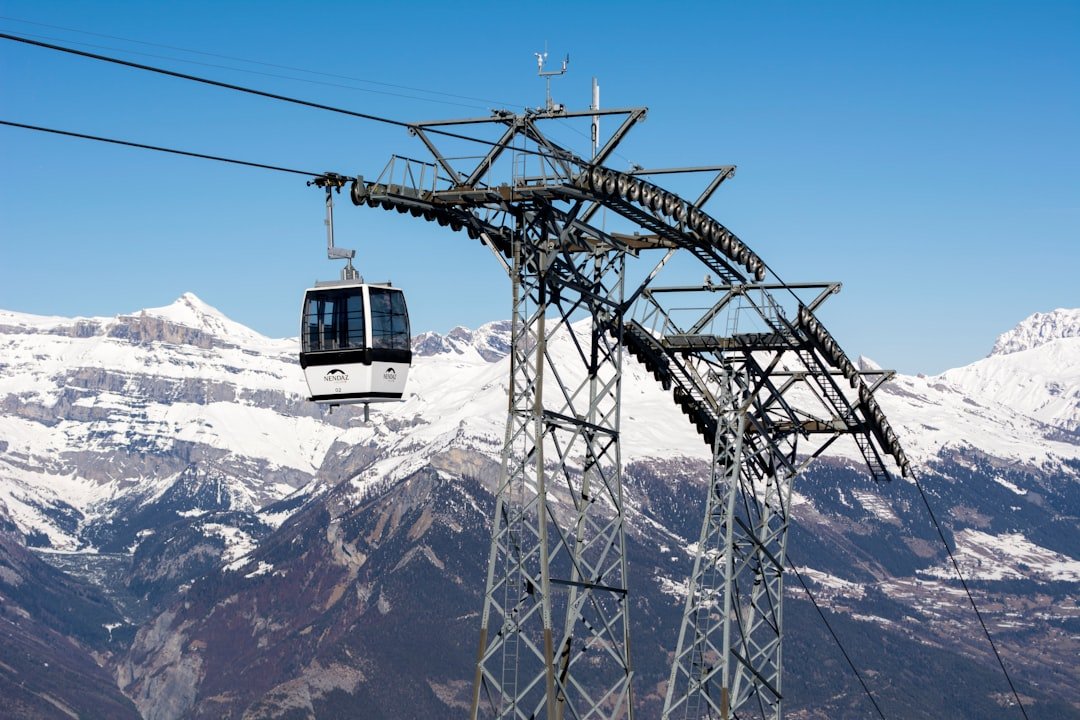
The railway creates some of the most distinctive man-made compositions on the mountain. Gornergrat Bahn highlights an iconic photo bend between Riffelberg and Riffelalp where the train can be photographed with the Matterhorn in the background.
For a train photograph, first choose a safe viewpoint from the established path, compose the scene, and wait for the train to enter the frame. A medium telephoto focal length can compress the train and mountain together, while a wider lens gives more context.
Warning: Never stand on the railway line, cross where crossing is not permitted, or move close to the tracks for a photograph. Use established paths and legal crossing points only.
6. Riffelalp Meadows and Swiss Stone Pine Forest
The final part of the descent has a noticeably different character. Open alpine scenery gives way to trees and greener terrain near Riffelalp. The change is useful if your earlier photographs are dominated by wide, exposed mountain views.
Use tree trunks or branches to frame the Matterhorn, photograph the railway through the landscape, or concentrate on smaller subjects such as textures, flowers, and forest light. Riffelalp is also one of the areas where marmots may be seen.
Once you reach Riffelalp station, the Gornergrat Railway provides the convenient return toward Zermatt. Check the current schedule before your hike rather than relying on an old departure time.
Tips for Capturing Stronger Photos
A tripod can be useful at dawn, dusk, or whenever you want to work with slower shutter speeds, but it is not essential for every image. During bright daylight, modern cameras and phones can often produce sharp handheld photographs if you use an appropriate shutter speed.
Composition usually matters more than carrying a large amount of equipment. Look for leading lines in the trail and railway, use rocks or flowers as foreground elements, and give the Matterhorn enough space in the frame rather than centering it automatically in every photograph.
The rule of thirds can provide a useful starting point, but do not treat it as a requirement. A centered composition often works well for a symmetrical reflection at Riffelsee. In other locations, moving the Matterhorn to one side can leave space for the trail, railway, or surrounding peaks.
Suggested Lenses and Equipment
- Wide-angle lens: Useful for Gornergrat panoramas, Riffelsee foregrounds, and large mountain scenes.
- Standard zoom: The most versatile single-lens choice for the full hike.
- Telephoto lens: Useful for wildlife, railway photographs, glacier details, and compressed layers of mountains.
- Tripod: Helpful for low-light photography and controlled long exposures.
- Neutral-density filter: Useful when you intentionally want a slower shutter speed in brighter conditions.
- Graduated ND filter: Optional for balancing a bright sky against a darker foreground in-camera.
- Lens cloth: Small but valuable when condensation, light rain, dust, or water spots reach the front element.
- Spare battery or power bank: Cold conditions, extensive live-view use, GPS, and video can increase battery consumption.
Wildlife and Nature Photography Opportunities
| Location | Possible Subjects | Photography Approach |
|---|---|---|
| Gornergrat and upper slopes | Ibex, rocky alpine habitat, glaciers, high-altitude vegetation | Use a telephoto lens for wildlife and wide compositions for habitat |
| Riffelsee and Rotenboden | Alpine flora, lake reflections, rocky terrain | Work from marked paths and use low viewpoints without trampling vegetation |
| Riffelberg | Valais Blacknose sheep in season, marmots, meadows, railway | Give animals space and use foreground vegetation to add context |
| Riffelalp | Marmots, meadows, Swiss stone pines, railway scenes | Use a longer lens for animals and wider compositions for forest-and-Matterhorn scenes |
Marmots are regularly reported around Riffelberg and Riffelalp, while ibex may be encountered higher on the Gornergrat. Sightings are never guaranteed, so wildlife should be treated as a bonus rather than the main reason for choosing a particular shooting position.
If an animal appears, stop at a respectful distance. A telephoto lens allows you to create a close-looking image without physically approaching. Do not feed wildlife, block its direction of travel, surround it with other photographers, or follow it away from the trail.
Gornergrat Bahn’s ibex guidance specifically asks visitors to keep their distance, avoid feeding animals, remain on marked paths, and respect wildlife quiet zones.
Capturing the Changing Landscapes Throughout the Trail
One of the strongest storytelling opportunities on this hike is the visual transition from high-alpine rock to meadow and forest. Rather than filling your memory card with dozens of similar Matterhorn photographs, deliberately document that change.
At Gornergrat, emphasize exposed rock, glaciers, and huge skies. Near Rotenboden, include alpine vegetation and Riffelsee. Around Riffelberg, use meadows, sheep, hikers, or the railway to introduce human and pastoral elements. Near Riffelalp, frame scenes through trees or use the forest itself as the subject.
A simple way to create a coherent photo series is to make one wide landscape, one medium environmental image, and one detail photograph in each major terrain zone. That gives you a much more complete visual record than repeating the same focal length throughout the descent.
The route becomes more visually varied as you descend: exposed rock gives way to Riffelsee, alpine meadow, railway scenes, and finally the greener landscape around Riffelalp.
Sunrise and Sunset Photography
Early and late light can add warmer color, longer shadows, and more texture to the mountain landscape. Riffelsee is particularly attractive when soft light coincides with calm water, producing a clear reflection of the Matterhorn.
True sunrise photography requires more planning than simply taking the first normal train of the day. Sunrise can occur before standard public transport reaches Rotenboden during part of the hiking season. Gornergrat Bahn offers special sunrise experiences on selected dates, so photographers should check current options rather than assume normal service will arrive in time.
Sunset creates a different transport problem: you must know the last suitable train from your finishing point. Never extend a shoot until dark without confirming how you will return and whether the trail remains appropriate for your equipment, experience, and lighting conditions.
Note: Check the official Gornergrat Railway timetable when planning early-morning or late-evening photography. Service patterns vary through the year.
Using Different Camera Techniques for the Best Results
Exposure Bracketing
Exposure bracketing can help when bright snow, clouds, or sky sit above a much darker foreground. Take several exposures without changing the composition, then blend them carefully in post-processing if the dynamic range exceeds what one frame can capture cleanly.
Focus Stacking
Focus stacking is useful when a foreground subject sits very close to the lens and you also want distant mountains to appear sharp. Photograph the scene several times while changing only the focus point, then combine the sharp areas during editing.
You do not need focus stacking for every landscape. At moderate focal lengths and normal viewing sizes, a suitable aperture and focus distance are often enough.
Long Exposure
A slower shutter speed can smooth moving clouds or water, but use the effect intentionally. At Riffelsee, an extremely long exposure may create a smooth surface even when small ripples are present, although it will not reproduce the same crisp natural reflection that genuinely calm water provides.
Telephoto Compression
A telephoto lens does more than photograph wildlife. It can make the Matterhorn appear visually closer to a train, ridge, hut, or hiker by narrowing the field of view and compressing distant layers. This is particularly effective around the railway viewpoints below Riffelberg.
Photographing in Cloudy Weather
If clouds hide the Matterhorn, the day is not necessarily lost. Concentrate on railway details, wildflowers, rocks, hikers in mist, forest textures, sheep, marmots, or shafts of light moving across the slopes. Low cloud can create more atmospheric photographs than a completely clear midday sky.
Planning the Hike for Photography
Check Trail Conditions First
High-altitude trails can retain snow even when conditions in Zermatt feel mild. Zermatt Tourism warns that Swiss Topwalk can be impassable in spring because of remaining snow, and mountain weather can change quickly.
Before leaving, check the current trail status rather than relying on an article, map screenshot, or report from a previous week. Gornergrat Bahn publishes current hiking information and recommends against using trails marked closed.
See the official Gornergrat hiking and trail-condition information before setting out.
Allow More Than the Nominal Hiking Time
The official reverse-direction estimate is about two hours, but that is walking time rather than a photography schedule. Riffelsee alone can occupy a photographer for a substantial period while waiting for changing light or calmer water.
For a relaxed photo hike, allowing roughly three to four hours is more realistic. Add more time if you plan to use a tripod extensively, photograph wildlife, wait for trains, or explore several compositions at Riffelsee.
Pack for the Mountain, Not Just the Camera
- Sturdy footwear with reliable grip
- Rain protection and an insulating layer
- Sun protection
- Water and food
- Fully charged phone
- Offline or downloaded route information where useful
- Optional hiking poles for the long descent
- Camera batteries and sufficient memory-card space
A lighter camera bag can be an advantage on a long descent. If you must choose between several specialized lenses and basic mountain equipment, prioritize the equipment needed to complete the route safely.
Preserving the Environment While Capturing Photos
The alpine environment is part of what makes this route photographically valuable, so protecting it should be part of the photography process. Stay on marked paths and established viewpoints rather than trampling vegetation for a cleaner foreground or a slightly different angle.
Take all food packaging and other waste with you. Do not pick flowers or move natural objects simply to improve a composition. Around wildlife, use distance and focal length rather than approaching the animal.
Pro Tip: If another photographer is already quietly observing wildlife, avoid walking closer than they are. Moving forward can disturb the animal and ruin the encounter for everyone.
The Gornergrat to Riffelalp route rewards photographers because it offers more than one postcard view. The Matterhorn reflection at Riffelsee may be the best-known image, but the full descent also gives you glaciers, rock, alpine meadows, railway scenes, wildlife opportunities, and forest. Photographing those transitions creates a stronger and more complete record of the landscape.
Frequently Asked Questions
What is the Gornergrat to Riffelalp trail?
The route described here follows Swiss Topwalk No. 23 in reverse, starting at Gornergrat and descending via Riffelsee and Riffelberg to Riffelalp. It combines high-alpine terrain, Matterhorn views, mountain lakes, meadows, railway scenery, and forest.
How long is the Gornergrat to Riffelalp trail?
Zermatt Tourism lists Swiss Topwalk No. 23 as 6.1 km. Its official page gives an approximate hiking time of two hours when walked in the opposite direction from Gornergrat down to Riffelalp. Photographers should allow additional time for stops.
Is the Gornergrat to Riffelalp hike easy?
No. The official Swiss Topwalk listing classifies it as a demanding mountain hiking trail. Walking downhill avoids the large climb, but you still have a long descent from above 3,000 m over mountain terrain. Suitable footwear, weather preparation, and reasonable fitness are important.
What are the best photo spots along the trail?
The strongest locations include the Gornergrat viewing platform, the rocky upper slopes, Riffelsee for the Matterhorn reflection, Riffelberg’s alpine meadows, railway-and-Matterhorn viewpoints between Riffelberg and Riffelalp, and the forest and meadow scenery around Riffelalp.
What is the best time of day to photograph Riffelsee?
Early morning and evening can provide soft light and are often favorable for calmer water, but wind conditions are crucial. A still lake produces the cleanest Matterhorn reflection, so check the weather as well as sunrise and sunset times.
Can I photograph sunrise at Riffelsee?
Yes, but normal railway service may not reach Rotenboden before sunrise at some times of year. Gornergrat Bahn offers special sunrise experiences on selected dates. Check the current timetable and seasonal offers before planning a sunrise shoot.
What camera gear should I carry?
A standard zoom is the most versatile choice. Add a wide-angle lens for large landscapes or a telephoto for wildlife, trains, and mountain details if those subjects matter to you. A tripod and filters are useful for specialized shots but are optional. Do not let camera equipment replace essential hiking gear.
What safety precautions should photographers take?
Check the current trail status and mountain weather, wear sturdy footwear, carry water and suitable clothing, and remain on marked paths. Never enter glacier terrain without appropriate guidance, never stand on railway tracks for photographs, and keep a respectful distance from wildlife.
Sources
- Zermatt Tourism – Swiss Topwalk No. 23 – official route, distance, elevation, difficulty, reverse hiking time, equipment, and safety guidance.
- Gornergrat Bahn – Photo Spots and Influencer Guide – viewing platform, railway photo bend, Riffelsee, sunrise experiences, and photography locations.
- Gornergrat Bahn – Riffelsee – Matterhorn reflection, location, and favorable photography conditions.
- Gornergrat Bahn – Hiking on Gornergrat – trail-condition information and advice regarding closed routes.
- Gornergrat Bahn – Official Timetable – current and seasonal railway schedules.
- Gornergrat Bahn – Ibex on the Gornergrat – wildlife locations and responsible wildlife-viewing guidance.