Grindelwald First gives photographers several very different Alpine scenes in one outing, from cliff-edge viewpoints and sweeping mountain layers to hiking trails and the reflections at Bachalpsee. You can make strong photos with a phone, compact camera, DSLR, or mirrorless camera. The biggest improvements usually come from choosing the right viewpoint, watching the light and weather, and planning your access before you arrive.
Quick Answer
For better Grindelwald First photos, combine wide landscape views with tighter mountain details, photograph from First Cliff Walk, First View, and the Bachalpsee trail, and plan around changing Alpine light. Carry spare power, protect your gear from weather, check lift and trail conditions, and never remain on exposed terrain when storms threaten.
Key Takeaways
- You do not need a professional camera. A phone or any camera you know how to use can produce strong images in good light.
- A wide-angle lens is useful for large Alpine scenes, while a telephoto lens can isolate peaks and compress layers of mountains.
- Good photo locations include First Cliff Walk, First View, the trail toward Bachalpsee, and Bachalpsee itself.
- Check the First Cable Car timetable, live operating information, trail conditions, webcams, and weather before planning golden-hour photography.
- Use foregrounds, leading lines, people, trails, and reflections to create depth and scale.
- Mountain weather can change quickly. Photography is never worth remaining on an exposed ridge or near water during a thunderstorm.
- Drone photography follows separate Swiss federal rules, so check current FOCA requirements and geographical restrictions before flying.
At a Glance
| Time Required | About 2-3 hours for viewpoints around First; allow roughly 4-5 hours if you also hike to Bachalpsee and stop often for photos. |
| Difficulty | Easy around the main First attractions; moderate effort if adding longer mountain walks. Conditions can change with weather and season. |
| Tools Needed | Camera or phone, lens cloth, spare battery or power bank, and extra storage. Wide-angle lens, telephoto lens, tripod, and polarizing filter are optional. |
| Cost | Transport cost varies by date, ticket, and pass. Check current Grindelwald-First fares and operating information before visiting. |
Choosing Camera Gear for Grindelwald First
A DSLR or mirrorless camera with interchangeable lenses gives you the most control over focal length, exposure, and image files, but it is not a requirement. Modern smartphones and compact cameras are much lighter to carry and can perform very well in daylight. Use the equipment you can operate quickly and safely while walking in the mountains.
For broad landscapes, a wide-angle lens is useful because it lets you include mountain peaks, valleys, trails, and foreground details in the same frame. A focal range around 16-35mm on a full-frame camera is versatile, but it is not the only good choice.
A medium telephoto or telephoto lens can be equally valuable. Longer focal lengths let you isolate ridgelines, photograph distant peaks, capture hikers against the mountains, and visually compress overlapping mountain layers. If you want to travel light, a standard zoom can cover many situations without frequent lens changes.
A tripod is helpful for low-light photographs, deliberate compositions, exposure bracketing, or slower shutter speeds, but you may not need one on a bright day. Wind is common in mountain environments, so keep the tripod low, extend the thinnest leg sections last, and never place it where it blocks a walkway.
A circular polarizing filter can reduce reflections from some non-metallic surfaces and deepen colors under suitable lighting. Rotate it while watching the effect rather than automatically using maximum polarization. With a very wide lens, polarization across a large blue sky can become uneven.
Carry at least one spare battery or a power bank and enough memory for the day. Cold conditions can reduce battery performance, and frequent use of a phone screen, GPS, video, or live view can drain power quickly.
Pro Tip: Keep a microfiber cloth somewhere you can reach without unpacking your entire bag. Mist, light rain, fingerprints, and condensation on the front element can ruin otherwise sharp mountain photos.
Finding the Best Vantage Points
Grindelwald First has several viewpoints with different photographic strengths. Instead of shooting every scene from eye level, walk around where it is safe to do so and look for foreground shapes, cleaner backgrounds, reflections, people for scale, and changing relationships between the mountain peaks.
First Cliff Walk
The First Cliff Walk presented by Tissot is one of the most recognizable locations at Grindelwald First. Jungfrau Railways lists it at 2,166 metres and describes a walkway extending 45 metres outward from the rock face.
Here, try both wide frames that include the structure and tighter images that use the walkway as a leading line. People walking through the frame can show the scale of the surrounding mountains. Keep camera bags and tripods out of the walking line, especially when the viewpoint is busy.
First View
The official First View platform is another strong photography stop. Jungfrau Railways lists the viewpoint at 2,194 metres and estimates around 20 minutes for the visit. It is useful for clean panoramic compositions and for comparing different focal lengths from one location.
Bachalpsee and the Trail from First
The hike toward Bachalpsee creates more natural compositions than the built viewpoints. Trails, grass, wildflowers when in season, small rises in the land, and hikers can all become foreground elements.
According to the official Bachalpsee information, the lake sits at 2,265 metres and the out-and-back outing from First is listed at about 1 hour 50 minutes. Actual photography time will be longer because you will stop repeatedly.
At Bachalpsee, look for reflections when the water is calm, but do not make the classic reflection composition your only goal. Try vertical frames, shoreline details, compressed mountain views, people on the trail, and wider environmental photographs.
A Simple Photography Route
- Start around the First mountain station and photograph the first open mountain views.
- Visit First Cliff Walk and use the walkway as a foreground or leading line.
- Continue to First View for wider panoramic compositions.
- If time, weather, and trail conditions are suitable, walk toward Bachalpsee.
- Photograph along the trail instead of saving every shot for the lake.
- At Bachalpsee, try reflections, wide landscapes, mountain details, and human-scale compositions.
- Return with enough time to meet the current transport schedule rather than planning around an assumed last gondola.
Planning Access Before Your Photo Session
The First Cable Car valley station is in Grindelwald. Jungfrau Railways states that it is about an eight-minute walk from Grindelwald railway station and that the gondola journey to First takes about 25 minutes via Bort and Schreckfeld.
Operating hours and attraction status change with the season, weather, maintenance, and other conditions. Before leaving, check the official Jungfrau operating information and current local weather or webcam views.
Note: Do not assume the normal first gondola will get you to Bachalpsee before sunrise. If sunrise is your goal, confirm current transport and trail access first and arrange a legitimate early-access plan rather than building the shoot around standard daytime lift service.
Understanding Lighting and Weather Conditions
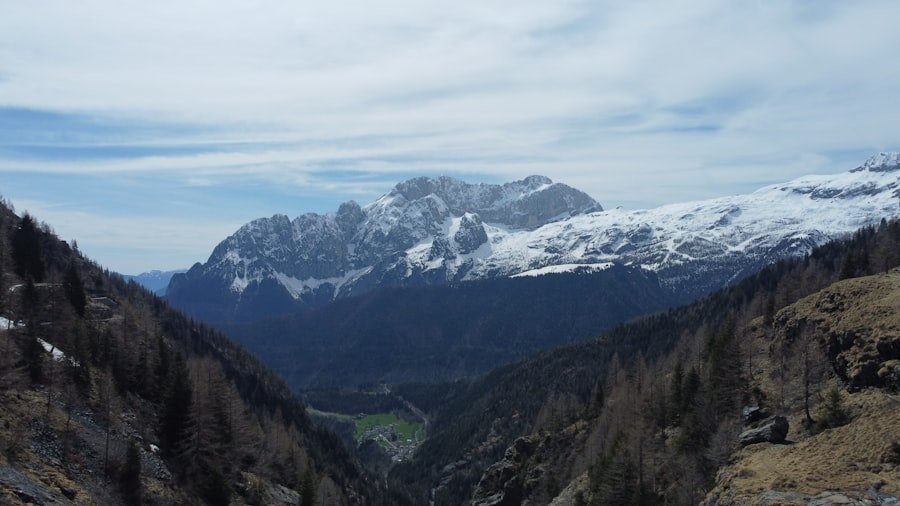
Light has a major effect on the appearance of mountain photographs. Lower-angle light around the beginning and end of the day can produce longer shadows and stronger texture, while the middle of a clear day often creates brighter skies and harder contrast.
Golden-hour light can be beautiful, but the best practical time is the period that works with current access and weather. A late-afternoon session may be easier to arrange than sunrise when lifts begin operating after the sun is already up.
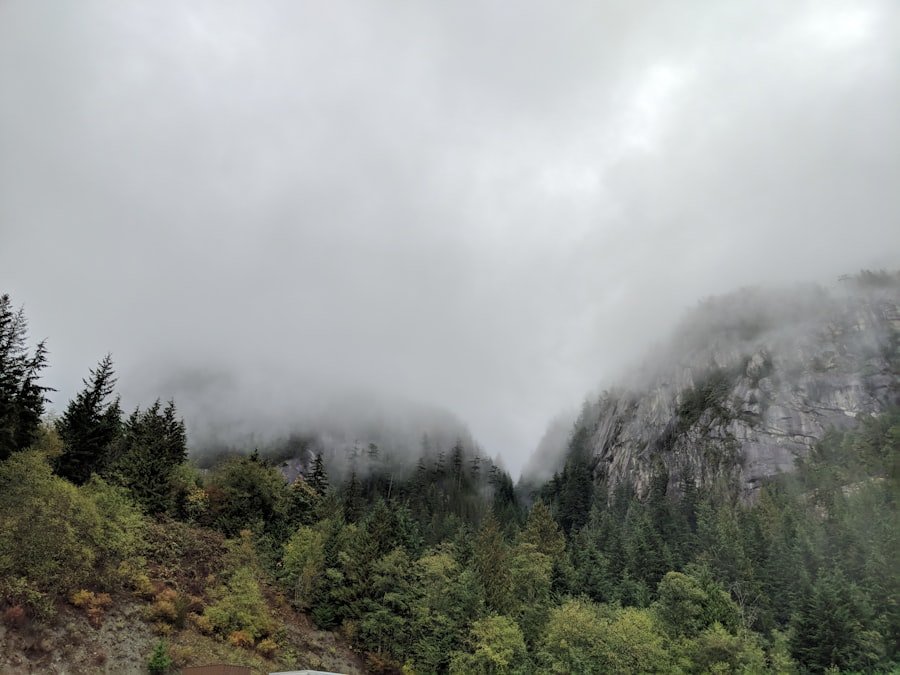
Clouds are not necessarily bad for photography. Broken clouds can create patches of light and shadow across the mountains, while an overcast sky can soften contrast. Mist can simplify a busy landscape and separate mountain layers.
Weather that looks dramatic through a camera can also become dangerous. Check the MeteoSwiss forecast and warnings before heading onto exposed trails.
Warning: Stop photographing and move away from exposed terrain when thunderstorms threaten. MeteoSwiss advises avoiding mountain ridges, peaks, open ground, isolated objects, and bodies of water in lightning conditions. Follow official warnings and local instructions rather than staying for a dramatic photograph.
Camera Settings for Mountain Photography
There is no single correct exposure for Grindelwald First because light changes constantly, but a few starting points make setup faster.
- General landscapes: Start near your camera’s base ISO and try an aperture around f/8. Adjust shutter speed for the available light.
- Maximum depth: Focus carefully rather than automatically using the smallest possible aperture. Very small apertures can reduce fine detail because of diffraction.
- People or moving hikers: Use a faster shutter speed, such as roughly 1/500 second or faster when movement needs to be frozen, then raise ISO if required.
- Handheld telephoto shots: Use a shutter speed fast enough to control both camera shake and mountain wind.
- Tripod landscapes: Keep ISO low when practical, turn off unnecessary stabilization if your camera or lens manufacturer recommends doing so on a tripod, and use a timer or remote release to reduce movement.
- Bright sky and dark foreground: Check the histogram and highlight warnings. Exposure bracketing can help when one frame cannot comfortably hold the full brightness range.
- File format: RAW files provide more latitude for recovering highlights, adjusting white balance, and refining shadows. RAW+JPEG is useful if you also want ready-to-share files.
Smartphone Settings and Techniques
If you are using a phone, clean the camera lenses first. Tap on the main subject to control focus, reduce exposure slightly when bright clouds are close to clipping, and avoid excessive digital zoom. If the phone has separate optical focal lengths, switch between them to create genuinely different compositions rather than taking the same frame repeatedly.
Use panorama mode selectively. A single carefully framed image often looks stronger than an extremely wide panorama with empty sky and foreground. For reflections at Bachalpsee, hold the phone level and lower it closer to the shoreline only where you can do so safely.
Composing Your Shots for Maximum Impact
| Technique | How to Use It at Grindelwald First |
|---|---|
| Rule of Thirds | Place an important peak, person, lake edge, or horizon away from the center when that creates a more balanced frame. |
| Leading Lines | Use trails, the Cliff Walk, shorelines, fences, or ridges to guide the viewer toward your subject. |
| Foreground Interest | Include rocks, grass, flowers, trail edges, or water to add depth to a wide mountain scene. |
| Frame within a Frame | Use parts of the Cliff Walk structure, vegetation, or terrain to create a natural boundary around the main view. |
| Point of View | Change your camera height and focal length instead of taking every photograph standing at eye level. |
Composition is what turns a scenic location into a deliberate photograph. The rule of thirds is a useful starting point, but it is not a rule you must obey. Centered symmetry can work especially well for reflections, while an off-center mountain peak may work better when a trail or shoreline leads toward it.
The strongest Grindelwald First photographs usually have more than a beautiful background. Give the viewer a clear subject, a path through the frame, and a reason to look from foreground to distance.
Natural trails are especially useful as leading lines. A path passing through grass or wildflowers can guide the eye toward a peak, while a person on that path adds scale. Try horizontal and vertical versions before moving on because mountain scenes often work surprisingly well in portrait orientation.
Low viewpoints can make foreground elements more important, but stay on permitted surfaces and avoid damaging vegetation simply to obtain a lower angle.
Capturing the Majestic Mountain Range
The mountains surrounding Grindelwald First deserve more than one ultra-wide photograph. Start with a wide environmental frame, then switch to a longer focal length and look for smaller arrangements of ridges, snow, rock, clouds, and light.
Wide images communicate scale by showing the relationship between mountains and the surrounding landscape. Telephoto images do something different: they remove distractions and make distant mountain layers appear closer together.
Watch how light moves across the peaks. A mountain that looks flat under even light can gain texture when side light creates alternating highlights and shadows. Cloud shadows can also isolate one ridge from another.
Seasonal conditions change the character of the scene. Snow, summer vegetation, changing trail conditions, cloud cover, and visibility all affect which compositions work best. Instead of trying to reproduce a photograph you saw online, work with the conditions you actually find.
Including People in Your Photos for Scale and Interest
People can make a mountain scene easier to understand. A single hiker surrounded by large peaks immediately provides scale and also gives the viewer a clear focal point.
Instead of asking someone to stand directly in the middle of every frame, place the person where the landscape naturally leads the eye. A hiker on a trail, a visitor near a viewpoint, or a small figure near the lake can create a stronger sense of place.
For candid-looking travel photographs, take several frames as the person walks naturally through the scene. Use a sufficiently fast shutter speed to prevent motion blur when you want the subject sharp.
Be considerate when photographing strangers. Avoid blocking busy viewpoints for a prolonged photo session, and respect people’s privacy when they are clearly identifiable or are the primary subject rather than an incidental part of a landscape.
Managing Crowds and Protecting Your Gear
Popular viewpoints can become busy. If people are constantly entering the frame, do not assume you need an empty scene. A few visitors often improve scale. You can also change your focal length, wait briefly for a cleaner composition, or frame more tightly.
Keep your camera attached to you securely around exposed areas. Avoid changing lenses where strong wind, rain, or blowing dust can reach the camera sensor. If your gear becomes cold and you later enter a warm indoor space, condensation can form. Keeping equipment inside a closed bag while it gradually warms can reduce sudden moisture on cold surfaces.
Accessibility and Practical Planning
Jungfrau Railways states that the First Cable Car journey, its intermediate stations, the First mountain station, and the restaurant are barrier-free. However, individual photo locations differ.
The official Jungfrau accessibility information says access to the First Cliff Walk includes a dirt track with a maximum width of 1.20 metres, while First View is not barrier-free because it includes steps.
If mobility, weather, or time limits how far you can walk, you can still make a varied set of photographs around the mountain station and accessible areas rather than treating Bachalpsee as mandatory.
Drone Photography at Grindelwald First
Drone photography should be planned separately from normal handheld photography. Switzerland’s Federal Office of Civil Aviation sets the national flight rules.
In the open category, rules include a maximum flight height of 120 metres above ground level, visual line of sight, requirements concerning uninvolved people, and respect for geographical flight restrictions. Registration requirements can also apply to small camera-equipped drones.
Before every flight, check the current FOCA geographical flight restrictions. Do not rely on an old screenshot or a rule summary saved from a previous trip because restricted areas and conditions can change.
Editing and Enhancing Your Images
Post-processing can refine a Grindelwald First photograph without making the landscape look artificial. Software such as Adobe Lightroom or Photoshop can adjust exposure, contrast, highlights, shadows, color, local brightness, and sharpness.
Start by correcting exposure and white balance. Then check bright clouds and snow for lost highlight detail and deep foreground areas for blocked shadows. Recovering some information is useful, but lifting every shadow until it matches the sky can remove the natural sense of depth.
Local masks or graduated adjustments can help balance a bright sky against a darker foreground. Apply clarity, texture, sharpening, dehazing, and saturation carefully. Strong global adjustments can create halos along mountain ridges or unrealistic blue skies.
If you bracketed exposures on a tripod, merge them only when the dynamic range of the scene genuinely needs it. A natural-looking single exposure is often preferable to an aggressive HDR result.
Good editing should make the photograph easier to read while preserving believable mountain light, color, texture, and atmosphere.
Sharing Your Stunning Grindelwald First Viewpoint Photos with the World
After selecting and editing your photographs, share a smaller group of strong images instead of uploading every frame from the day. A varied set might include one wide mountain panorama, one Cliff Walk image, a trail photograph, a Bachalpsee scene, a telephoto mountain detail, and a photograph with a person for scale.
Social platforms such as Instagram or Facebook can be useful for sharing travel photography. Relevant location and subject tags can help interested viewers find the images, but a short caption explaining the weather, viewpoint, focal length, or story behind a photograph often adds more value than a long group of generic hashtags.
A photography blog or personal website gives you more room to explain what you photographed, which viewpoint you used, what challenges you faced, and which settings worked. Those details can be more useful to another photographer than simply describing the scenery as beautiful.
As a separate and unrelated nature-focused read on this site, you can also explore the delightful world of Asian melon. It covers a different subject and is not part of the Grindelwald First photography guidance above.
Frequently Asked Questions
What is the Grindelwald First viewpoint?
Grindelwald First is a mountain destination above Grindelwald in Switzerland’s Bernese Oberland. The area includes panoramic mountain views, First Cliff Walk, First View, hiking routes, and access toward Bachalpsee. The First mountain station is listed by Jungfrau Railways at 2,166 metres.
How do I get to Grindelwald First?
The usual visitor route is the First Cable Car from Grindelwald. The valley station is about an eight-minute walk from Grindelwald railway station, and Jungfrau Railways states that the gondola journey to First takes about 25 minutes via Bort and Schreckfeld. Mountain hiking routes also exist, but always check the current route and trail conditions before choosing to walk instead of using the lift.
What are the best photo spots at Grindelwald First?
Start with First Cliff Walk and First View, then photograph along the trail toward Bachalpsee if time and conditions allow. Bachalpsee is especially useful for reflections and wider environmental scenes, while the trail offers hikers, foreground vegetation, and changing mountain angles.
What camera settings work well at Grindelwald First?
For general landscapes, start near your camera’s base ISO with an aperture around f/8 and choose the shutter speed for the available light. Use faster shutter speeds for moving hikers or windy telephoto shots. Check the histogram in high-contrast scenes and bracket exposures when necessary.
Do I need a wide-angle lens or tripod?
No. A wide-angle lens is useful for large mountain scenes, but standard and telephoto lenses create equally valuable compositions. A tripod helps in low light, for bracketing, and with slow shutter speeds, but it is optional for many daylight photographs.
Can I photograph Bachalpsee at sunrise?
Bachalpsee can be photographed around sunrise, but you should not assume regular gondola service will get you there before the sun rises. Check the current First Cable Car timetable, trail conditions, weather, and legitimate early-access options before planning a sunrise session.
Are there photography restrictions at Grindelwald First?
The official visitor pages promote the viewpoints for enjoying the mountain scenery but do not provide a general camera-specific rule list. Follow all posted instructions, barriers, staff directions, and normal visitor-safety requirements. Drone photography is separate and must comply with current Swiss FOCA flight rules and geographical restrictions.
What should I do if the weather changes while I am photographing?
Protect your camera from moisture and follow official weather warnings. If thunderstorms threaten, leave exposed viewpoints, ridges, open ground, and bodies of water. Do not remain outside simply because clouds or lightning make the scene look dramatic.
Sources
- Jungfrau Railways: Grindelwald-First – official elevation, First Cliff Walk, First View, attractions, and visitor information.
- Jungfrau Railways: Bachalpsee – official Bachalpsee elevation, hiking time, and route information.
- Jungfrau Railways: Operating Information – current lift, railway, and attraction operating status.
- Jungfrau Railways FAQ – accessibility information for First Cable Car, First Cliff Walk, First View, and other facilities.
- MeteoSwiss: Thunderstorm Safety – official recommendations for lightning and thunderstorm hazards in exposed terrain.
- Swiss Federal Office of Civil Aviation: Drone Flight Rules – current national requirements covering altitude, visual line of sight, people, registration, and geographical restrictions.